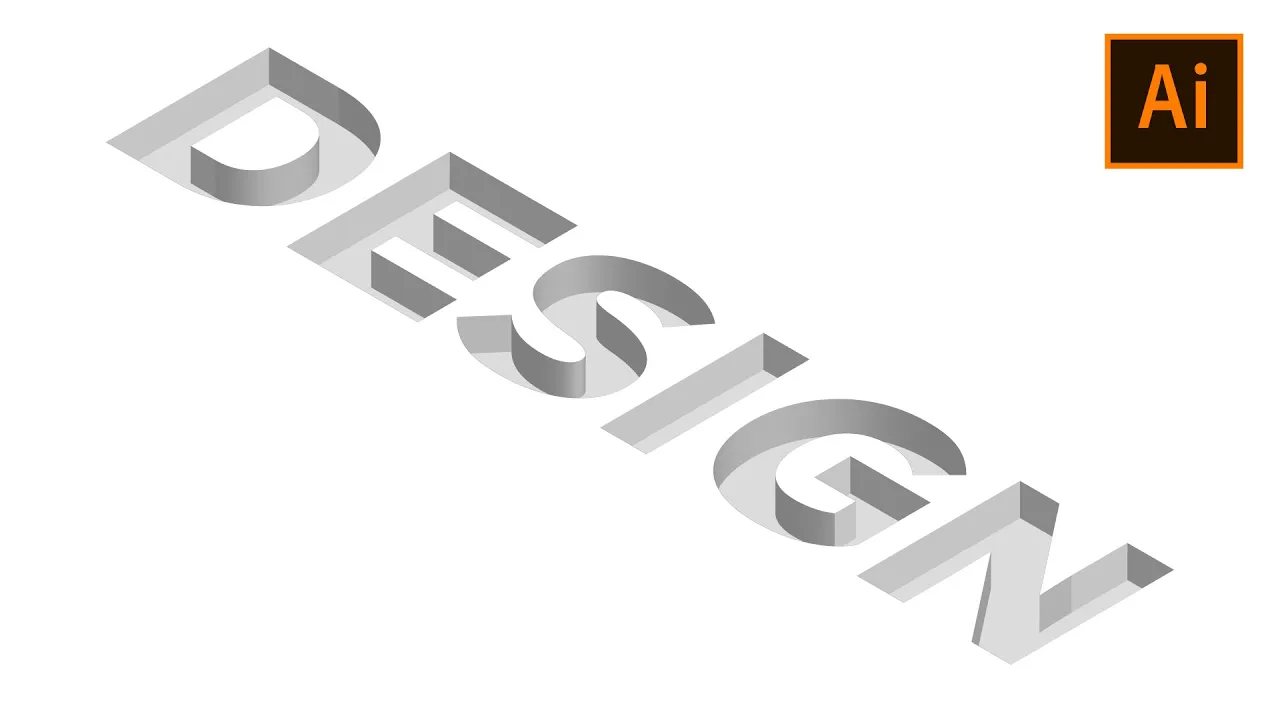
3D Deep Text Effect In Adobe Illustrator | Deep Hole Design | Illustrator Tutorial
Education

3D Deep Text Effect In Adobe Illustrator | Deep Hole Design | Illustrator Tutorial
Hello viewers, welcome to my channel! In this tutorial, I will show you how to create a 3D depth effect using Adobe Illustrator. Let's dive right into the process.
Step-by-Step Guide
Type Your Text:
- First, select the Type Tool (
T) and type your desired text.
- First, select the Type Tool (
-
- Choose the font "Nexra Black" from your font options.
Match Background Color:
- Select your text and change its color to match the background.
Apply 3D Effect:
- Navigate to
Effect>3Dand chooseMore Options.
- Navigate to
Adjust 3D Settings:
- Check the box for
Draw Hidden Faces. - Change the
Blend Stepsto 265. - In the
Positiondropdown, selectIsometric Top.
- Check the box for
Confirm Settings:
- Press
OKto apply the changes.
- Press
Expand Appearance:
- Go to
Object>Expand Appearance.
- Go to
Direct Selection:
- Using the Direct Selection Tool, select only the top part of the text.
Cut and Paste in Place:
- Press
Ctrl + Xto cut the selected part. - Select everything, then press
Shift + Ctrl + Vto paste it in place.
- Press
Create Compound Path:
- Go to
Object>Compound Path>Make.
- Clipping Mask:
- Select everything again and go to
Object>Clipping Mask>Make.
And that's it! You've successfully created a 3D depth effect in Adobe Illustrator. If you found this tutorial helpful, please subscribe to my YouTube channel. Thanks for watching!
Keywords
- Adobe Illustrator
- 3D Depth Effect
- Type Tool
- Nexra Black
- Expand Appearance
- Direct Selection Tool
- Compound Path
- Clipping Mask
FAQ
Q1: What is the purpose of matching the text color with the background? A1: Matching the text color with the background creates a seamless look, enhancing the 3D depth effect.
Q2: Why do we need to adjust the blend steps to 265? A2: Setting the blend steps to 265 smoothens the transitions and provides a refined appearance to the 3D effect.
Q3: What does expanding appearance do? A3: Expanding appearance converts the effect into editable vector paths, making it easier to manipulate the design further.
Q4: Why use the direct selection tool to select the top part of the text? A4: The Direct Selection Tool allows you to manipulate specific parts of the text object without affecting the entire text block.
Q5: What is the function of creating a compound path? A5: Creating a compound path combines multiple objects into a single path, making it easier to apply effects like a clipping mask.
Q6: How does the clipping mask enhance the effect? A6: The clipping mask confines the visibility of the underlying objects, ensuring that the 3D depth effect remains clean and focused.
Feel free to reach out if you have any more questions!

