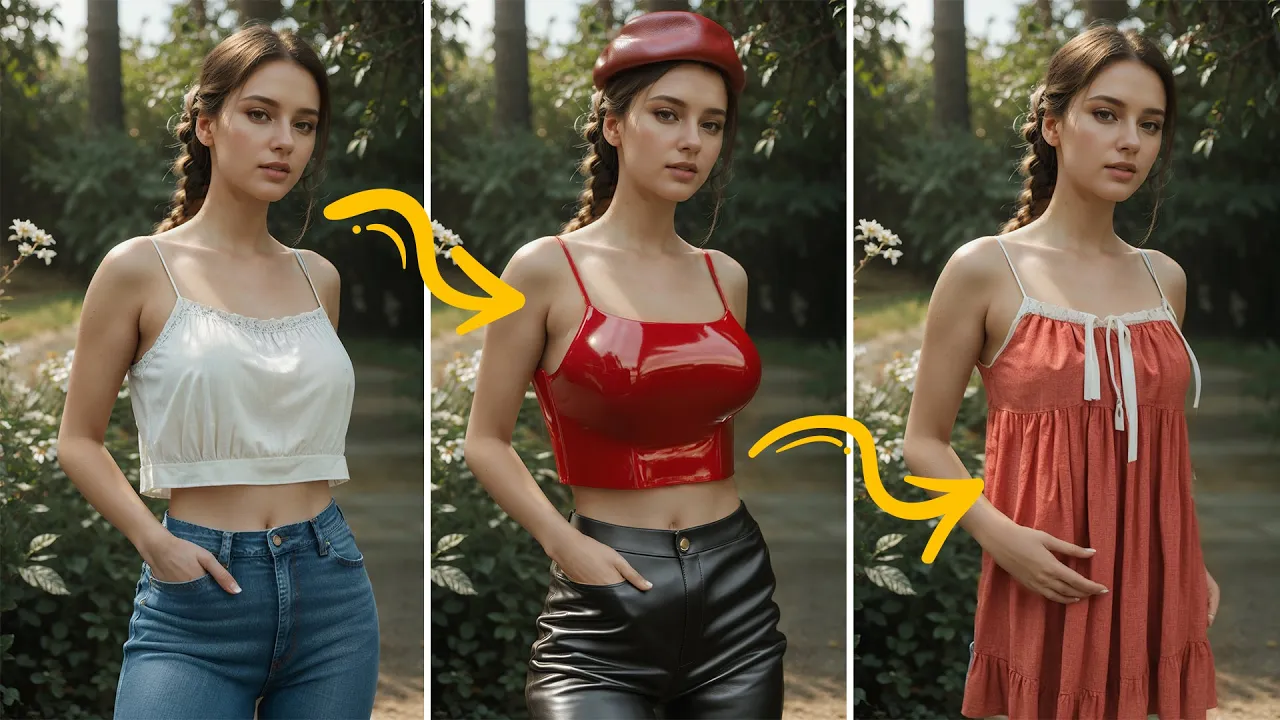
How to change clothes with AI.
Howto & Style

How to Change Clothes with AI
Introduction
In this article, I will demonstrate how to transform an image using Stable Diffusion and the power of inpainting. This guide will cover various techniques for changing clothes in an image, making it super simple for you to replicate. By the end of this tutorial, you’ll be equipped with the skills to alter any character’s clothing in different styles, whether photorealistic or painted. Additionally, I’ll share some tips and tricks on handling issues that might arise during the process.
Step-by-Step Guide
Initial Setup
- Starting Image: We begin with an image generated through Stable Diffusion v1.5, featuring a woman in a white crop top and blue jeans, standing in a park.
- Load Image to Inpainting Tab: Open the image-to-image tab and select the inpainting tab. If you have an inpainting model, use it for potentially improved results, although a regular model will also suffice.
Drawing the Mask
- Press 'S' to Zoom In: This provides a closer view for detailed work.
- Draw the Mask: Outline the area of the clothing you wish to change using the brush tool. You can adjust the brush size and correct any errors with the eraser tool.
Setting Up Inpainting Parameters
- Enter Prompt: After masking, input the description of the new clothes. For example, “leather pants” if you want to change jeans to leather pants.
- Preloaded Inpainting Styles: You can use preloaded styles from my Patreon for ease. Options include leather, silk, cotton, velvet, etc.
- Settings: Adjust settings like inpaint area to 'only masked,' denoising strength around 0.7, and the resolution box (e.g., 768x768).
Generating the Image
- First Generation: Click generate to produce the image with the new clothing.
- Iterating and Refining: If the result isn't satisfactory, tweak the settings. Increase the denoising strength for larger changes or select 'latent noise' to disregard the original colors.
Changing Upper Garments
- Masking the Crop Top: After dealing with the pants, mask the crop top similarly.
- Input New Prompt: Describe the new top and its material, for example, “green silk crop top.”
- Adjust Parameters: Ensure settings are appropriate for the new task and generate the image.
Adding New Elements
- Using Inpainting Sketch: For elements not originally in the image, use the inpainting sketch tab. Draw the new item (e.g., a hat) roughly and define its color.
- Generate and Refine: Once the rough sketch is generated into a more refined image, inpaint again for a polished look.
Troubleshooting
- Coordinate Errors: Ensure a mask is drawn to avoid errors.
- Balancing Denoising Strength: Adjust based on the desired amount of change. Lower values retain more original structure, while higher values introduce more new data.
Conclusion
By following these steps, you should be able to change the clothes in any image while leveraging AI inpainting. Experiment with different materials and styles to refine your results. For ready-to-use styles and optimized settings, consider checking out my Patreon.
Happy editing, and I'll see you in the next tutorial!
Keywords
Keywords: Stable Diffusion, inpainting, AI, image editing, clothes changing, photorealistic, painted styles, masking, denoising strength, refining images.
FAQ
Q1: Can I use the regular model instead of the inpainting model? A1: Yes, you can use the regular model, although having an inpainting model might offer slightly improved results in some cases.
Q2: What materials are available for preloaded inpainting styles? A2: Preloaded styles include leather, silk, cotton, velvet, and more. These can be accessed through my Patreon.
Q3: How do I handle errors like “coordinate right is less than left”? A3: This error typically means that no mask is drawn. Make sure to properly draw a mask around the area you want to edit.
Q4: What's the ideal denoising strength for most changes? A4: A denoising strength between 0.6 and 0.9 works well for most cases, but this may need to be adjusted depending on the specific requirements of your edit.
Q5: Can I add clothing items that aren't originally in the image? A5: Yes, use the inpainting sketch tab to draw the new item, and then refine it using the regular inpainting process.