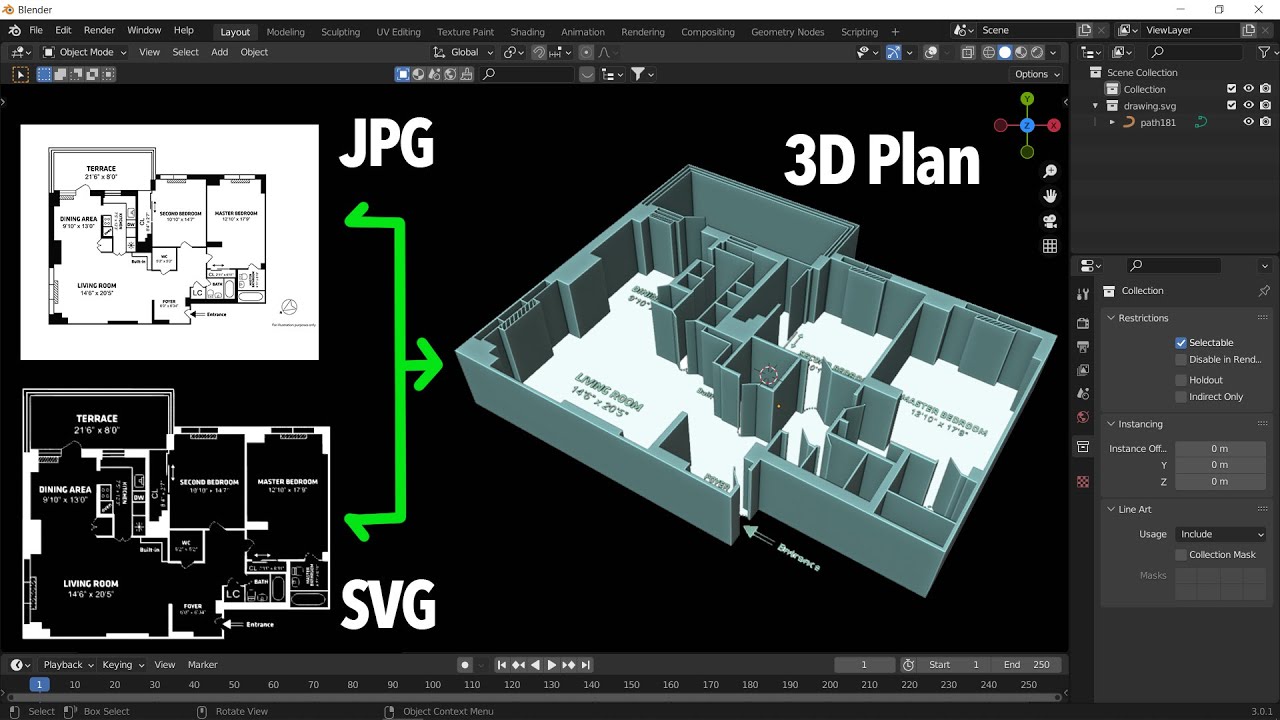
How To Turn JPG image to 3D Floor Plan - Blender
Education

How To Turn JPG Image to 3D Floor Plan - Blender
Turning a 2D floor plan into a 3D model can seem like a daunting task, but it's absolutely achievable with some simple steps and free software. This guide will walk you through the entire process using Inkscape to convert a floor plan image into a vector file and Blender to create the 3D model.
Step 1: Gathering Floor Plan Images
First, search Google for high-resolution 2D floor plan images. High-resolution images work best for this method because they maintain more detail when converting to vector files. Download a couple of images to use.
Step 2: Converting the Image to Vector File Using Inkscape
Inkscape is an excellent free vector graphics editor you can use to convert your raster images (JPG, PNG) into vector files (SVG).
Download and Install Inkscape
- Go to the Inkscape main page and find the download button.
- Choose the system you operate and install the software.
Import the Image
- Open Inkscape.
- Go to
File > Importand choose the floor plan image you downloaded. Alternatively, you can drag the image directly into the Inkscape window.
Tracing the Bitmap
- Right-click on the imported image and select
Trace Bitmap. This opens a new panel on the right. - Select the
Multi-colortab and set the detection mode toColors. - Ensure the
Stackoption is enabled to separate each layer. - Set the scan slider value based on the number of colors in your image. For black and white images, leaving it at the minimum value is fine.
- Hit
Applyto complete the tracing. - Save the traced image as an SVG file.
- Right-click on the imported image and select
Step 3: Importing to Blender
Now we'll use Blender to convert the SVG into a 3D model.
Clearing the Scene
- Open Blender and clear the default scene.
Import the SVG File
- Go to
File > Import > Scalable Vector Graphics (SVG). - If the SVG import option isn’t available, enable it via
Edit > Preferences > Add-ons, and search for the SVG import add-on. - Import the SVG file created in Inkscape.
- Go to
Scaling and Cleaning Up
- The imported SVG will likely be off-scale. Use a known object like doors or steps to adjust the scale.
- Hide or delete the background layer.
- Convert the SVG paths to mesh by selecting and going into
Edit Mode.
Cleaning Up the Mesh
- Use the
Limited Dissolvecleanup option (F3 > Limited Dissolve) to clean up the mesh. - Manually fix any remaining messy lines.
- Use the
Extruding the Walls
- Select a few vertices and use
Ctrl++to grow the selection until the walls are highlighted. - Hit
Pto separate the walls. - Extrude the faces on the Z-axis to create the 3D walls.
- Select a few vertices and use
Final Thoughts
By following these steps, you can convert any 2D floor plan into a 3D model using Blender and Inkscape, starting from a simple image. Happy modeling!
Keywords
- 3D Model
- Inkscape
- Blender
- Floor Plan
- Vector File
- Tracing Bitmap
- SVG Import
- Extruding Walls
FAQ
Q1: What software do I need for turning a 2D floor plan into a 3D model?
A1: You need Inkscape for converting the image to a vector file and Blender for creating the 3D model.
Q2: Is Inkscape free to use?
A2: Yes, Inkscape is a free vector graphics editor.
Q3: What file format should I save from Inkscape to use in Blender?
A3: Save the file as SVG (Scalable Vector Graphics).
Q4: Why is my imported SVG not scaling correctly in Blender?
A4: The imported SVG may be off-scale. You can adjust the scale based on known dimensions such as door lengths.
Q5: How can I clean up the mesh in Blender?
A5: Use the Limited Dissolve cleanup option in Edit Mode to clean up the mesh. Manually fix any remaining lines.
Q6: How do I convert SVG paths to meshed walls in Blender?
A6: Select the SVG paths, convert them to mesh in Edit Mode, and extrude the faces on the Z-axis to create the 3D walls.

