Using A.I. for 3D modeling in Blender
Film & Animation

Using A.I. for 3D Modeling in Blender
Hi, my name is Amelia Scarlet, and today I'm going to walk you through how I transform AI-generated 2D images into full 3D environments using Blender. Let's dive in!
Step 1: Look for Reference Images
The first step is to gather some reference images. If you're struggling to find the right images, check out my tutorial on inspiration resources. These references will guide the AI in generating the desired content.
Step 2: Use an AI Image Generator
Open up your AI image generator. I’m using ChatGPT. Start by typing your prompt. Mine is "a photo of a surreal Stone Gothic castle front facing on a white background." Upload a few of the reference pictures that you found, especially those that are front-facing.
Once the AI generates a few images, pick the one you like the most. For this example, I chose the first image and asked for the seed for that image. Next, I requested a close-up of the window from that image. It wasn’t quite what I expected, so I tried again with a simpler prompt: "Gothic arched window front-facing on a white background."
Once you get a satisfying result, give it a thumbs up. I then asked for a "square Gothic wall facade" and downloaded it when it looked good.
Step 3: Generate a Depth Map
To create a depth map, you can use a website that offers AI-generated depth maps for free. Upload the image you generated earlier, set the Ensemble Size to 10 for maximum detail, and press "Compute Depth." Download the generated depth map once it’s ready.
Step 4: Modeling in Blender
Open Blender and start by adding a plane. Create a new material and use the image you just created as the base color. Turn on Material View to see it.
- Subdivide the Plane: Subdivide your plane a few times.
- Add Subdivision Modifier: Add a subdivision modifier and tweak the settings.
- Add Displacement Modifier: Create a new texture within the displacement modifier. Open the depth map, ensure the color space is set to 'Non-Color' and the coordinate set to 'UV.' Adjust the strength accordingly.
- Correct and Adjust: If the result isn’t looking right, it might be the strength setting. Adjust it until it looks correct, then shade it smooth.
- Duplicate and Create Array: Duplicate the generated wall and add an array modifier. Add a plane for the floor and test the overall scene.
Step 5: Kit Bashing and Assembly
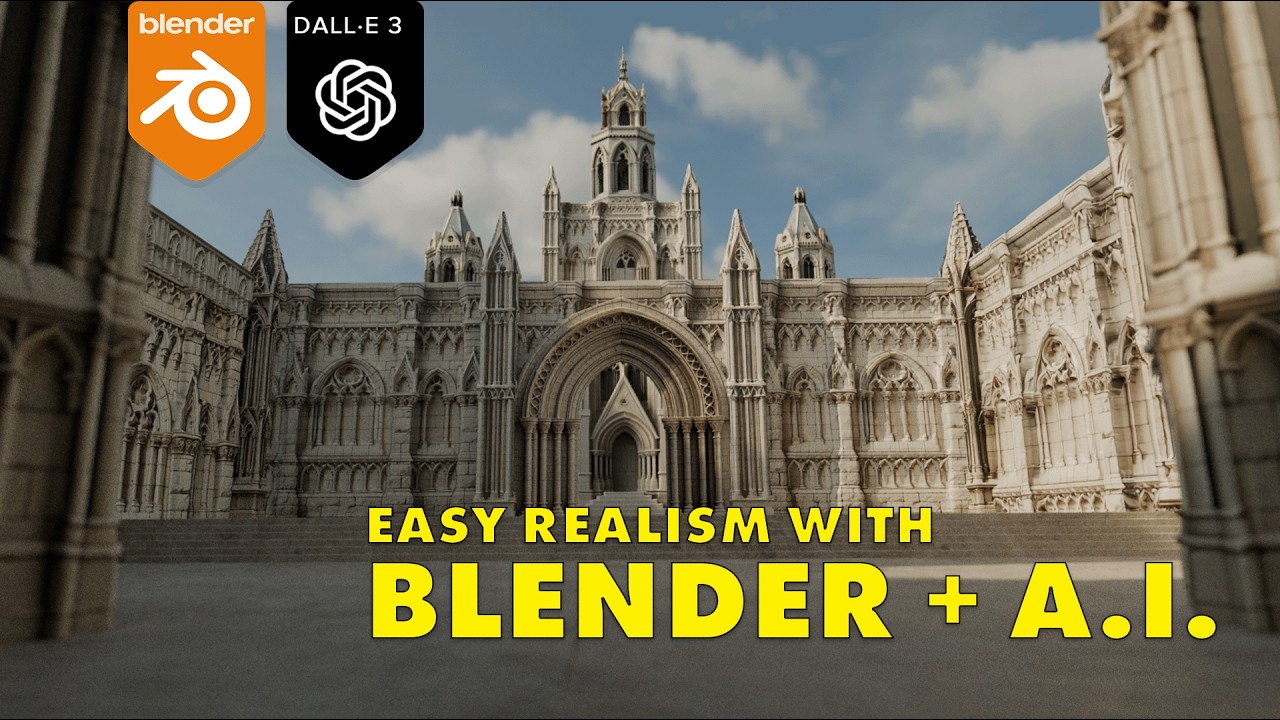
You can now repeat the process for as many images as you want to create a complete kit. This kit can be used for kit bashing to quickly assemble a detailed 3D environment with minimal modeling work.
By following these steps, I was able to assemble a quick environment that provides a pretty solid background with relatively little modeling work.
Keyword
- AI-generated images
- Blender
- Depth map
- Subdivision modifier
- Displacement modifier
- Plane
- Material input
- Kit bashing
- Gothic architecture
FAQ
Q1: What AI image generator did you use? A1: I used ChatGPT.
Q2: How do you generate a depth map? A2: I use a website that offers free AI-generated depth maps. Upload the image, set the Ensemble Size to 10 for maximum detail, and compute the depth.
Q3: How do I input the AI-generated image into Blender? A3: Create a new material for a plane and use the AI-generated image as the base color. Then subdivide the plane and add a displacement modifier using the depth map.
Q4: What if the displacement strength looks wrong? A4: Adjust the strength until the displacement looks correct. You might need to invert the value in some cases.
Q5: Can I create an entire environment with minimal modeling work? A5: Yes, you can kit bash using multiple AI-generated pieces to quickly assemble a detailed 3D environment.

