Topview Official Guide: AI Avatar
Official Guide
AI Avatar: Lifelike Digital Avatars for Every Scenario
Create hyper-realistic AI avatars for product promotion, keynote speeches, storytelling, and more — all from a single photo and a script.
Tools Overview
Hyper-realistic talking avatars with custom motion control.
AI avatars that hold and showcase your products.
Add lip-synced voiceover to any uploaded video.
Create a unique AI avatar from photos or text prompts.
Avatar 4 (AI Avatar)
Avatar 4 is Topview's flagship avatar technology. It offers three flexible production modes:
Higher-quality mode for broadcast-ready results. Supports up to 120 seconds.
Streamlined mode — faster, cheaper, ideal for high-volume creation.
Save an extra 50% credits — processed during idle hours, delivered within 24 hours.
Video Guide
Pricing
| Mode | Old Price | New Price | Savings |
|---|---|---|---|
| Avatar 4 (Standard) | 0.25 Credits / Second | 0.10 Credits / Second | 60% off |
| Avatar 4 Fast | 0.15 Credits / Second | 0.06 Credits / Second | 60% off |
| Off-Peak Mode | -- | 50% off normal mode price | Business Exclusive |
How to Use
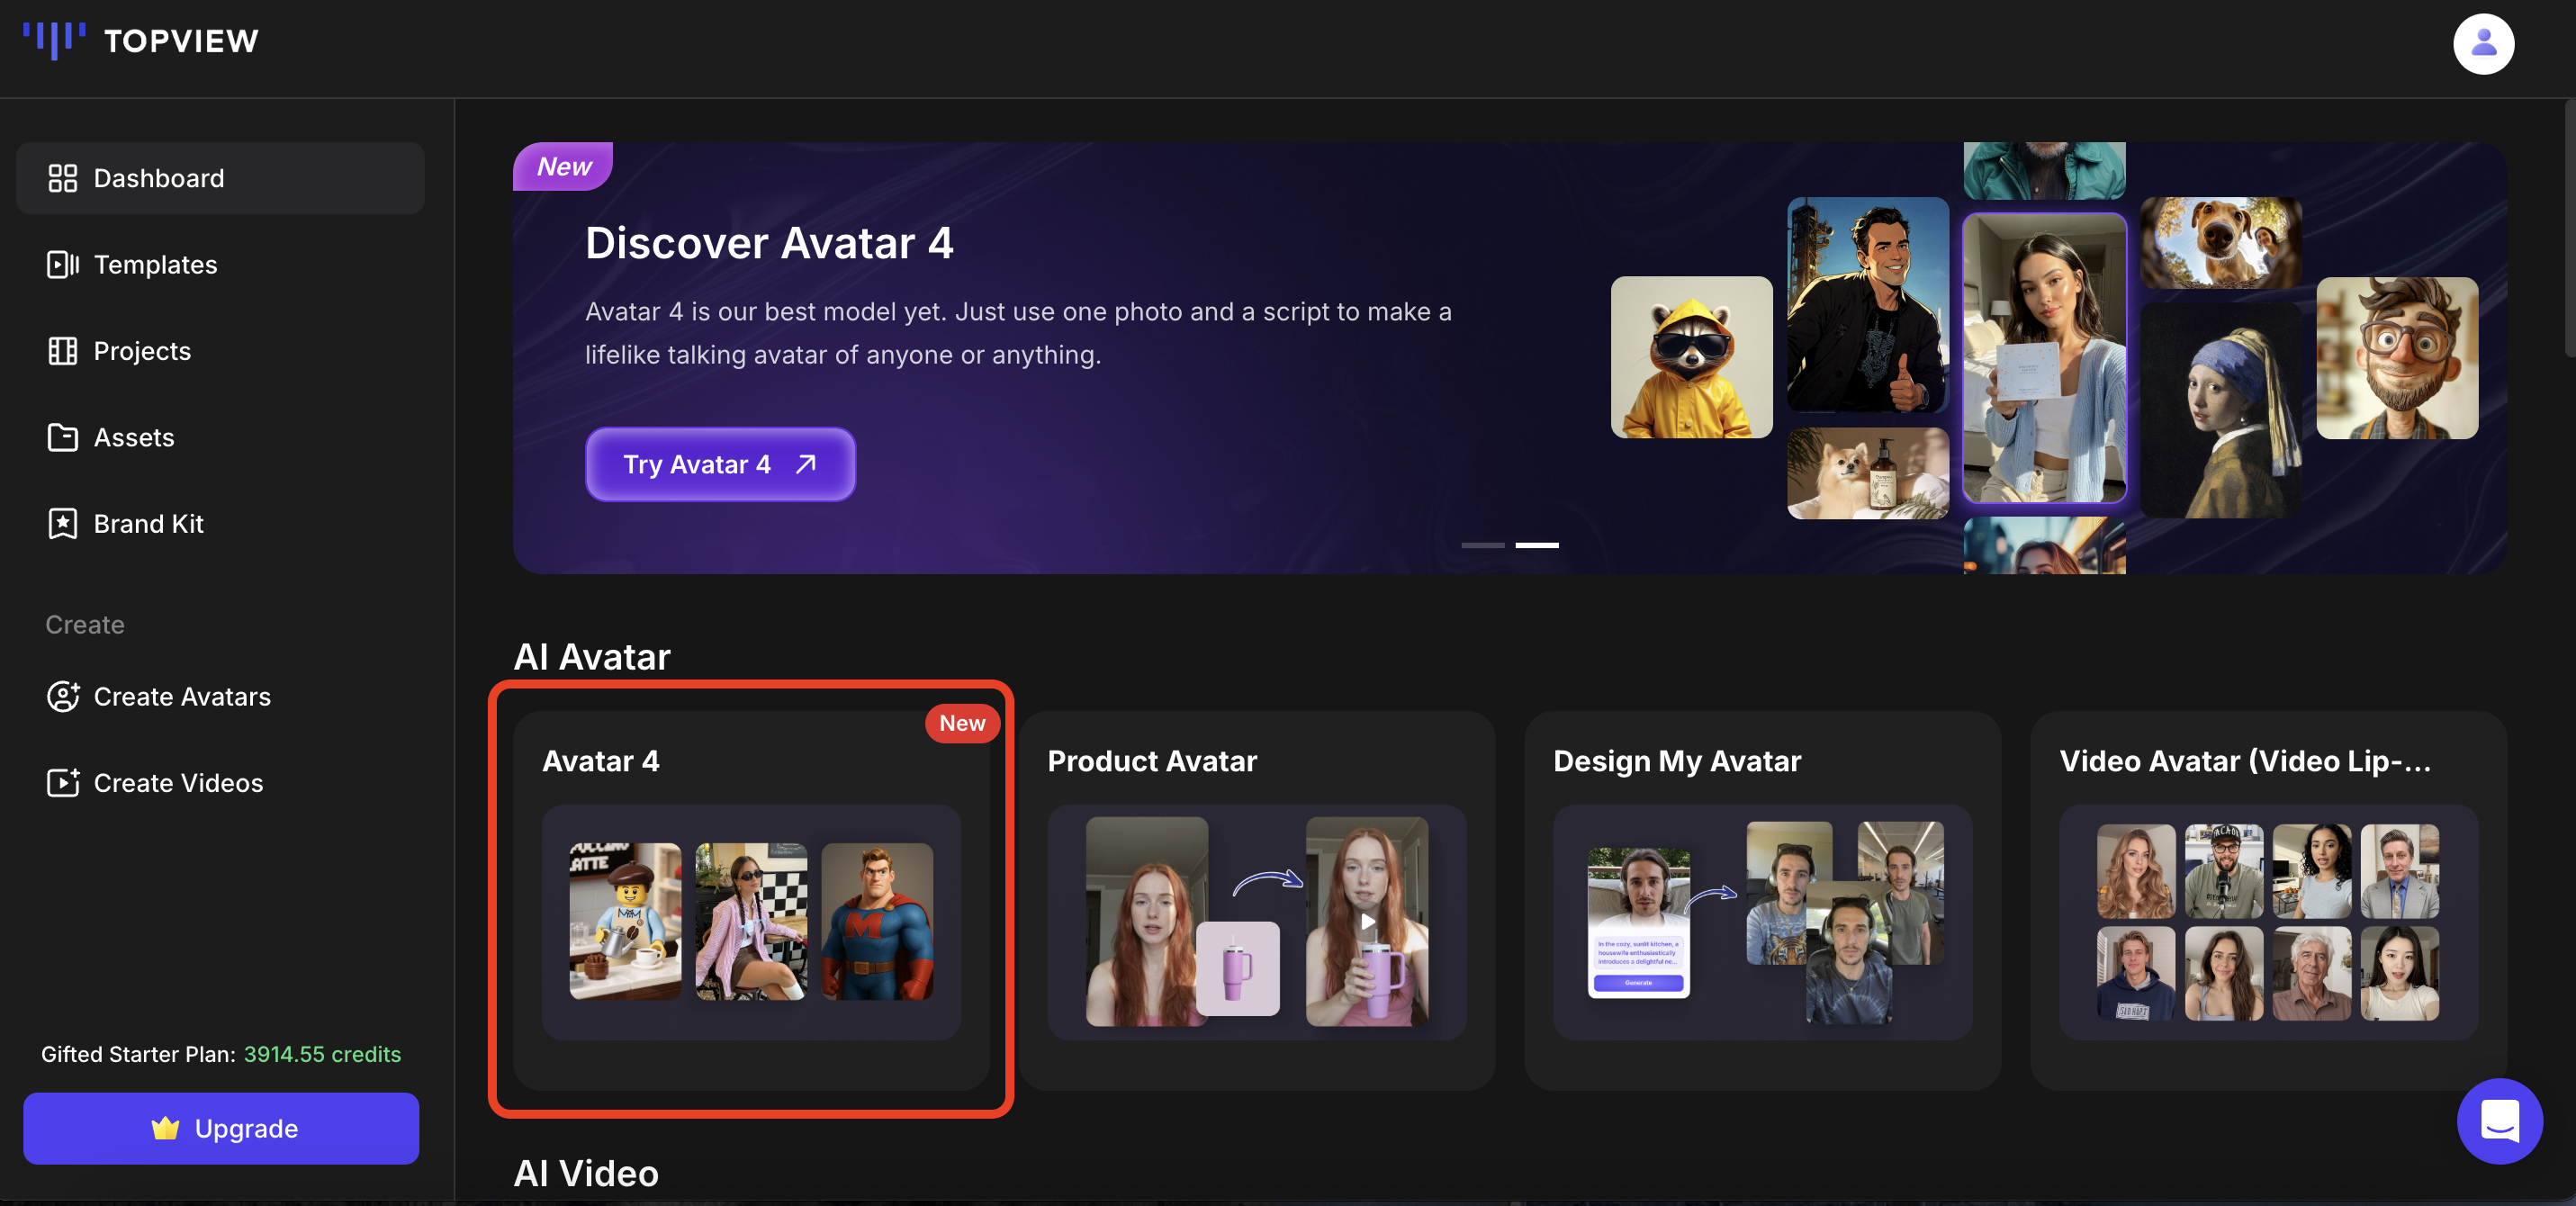
Step 1: Select Your Mode
Click on "Avatar 4". Choose between Standard, Avatar 4 Fast, or Off-Peak Mode (Business only). Default is Avatar 4 Standard.
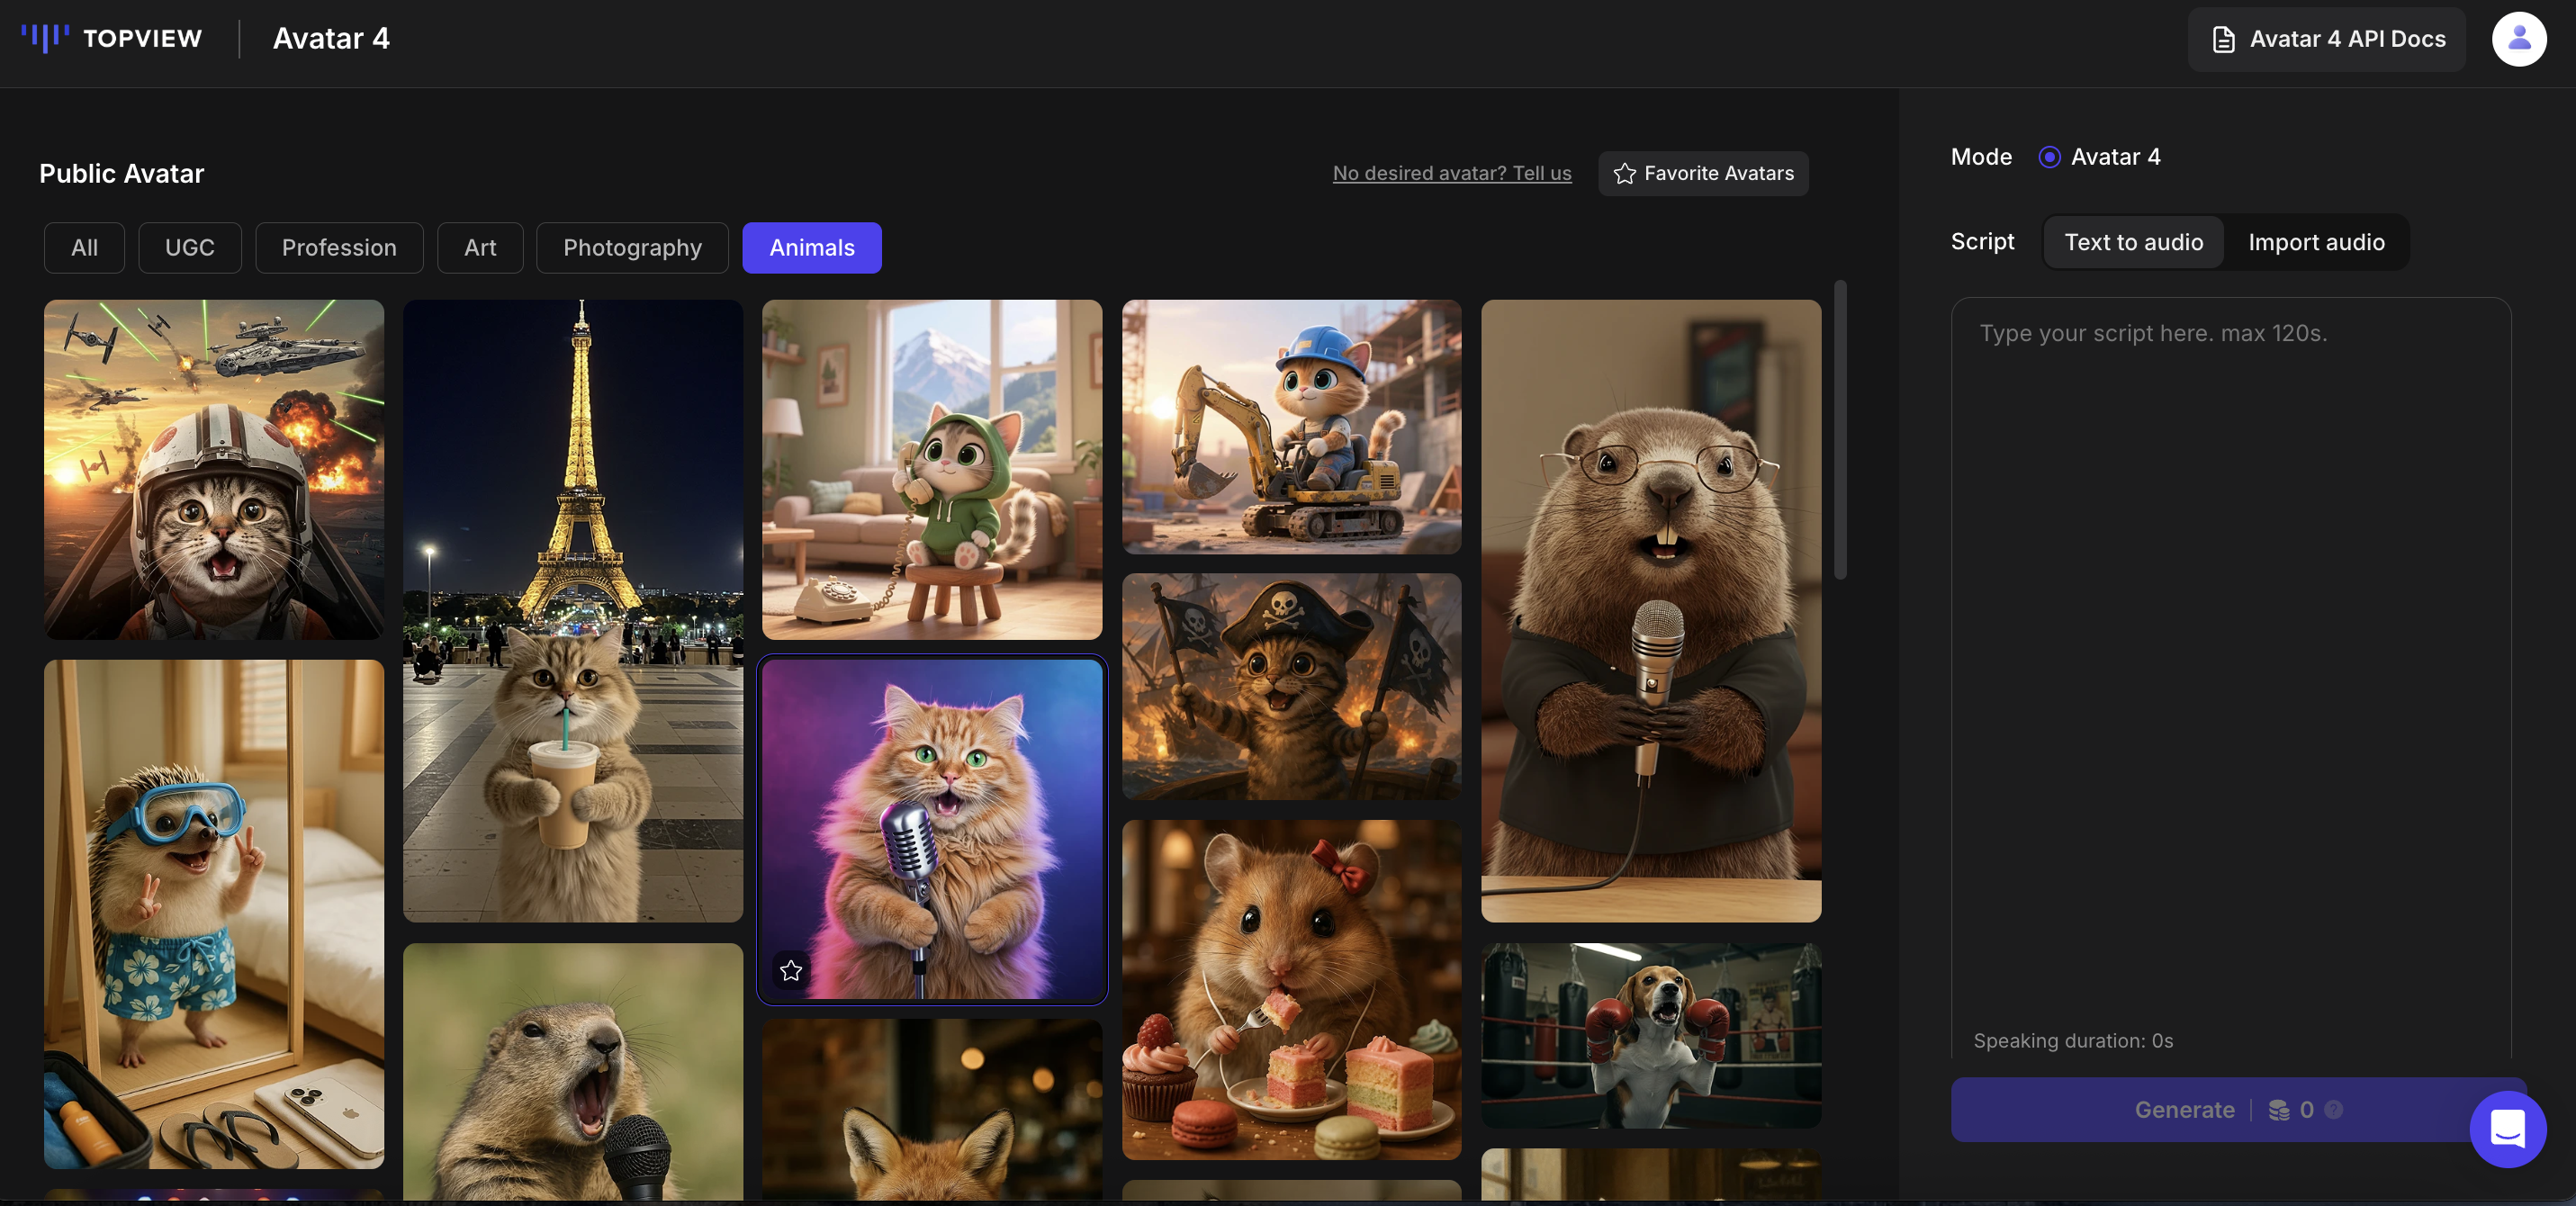
Step 2: Choose or Create Your Avatar
Select your ideal avatar template from multiple categories, or click "Create Your Avatar" to upload your own image or let AI generate a custom avatar.
Choose from Templates
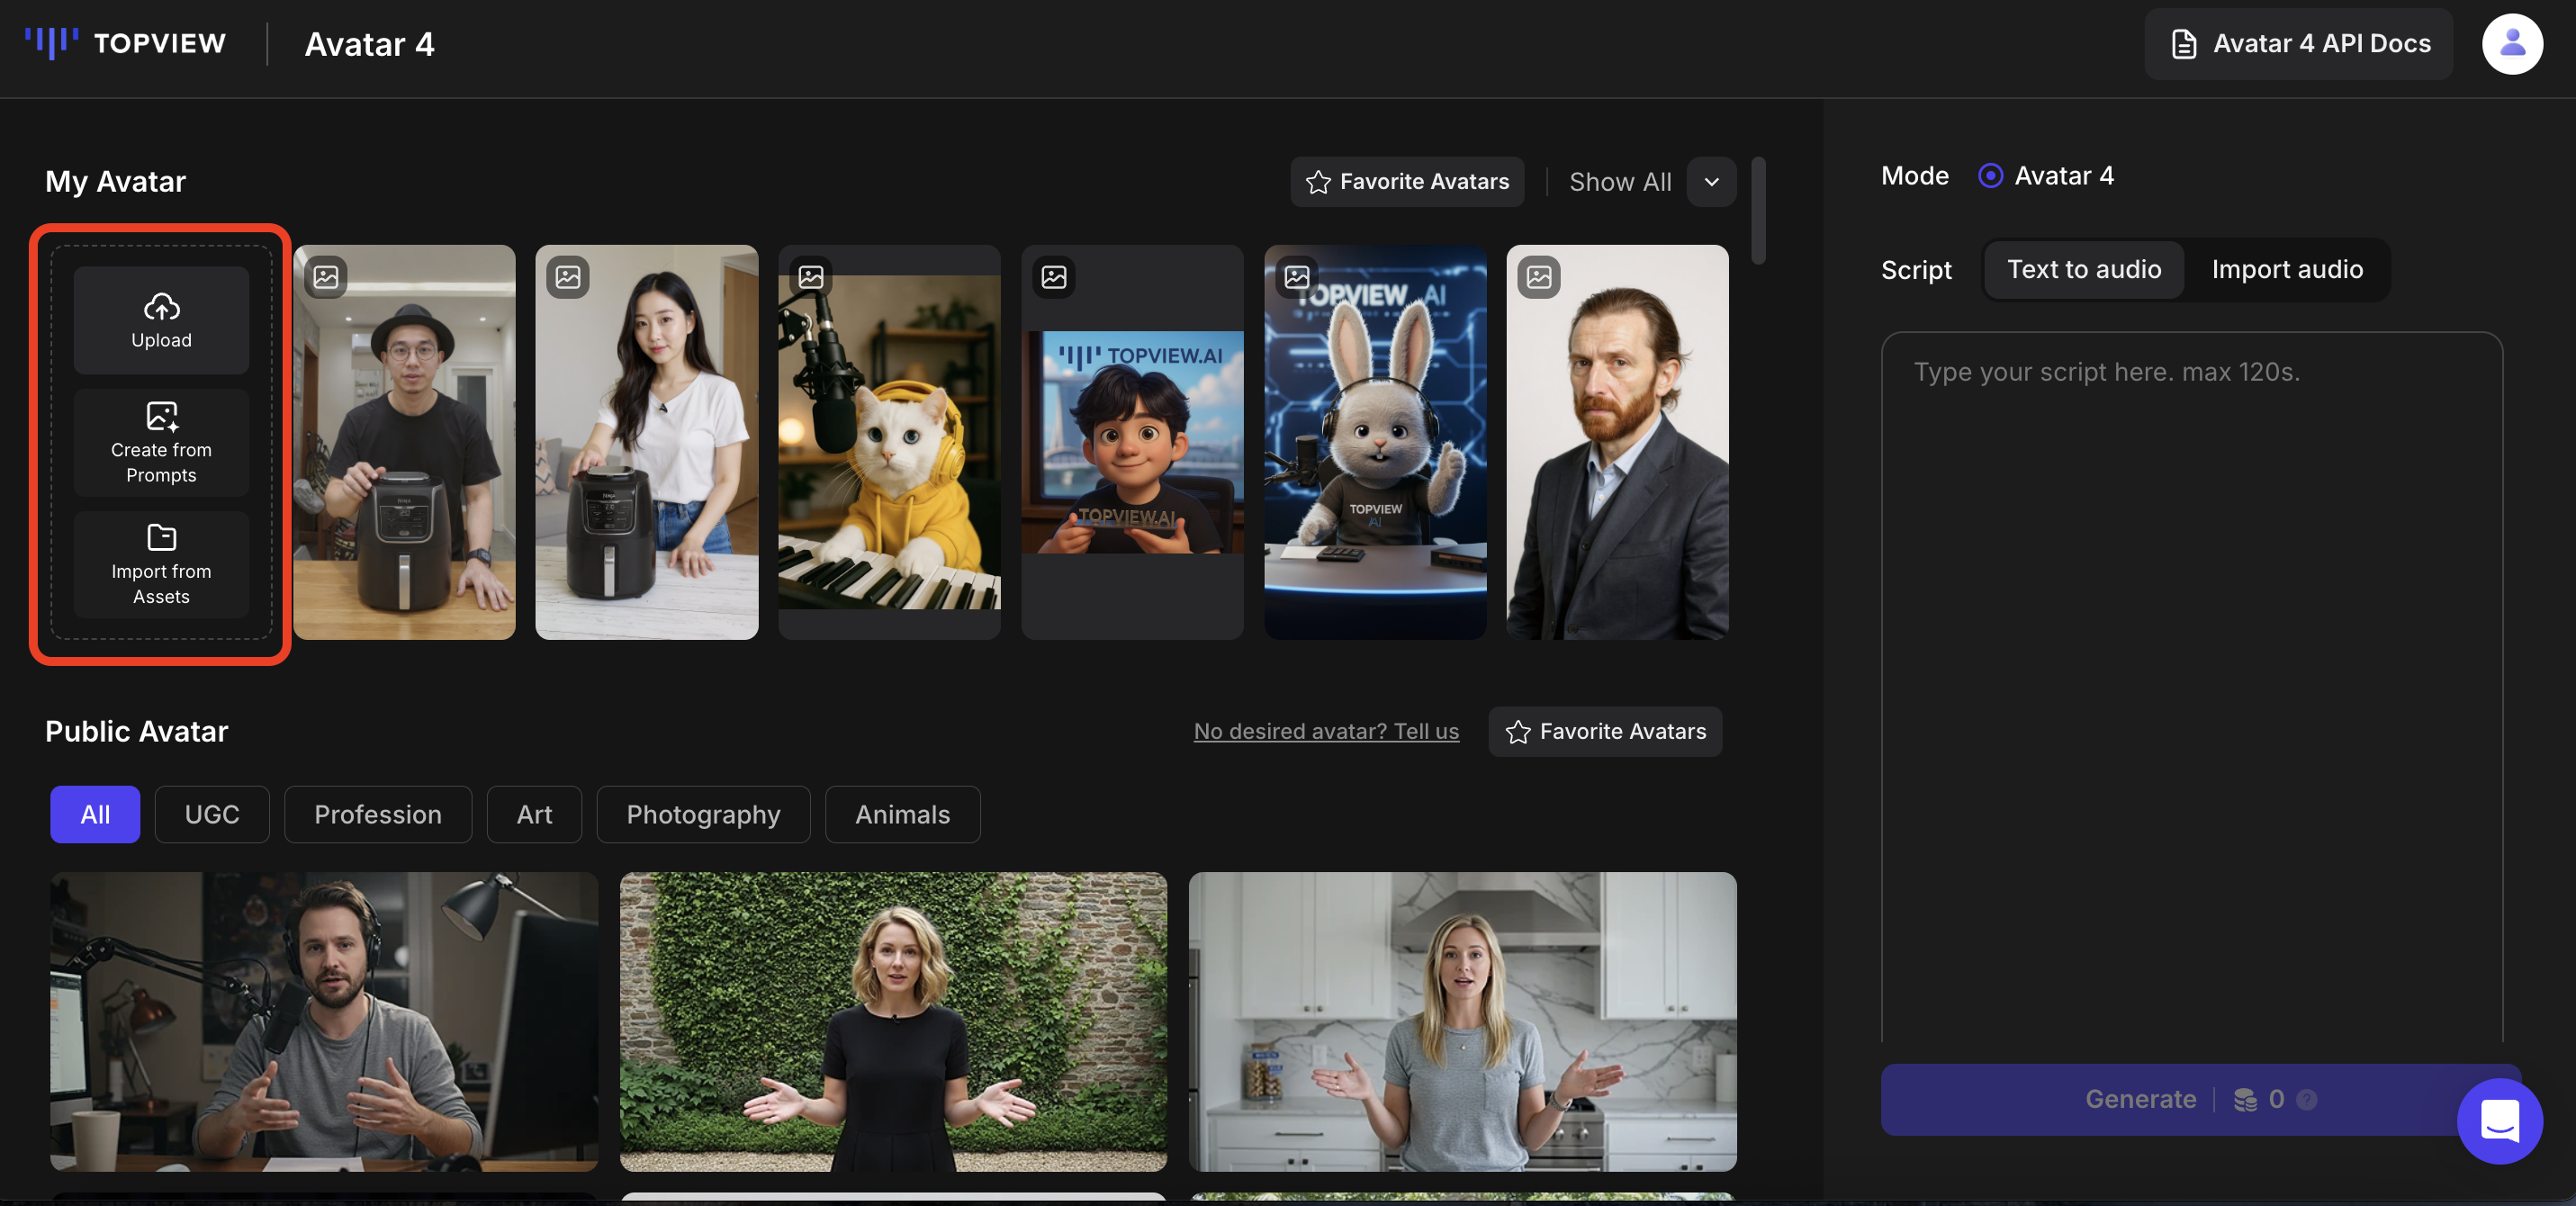
Create Your Own Avatar
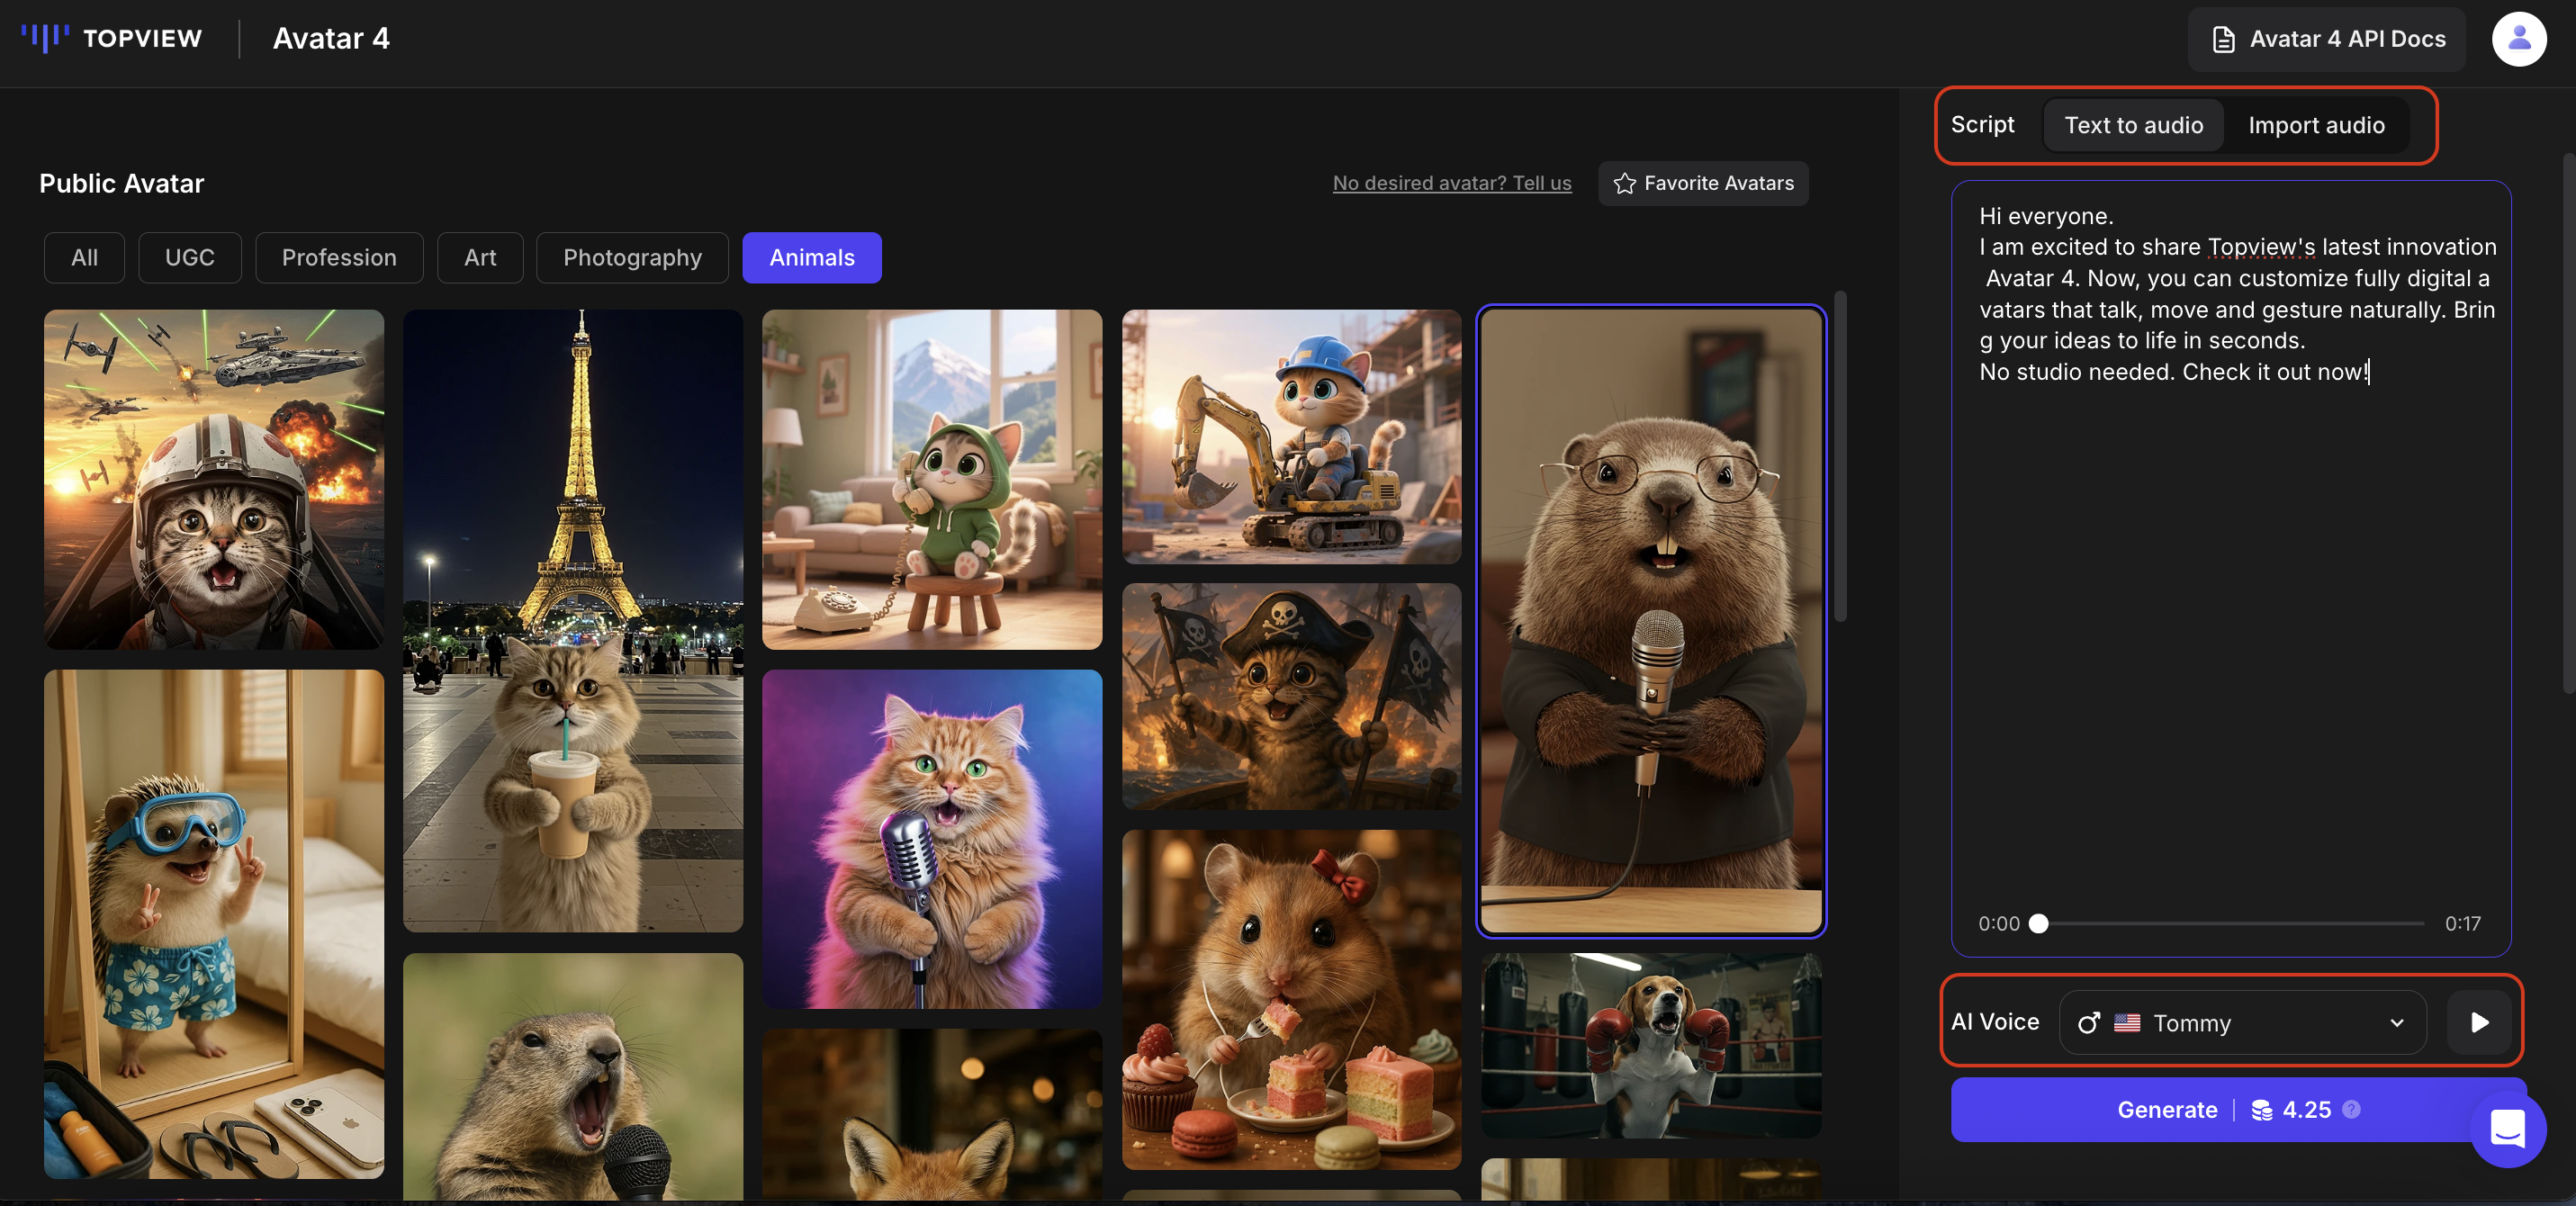
Step 3: Choose Voice & Input Script
Choose the voice for the voiceover:
- Public Voice Library: Find the suitable voice by filtering language, gender, and age. Click the play button to preview the voice effect.
- Custom Voice: Upload an audio file so that the AI can create a new cloned voice.
Then choose your input method:
- Text to Audio: Directly input a text script and the avatar will read the script in the voice you have chosen.
- Import Audio: The avatar will perform lip-syncing to the audio you imported.
Audio Fine-Tuning Tips
- Add Pauses: Place the cursor where the pause is required and click "Add Pause" to set the duration.
- Adjust Pronunciation: Click "Modify Pronunciation" and type in the correct pronunciation.
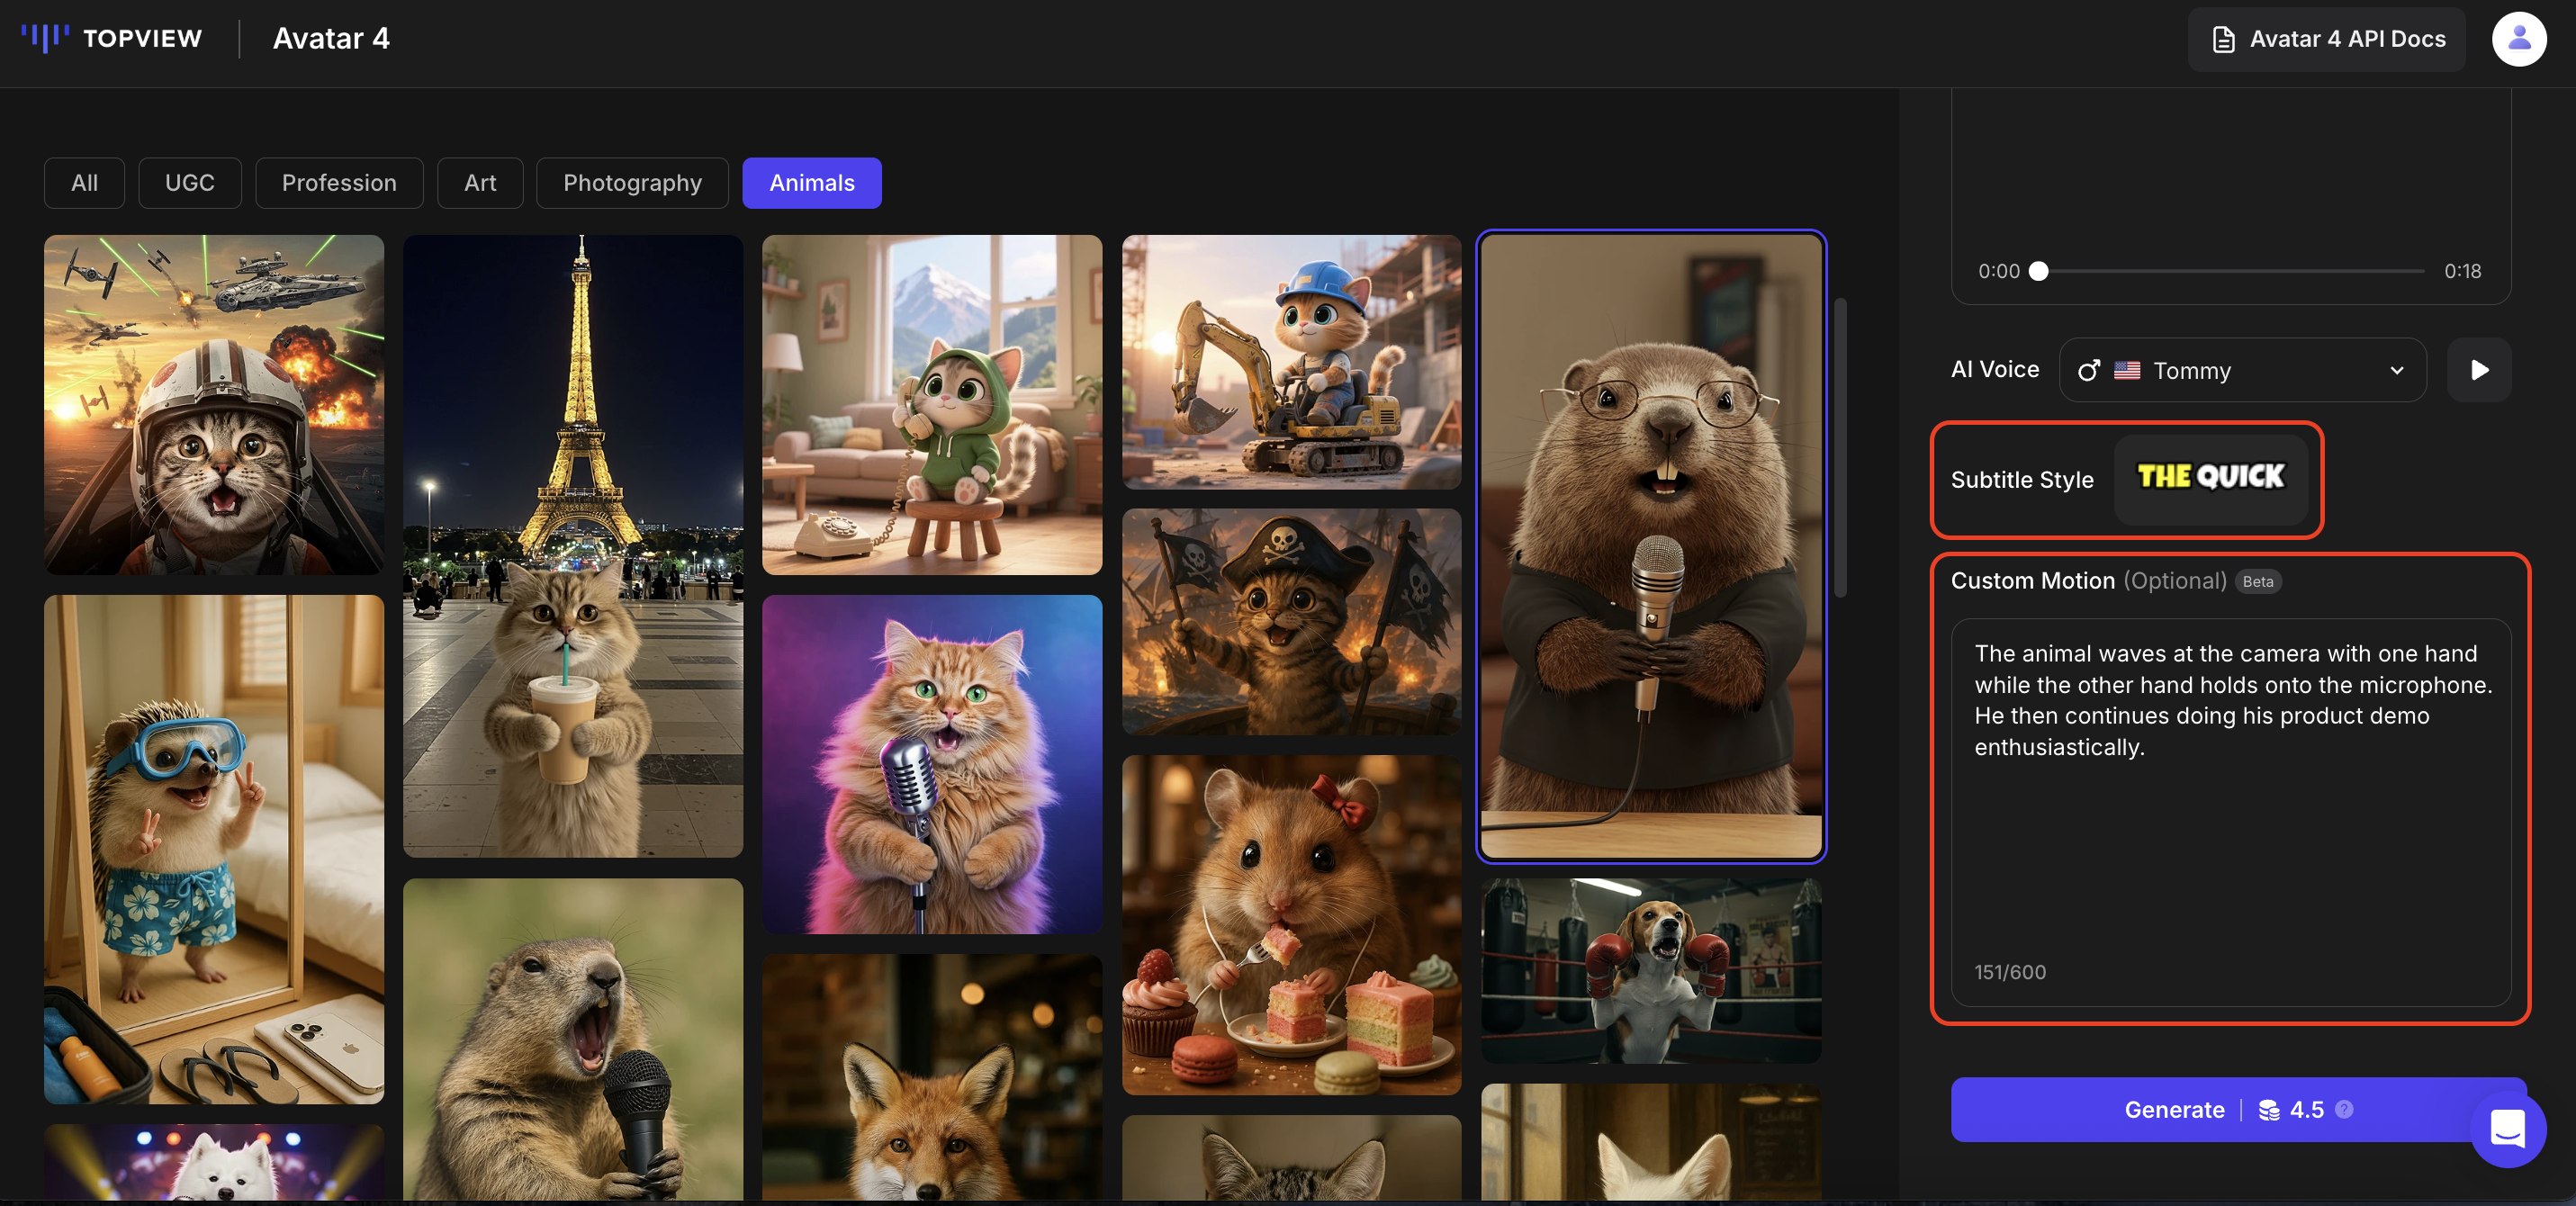
Step 4: Set Properties & Generate
Configure the remaining settings before generating:
- Subtitles: Can be turned on/off in subtitle style settings.
- Custom Motion: Avatar 4 supports guiding the actions of the avatar by entering prompt words in the custom motion area.
When ready, click "Generate" to obtain your video.
Sample Videos
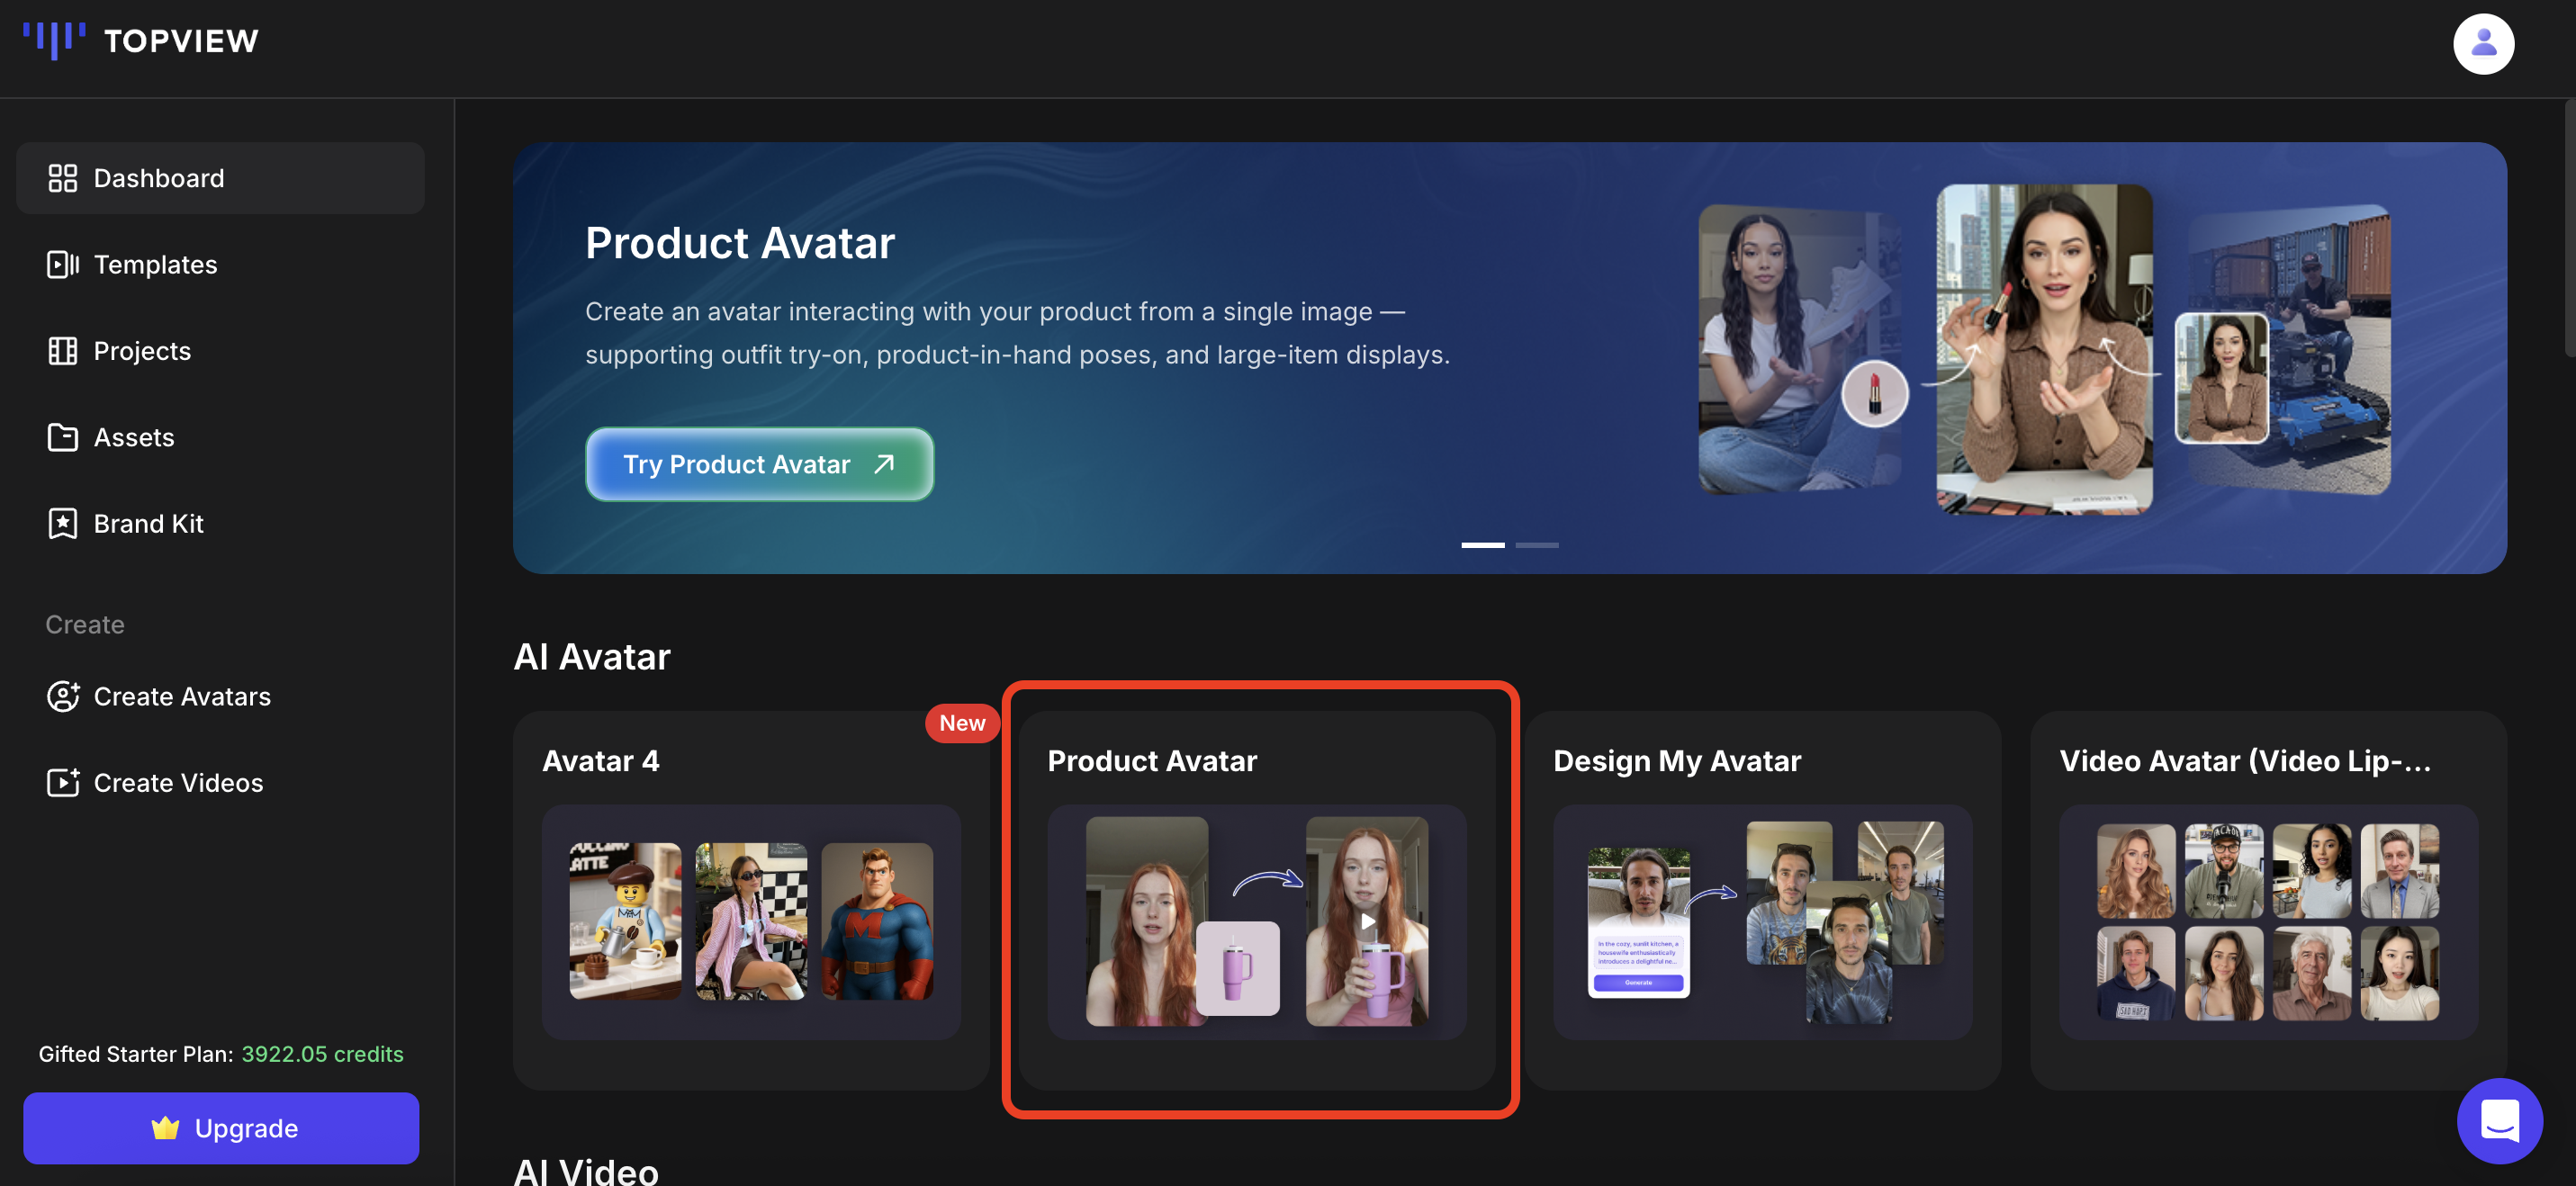
Product Avatar
Product Avatar is an AI-powered tool that combines your product image with a lifelike AI avatar. The avatar can hold, showcase, or interact with your product — creating natural and engaging visuals.
Upload just one product image to generate the video.
Instantly create high-quality, user-generated content-style videos.
No influencers, actors, or production team required.
Video Guide
How to Use
Step 1: Enter Product Avatar & Choose an Avatar
Select your ideal avatar template from the various categories. Choose an avatar that best fits the product you want to showcase. Alternatively, click "Use My Photo" to upload your own image or use AI to generate a custom avatar.
Product Avatar Interface
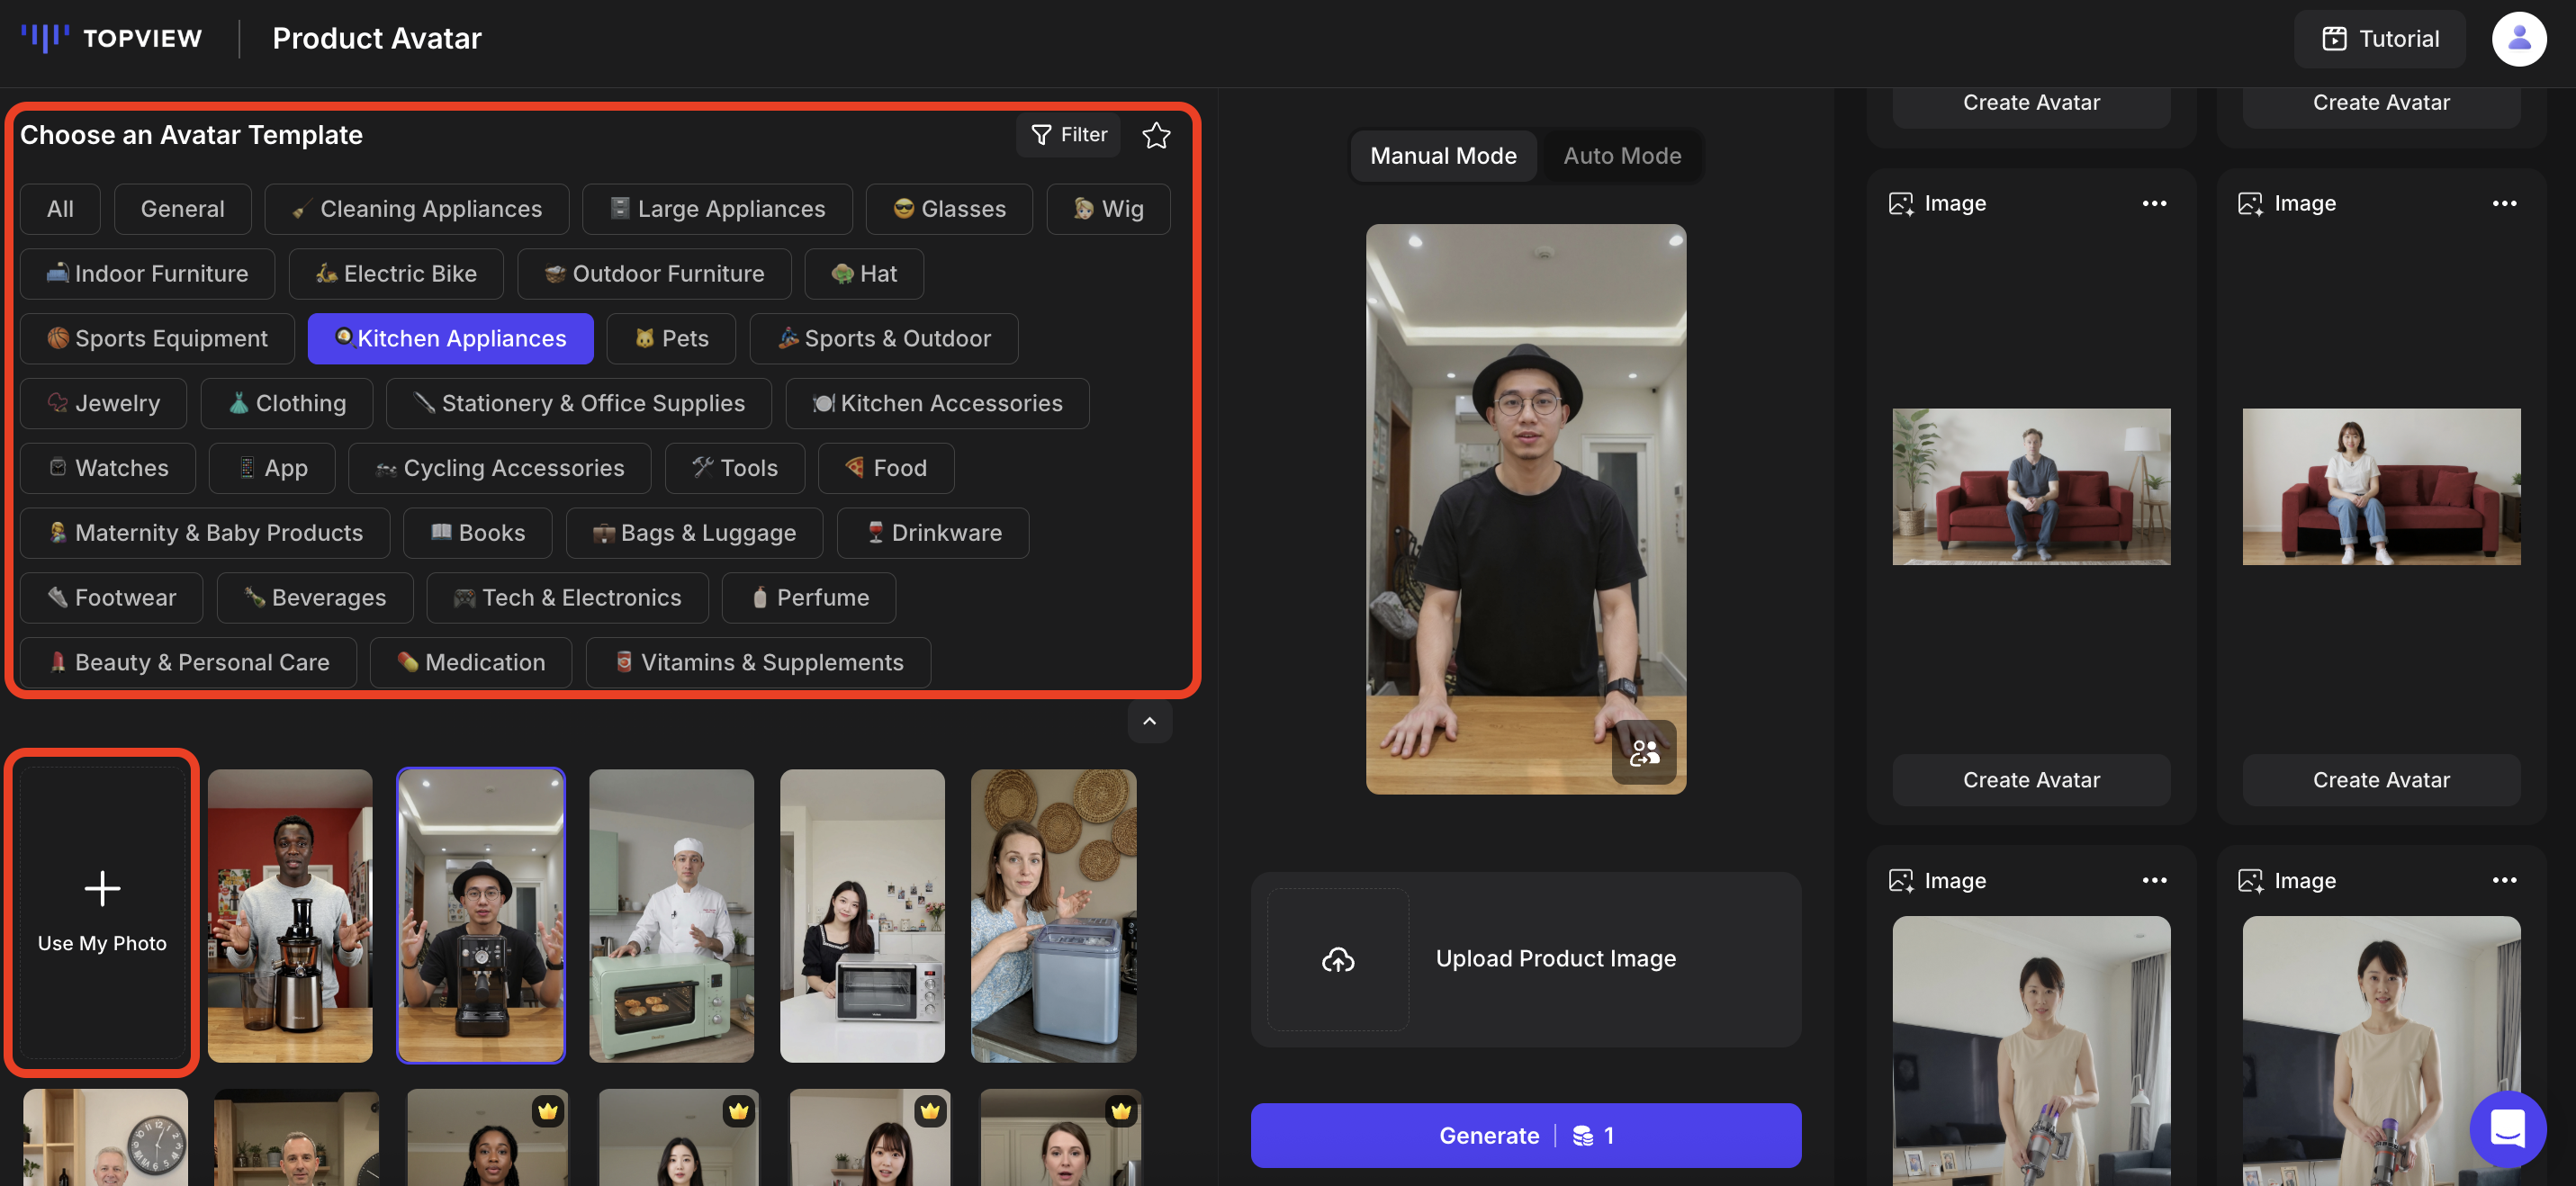
Choose from Templates
Step 2: Upload Product Image & Generate
Click "Upload Product Image" to upload your product. You can choose between two modes:
- Manual Mode: Adjust the product's size and placement manually, then click "Generate".
- Auto Mode: Once your product image appears, click "Generate" directly.
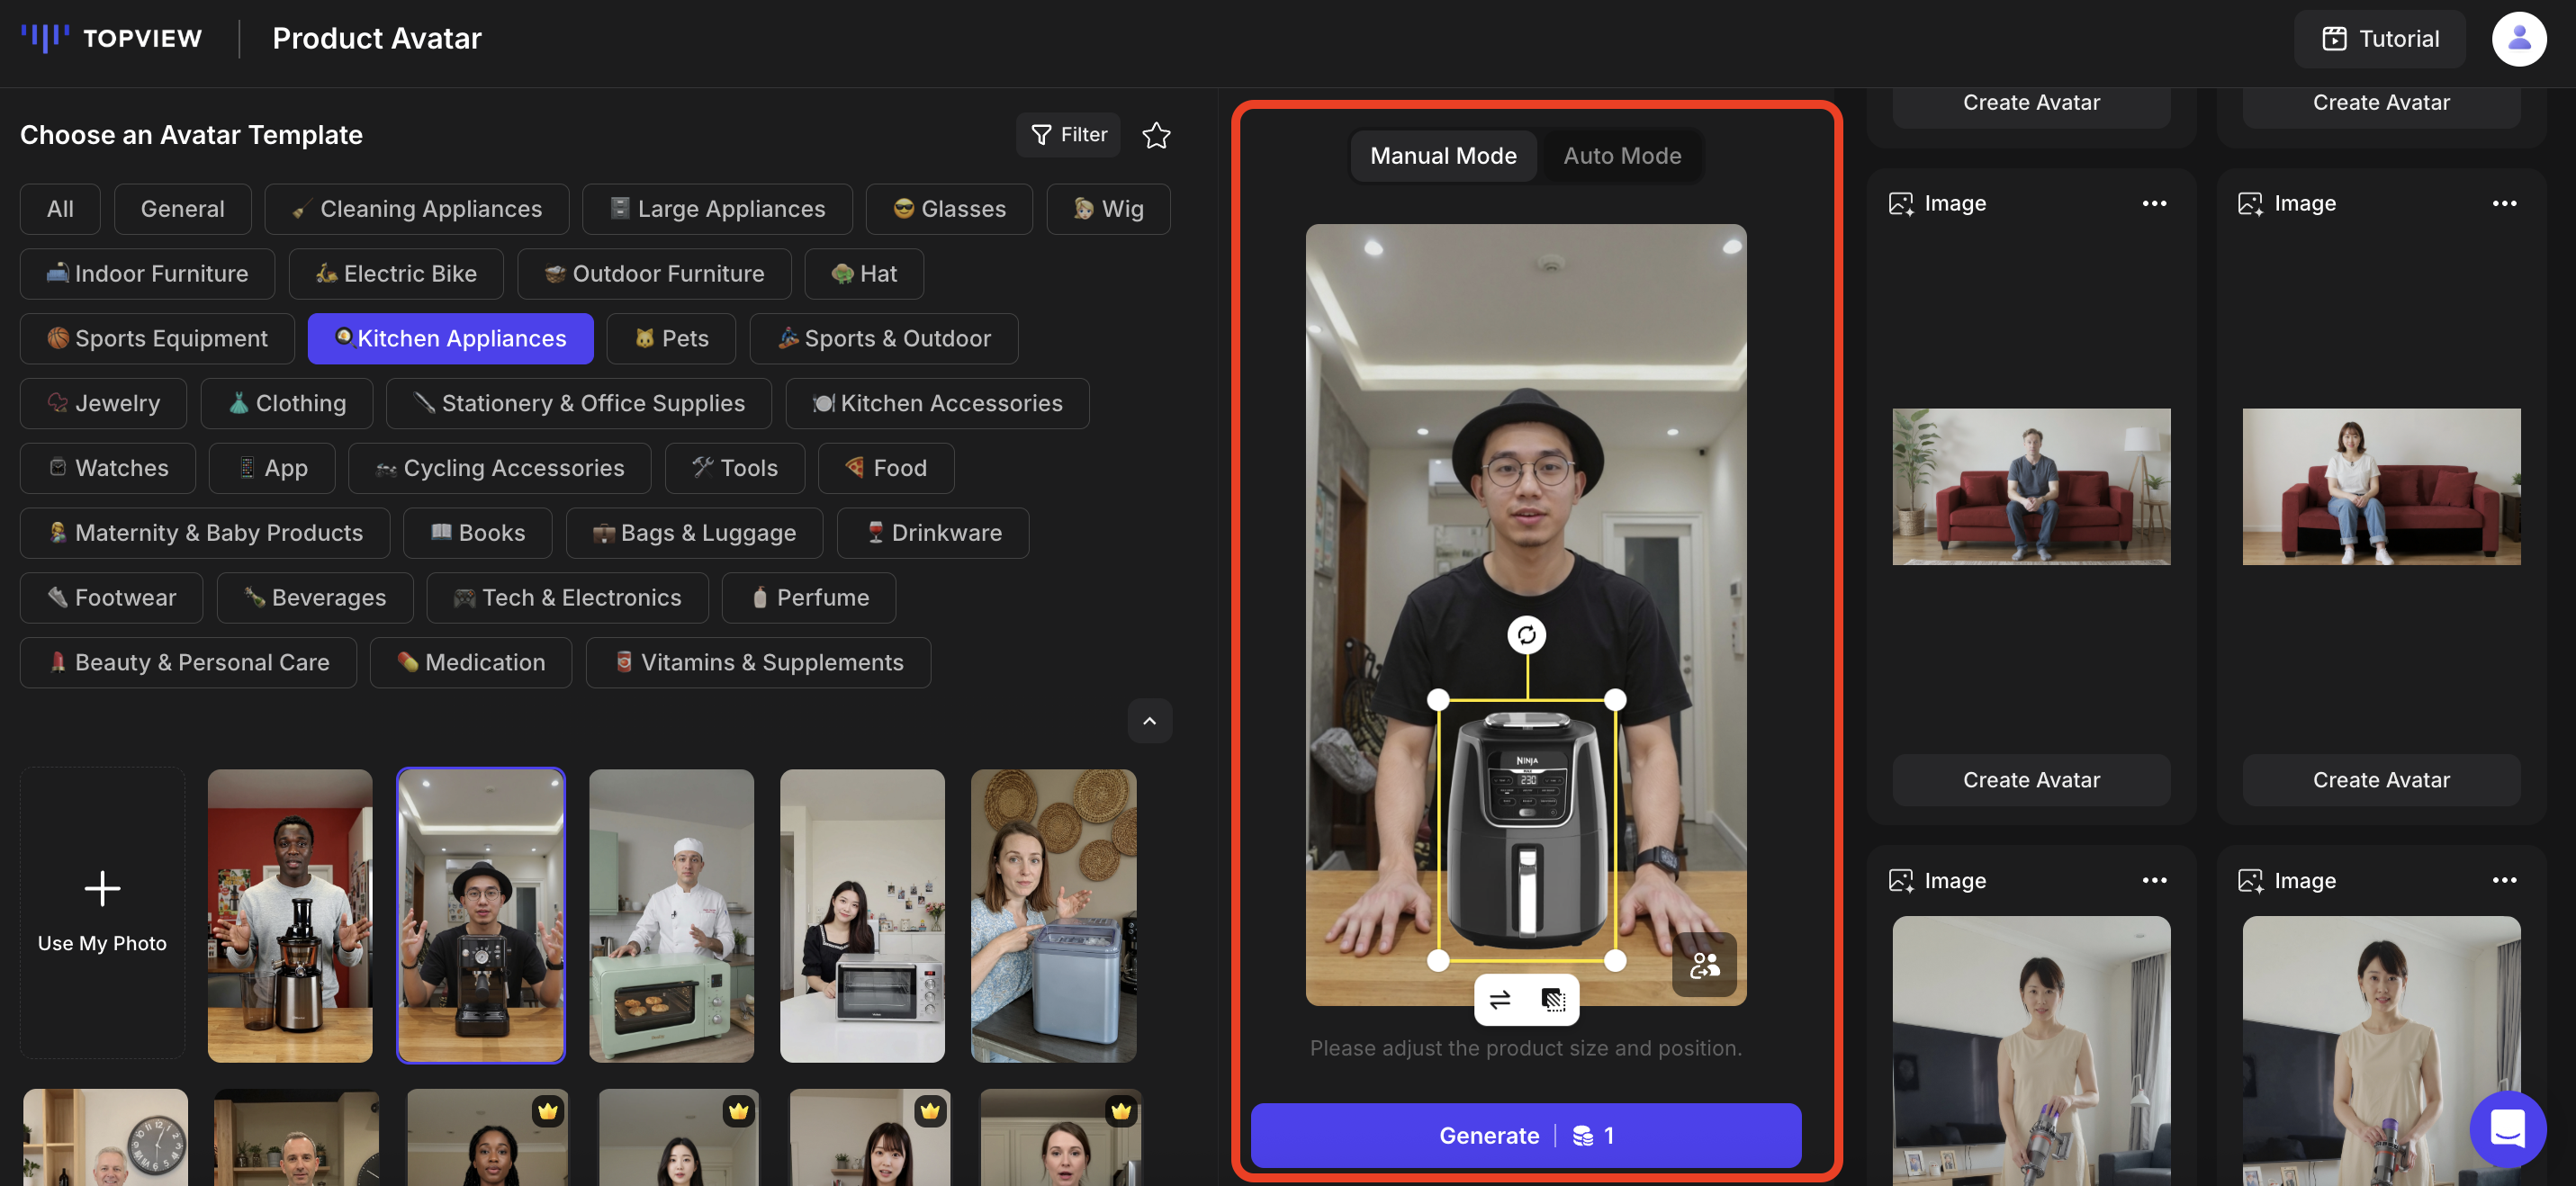
Manual Mode
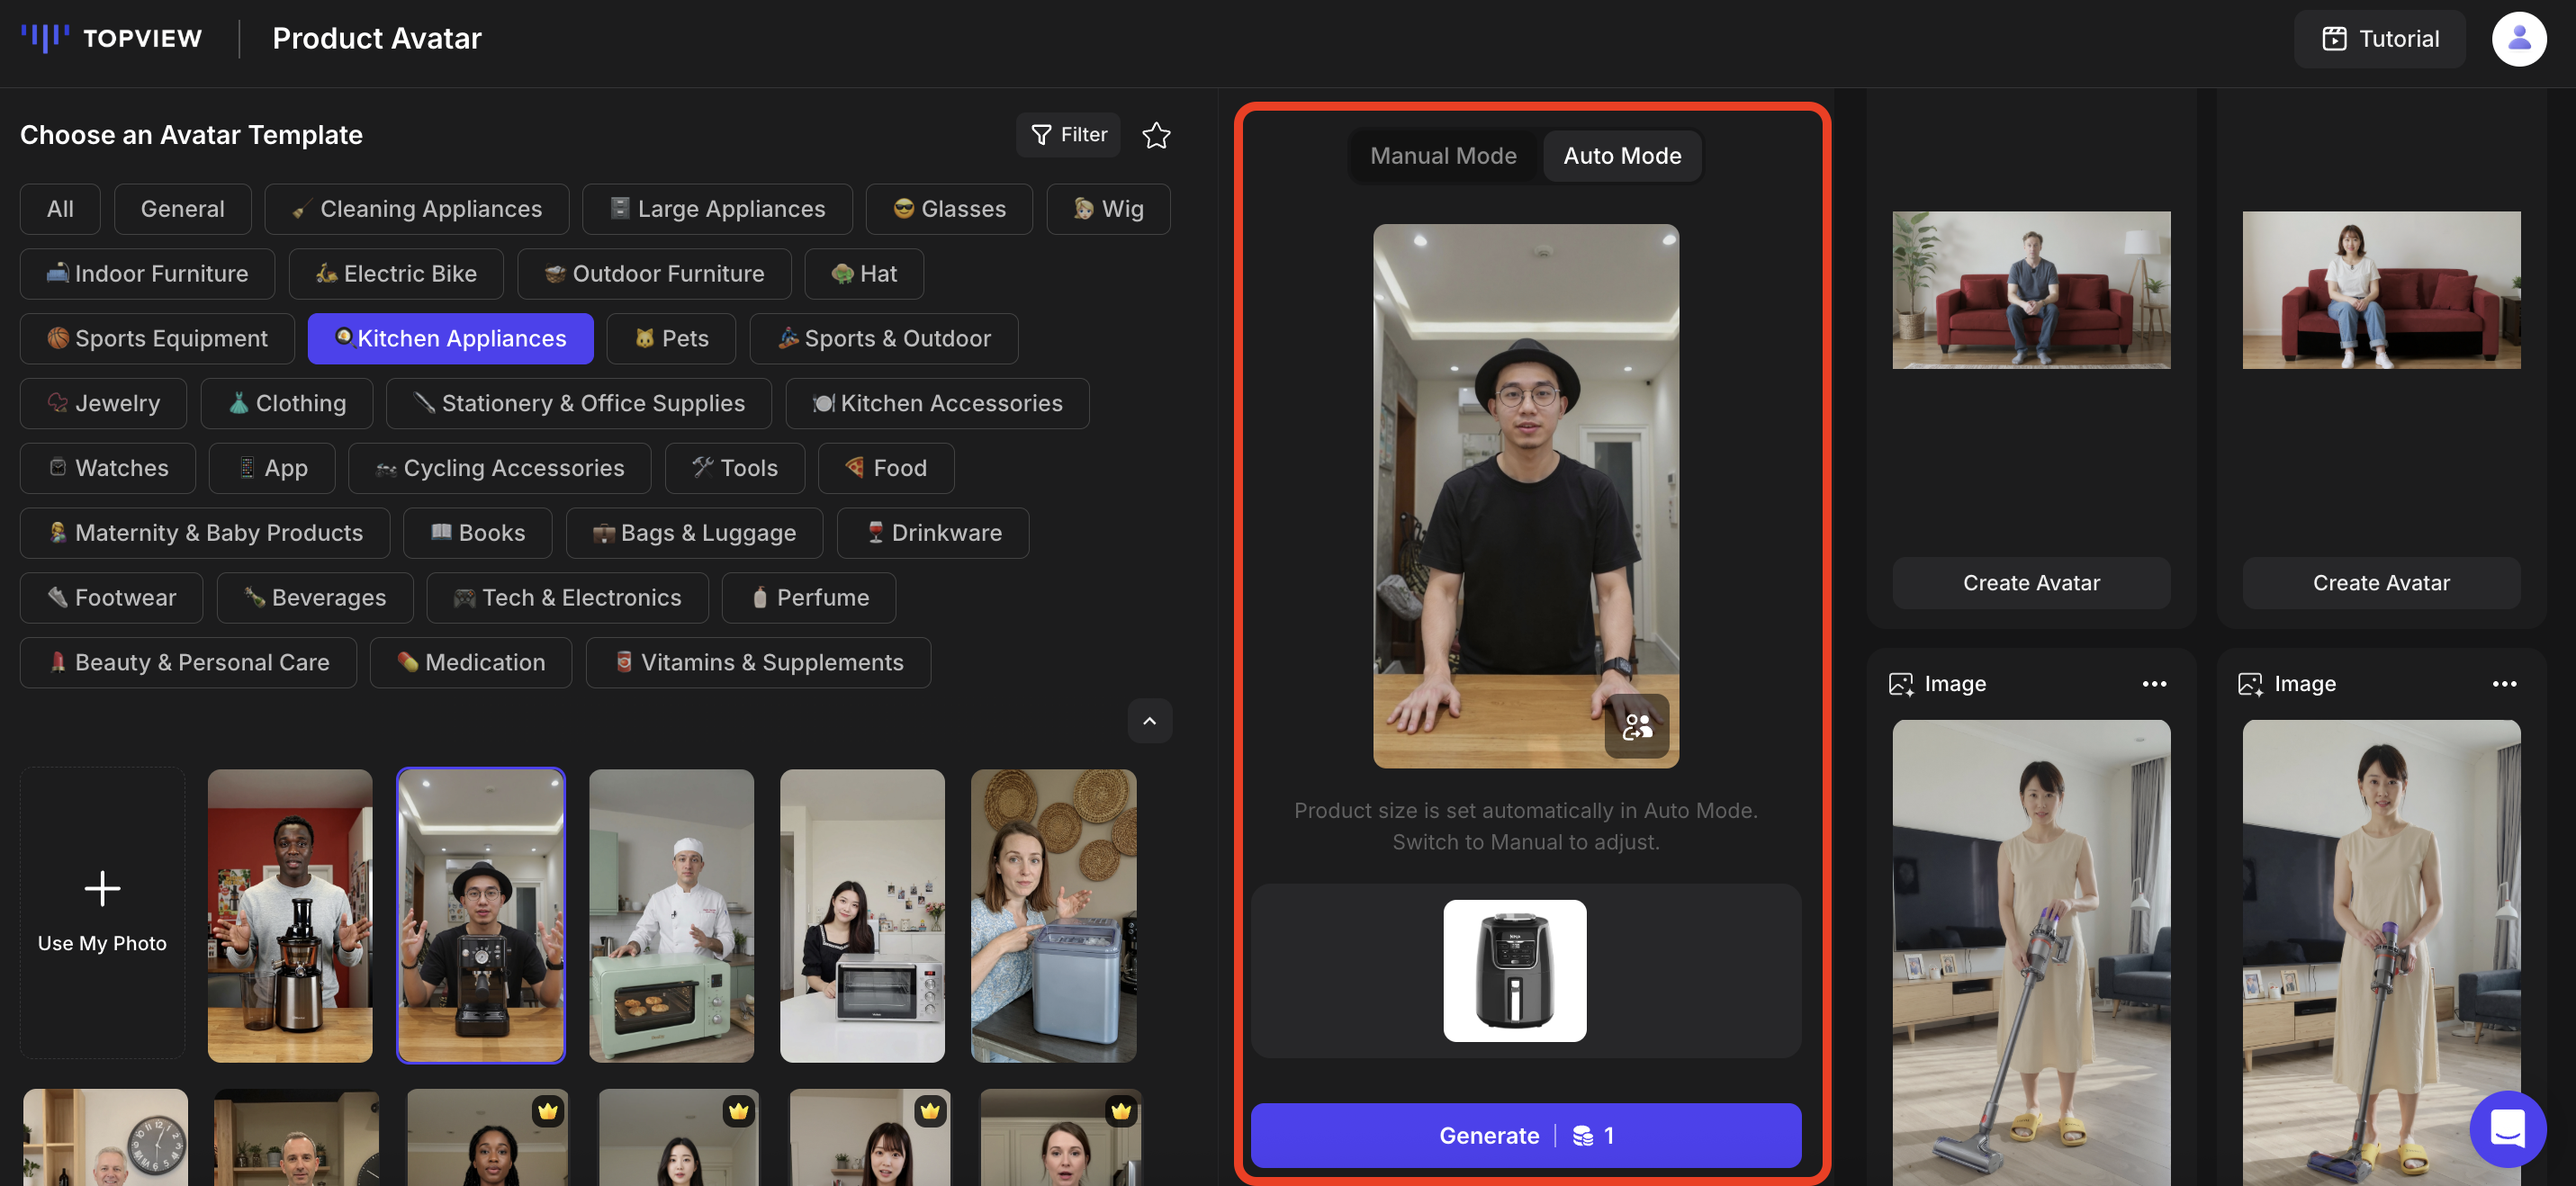
Auto Mode
Step 3: Create Avatar Video
Click "Create Avatar" to animate your image into a video. Pick the Avatar Action Mode (Avatar 4 is the latest), enter your script, select the voiceover, and click "Generate".
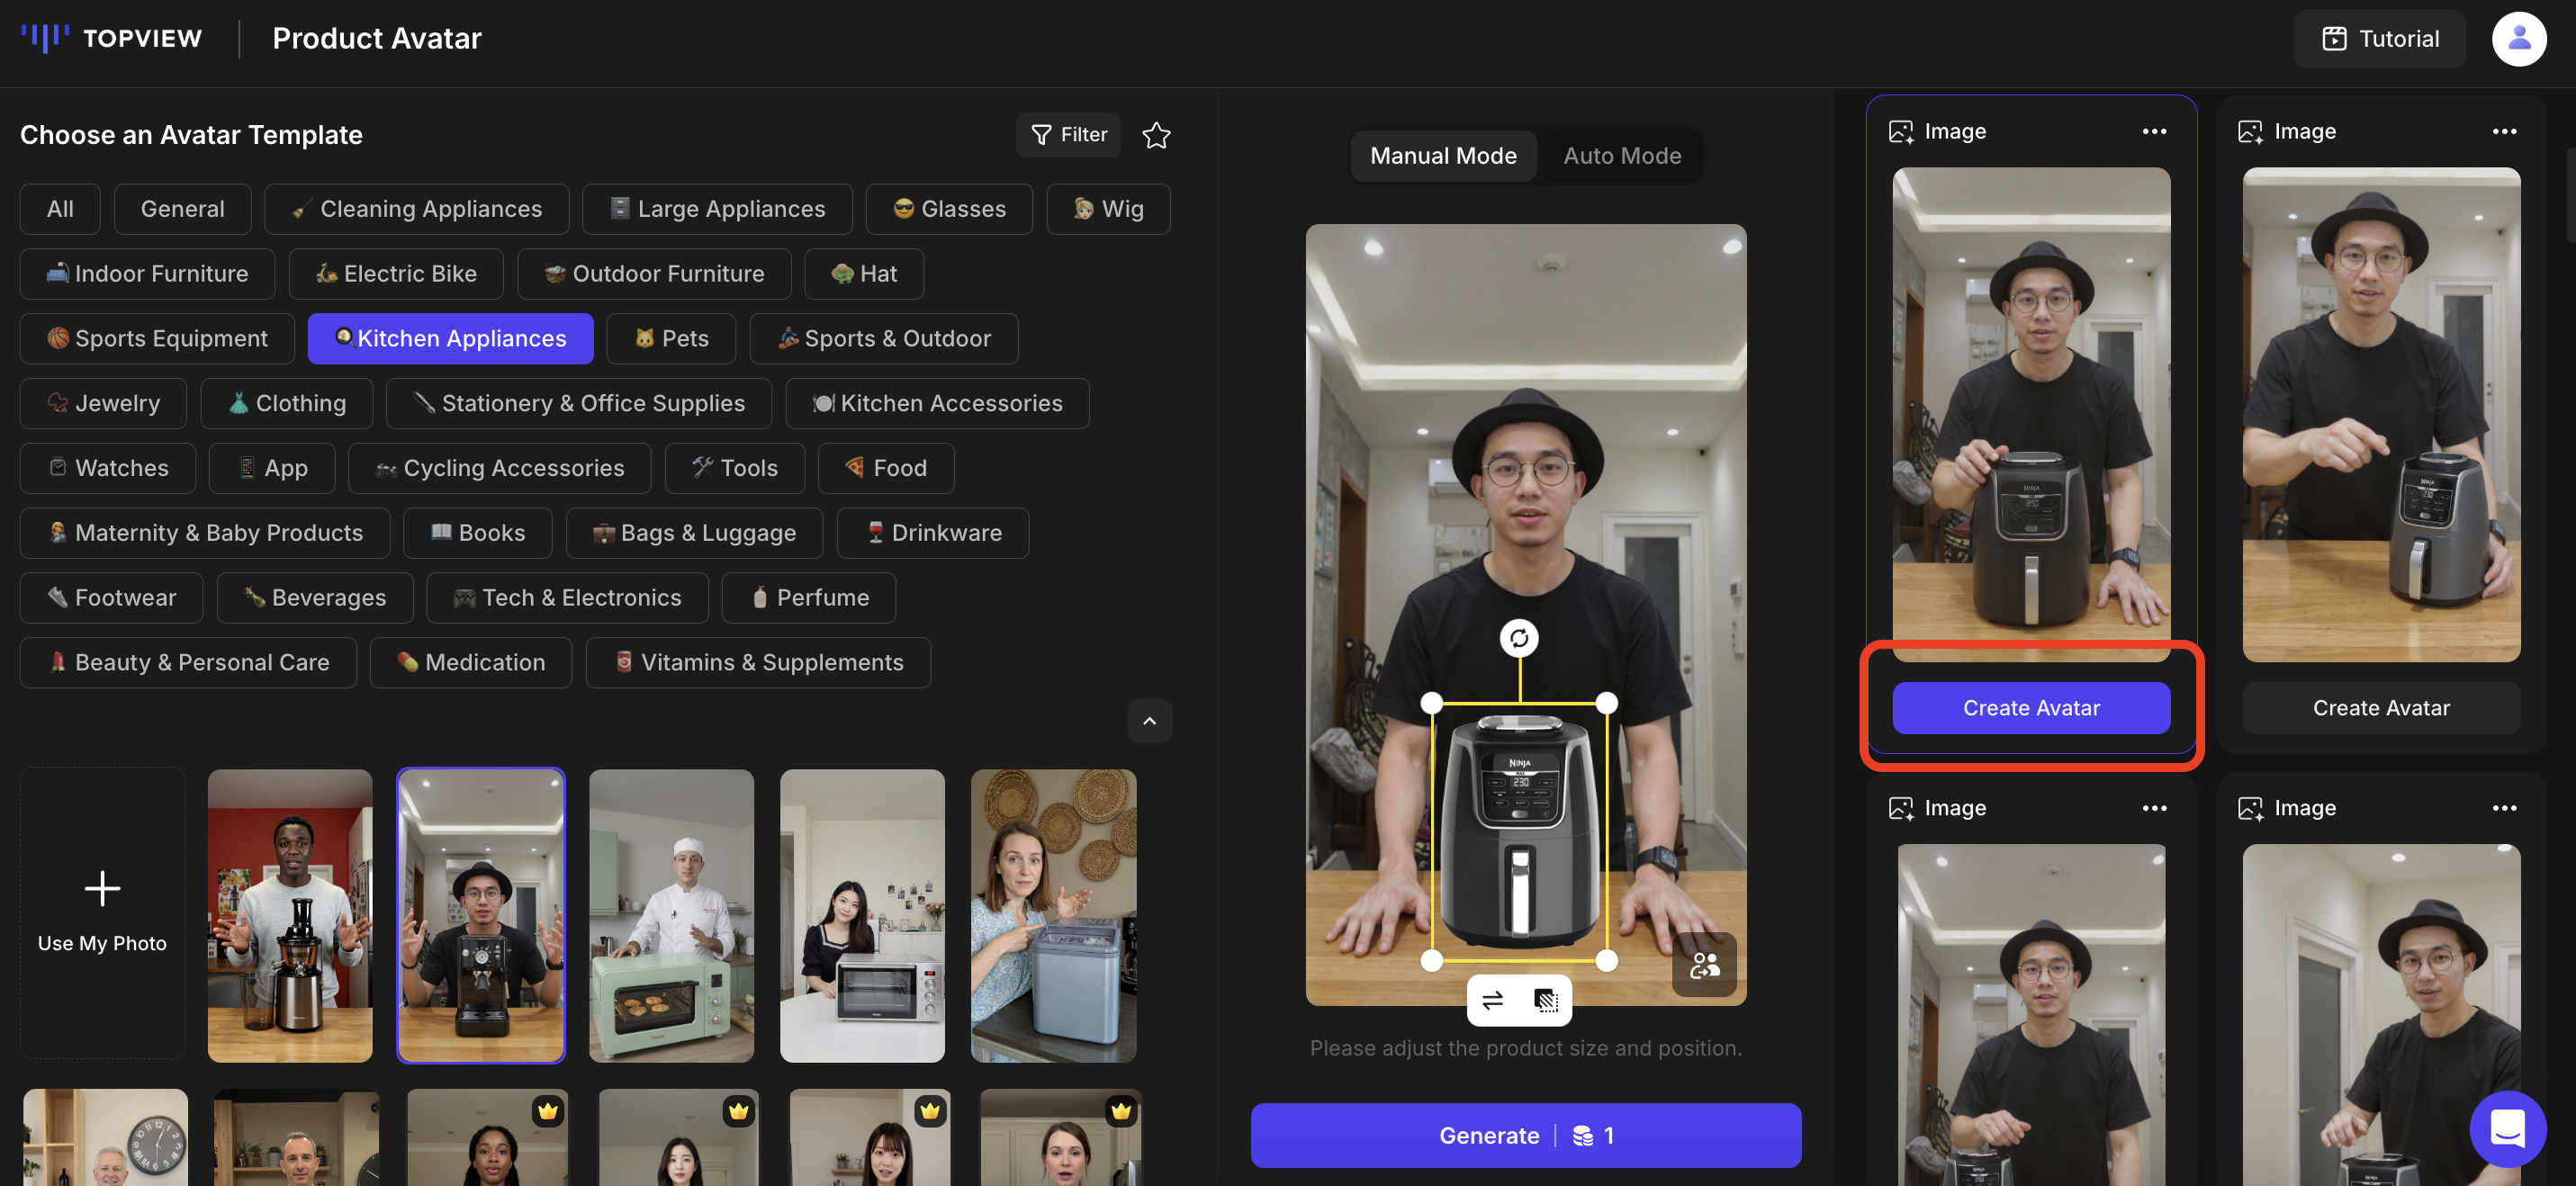
Create Avatar
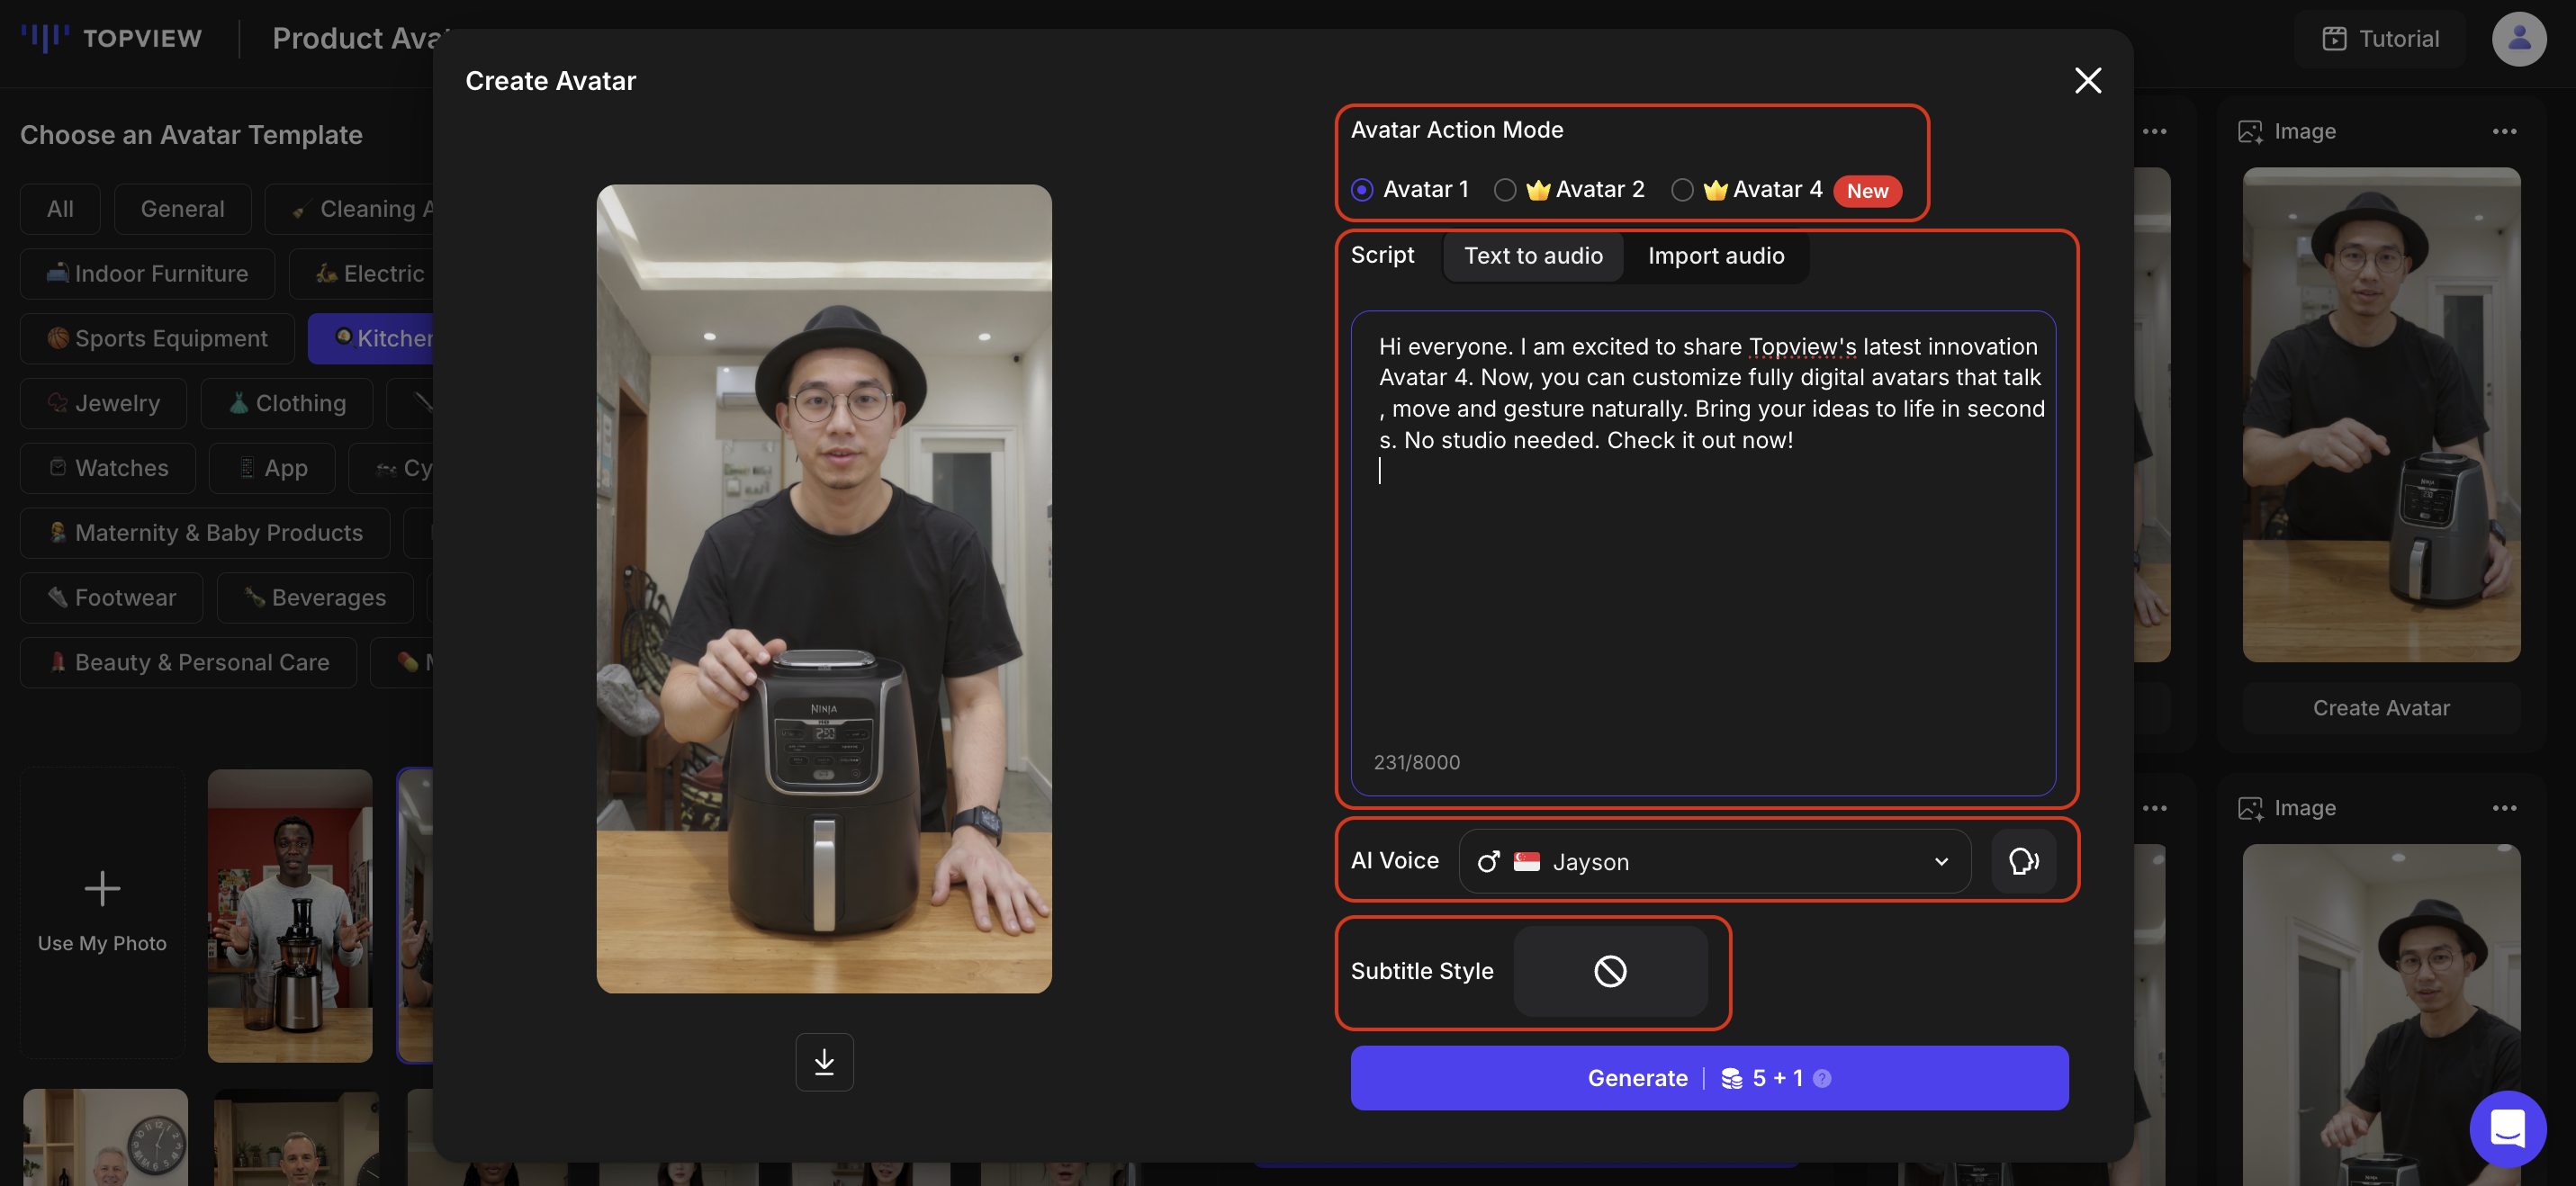
Avatar Video Settings
Sample Videos
Video Lip-Sync (Video Avatar)
Add AI-driven lip-sync to any uploaded video. The steps are similar to Avatar 4:
- Upload Video: Enter the tool and upload the video you want to use.
- Script & Voice: Type in the script and choose your ideal voice (same voice options as Avatar 4).
- Generate: Click "Generate" to create the lip-synced video.
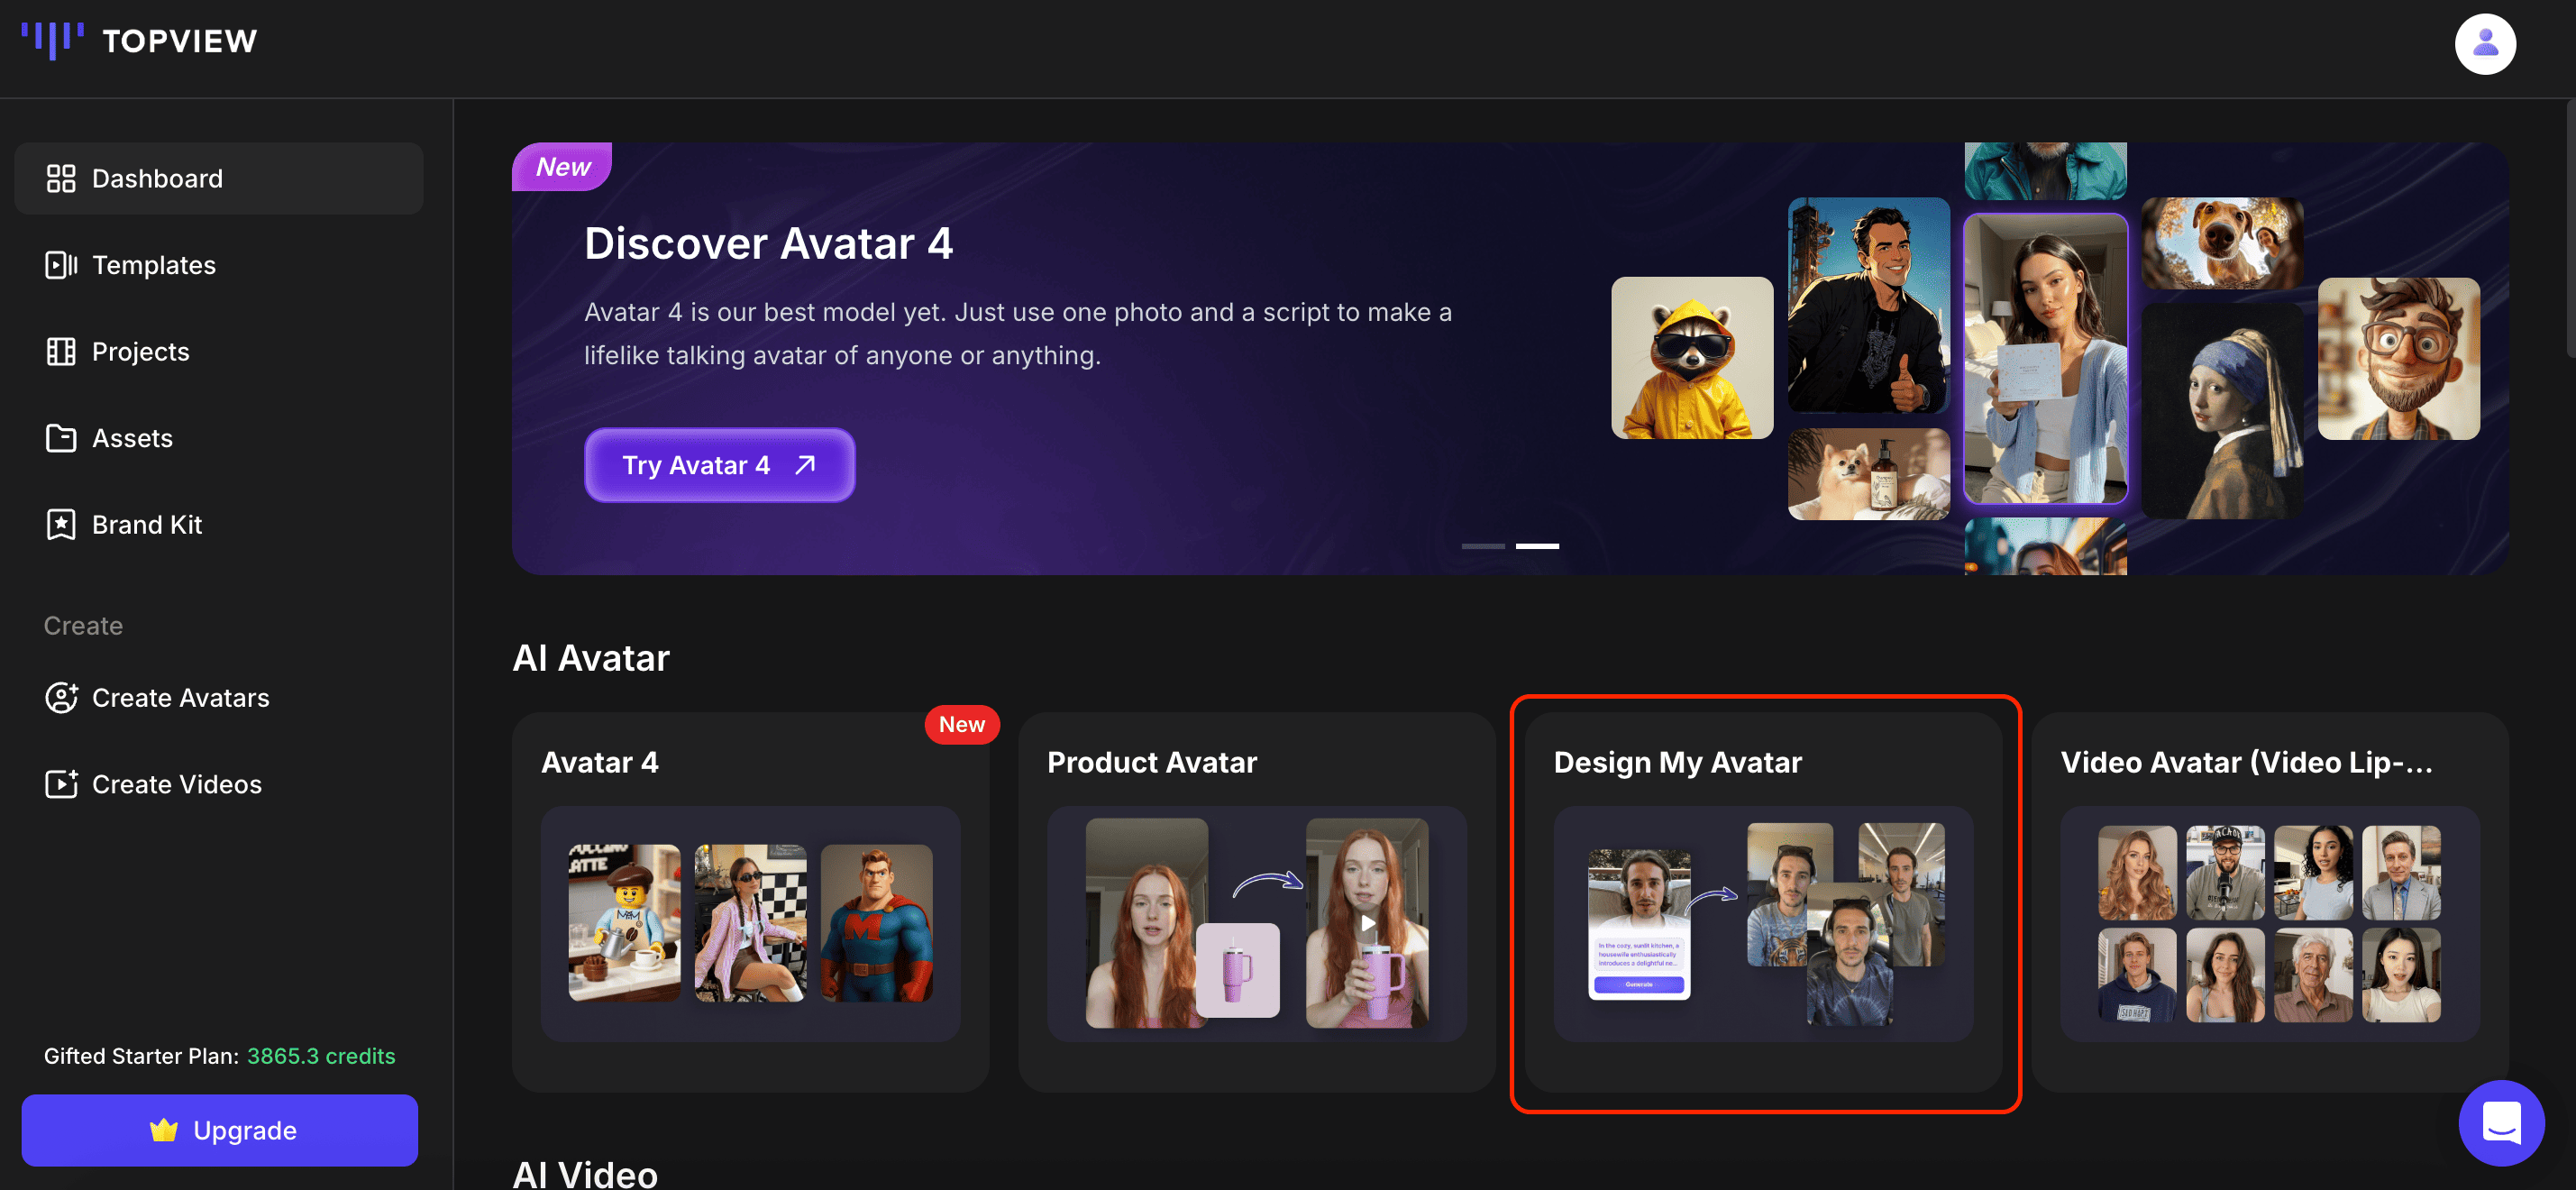
Design My Avatar
Design My Avatar lets you create your own digital avatar. You can support a fixed digital human IP, customize freely with prompts, and build a versatile identity usable across platforms.
How to Use
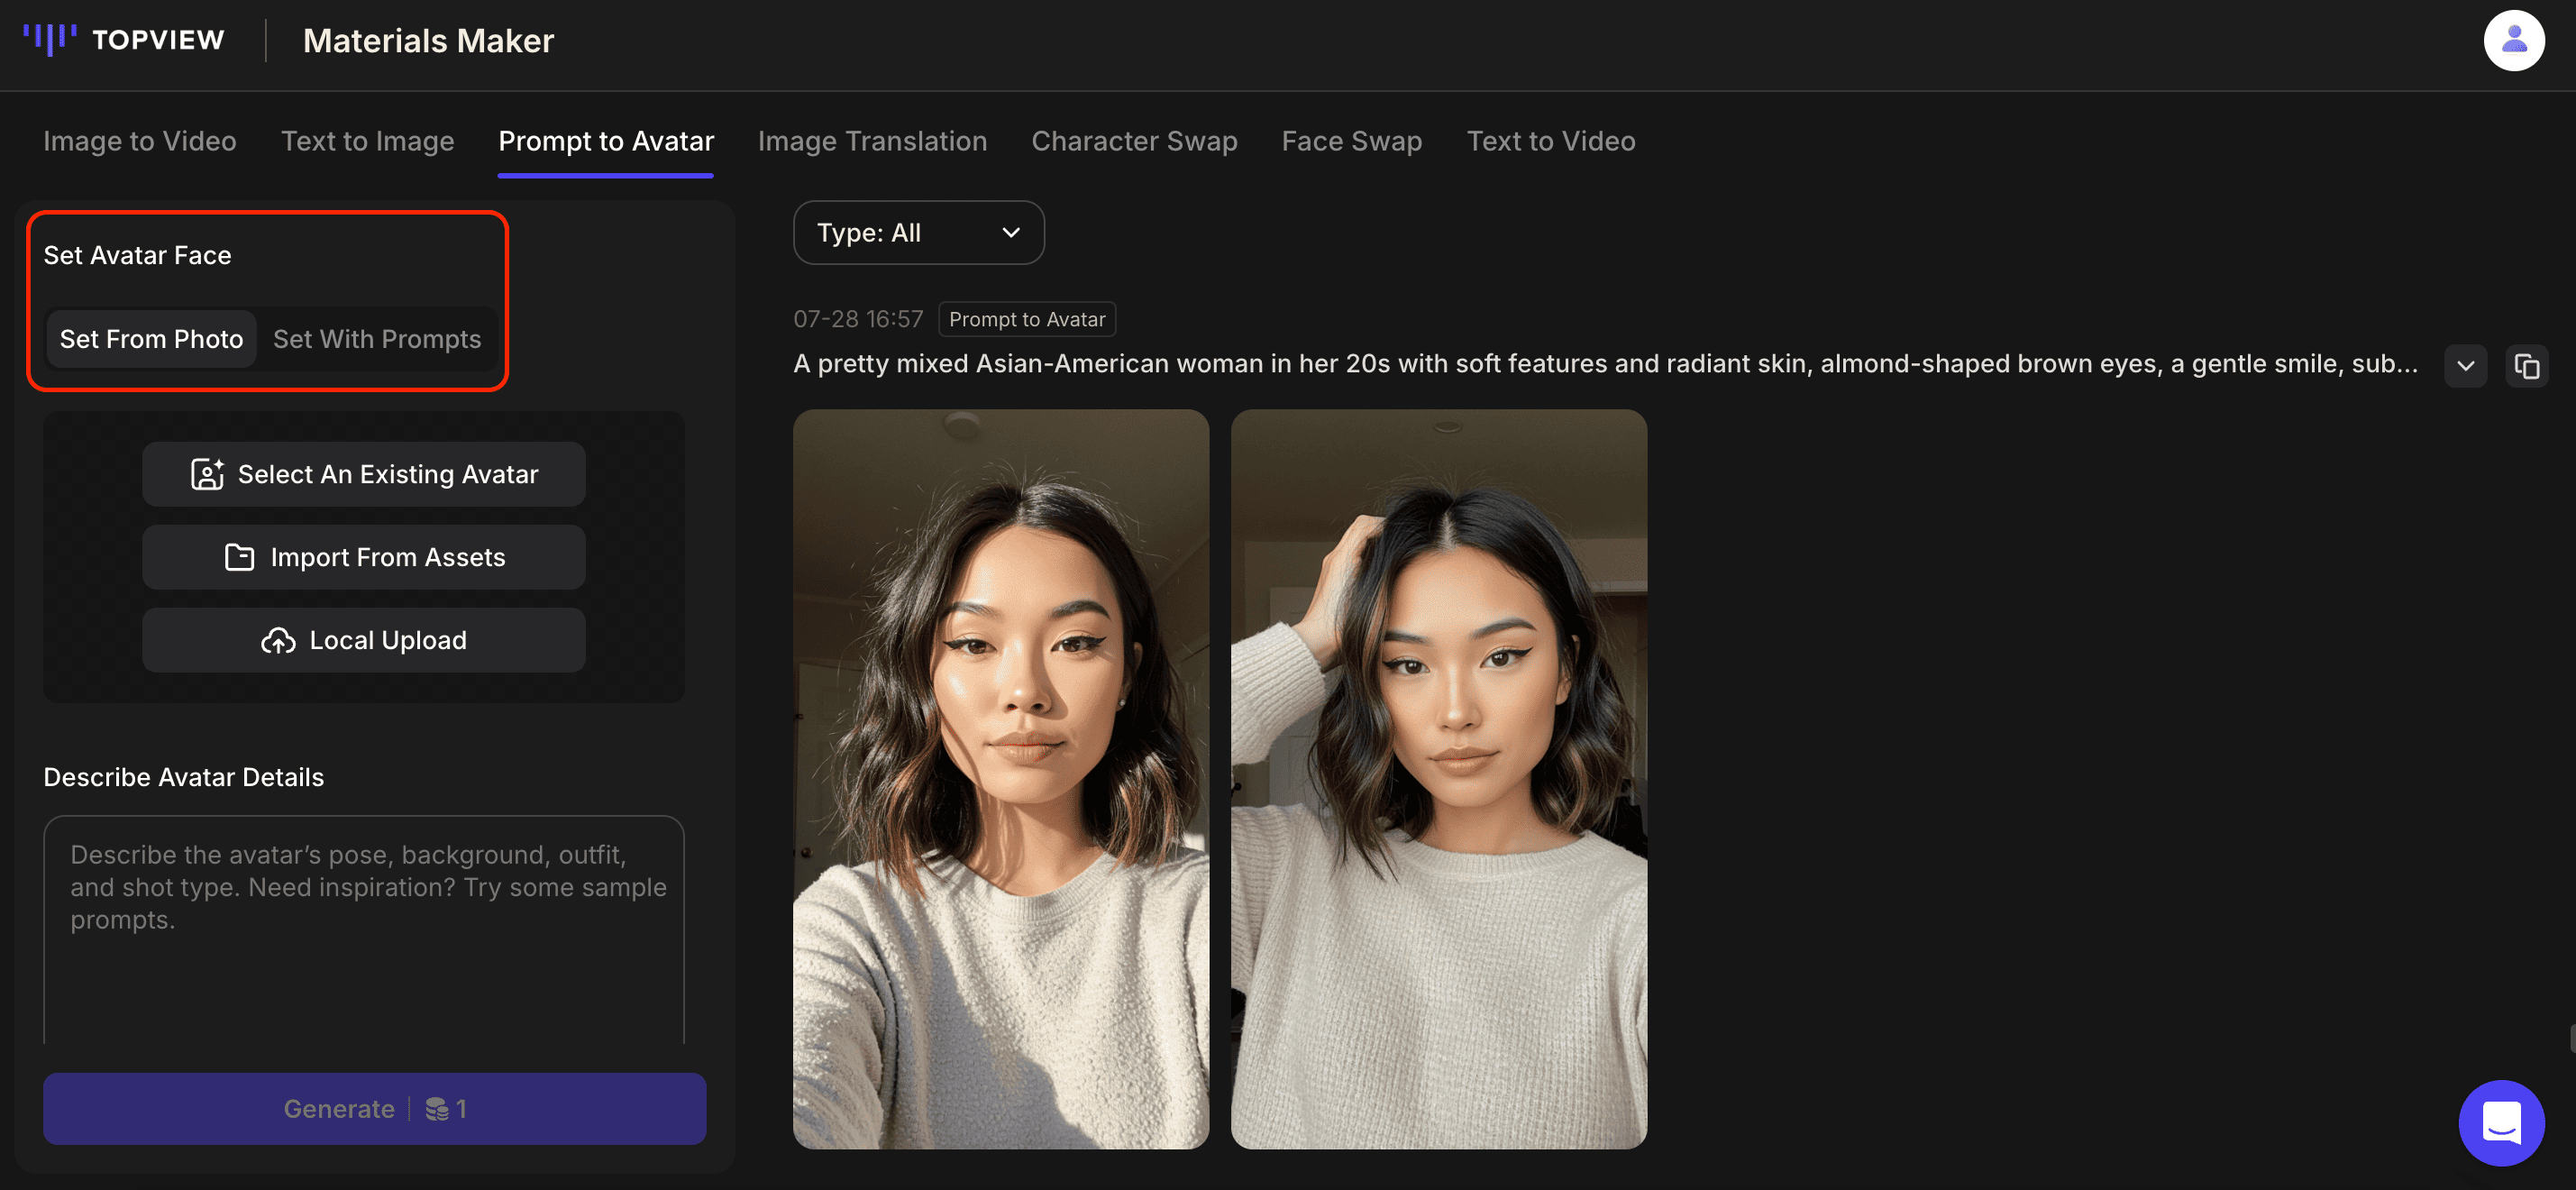
Step 1: Set the Avatar's Face
Enter "Design My Avatar" and choose one of two methods:
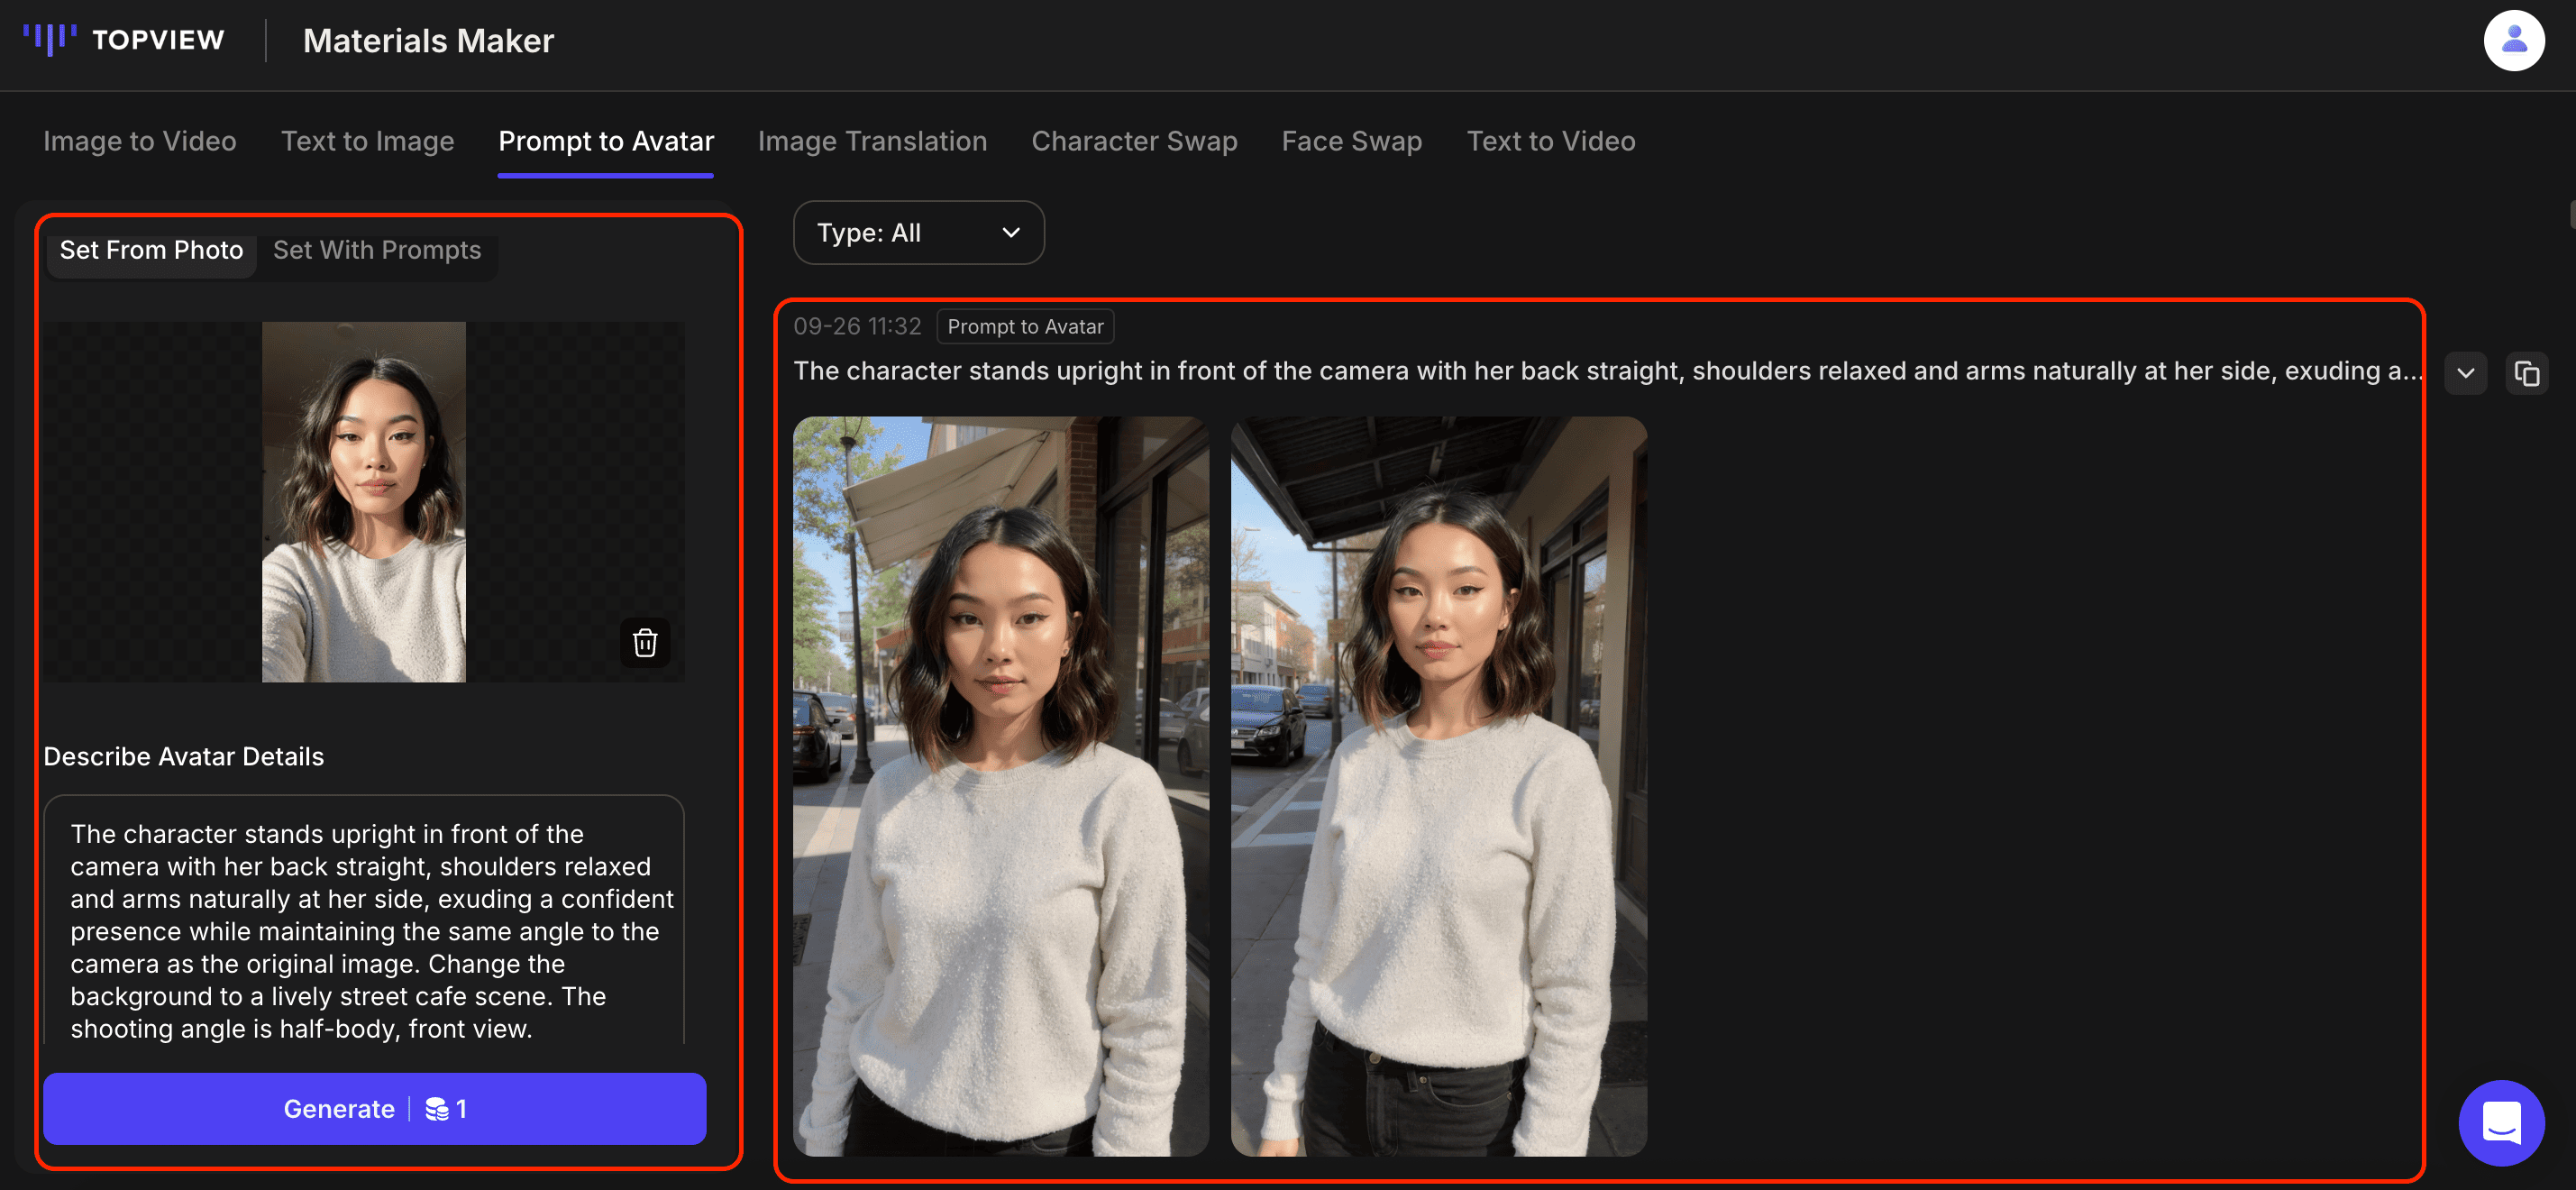
Set From Photo
Upload a photo to fix the avatar's appearance. Change hairstyle, clothing, and background through prompts while keeping the face consistent.
Best for: brands wanting a consistent "digital human IP".
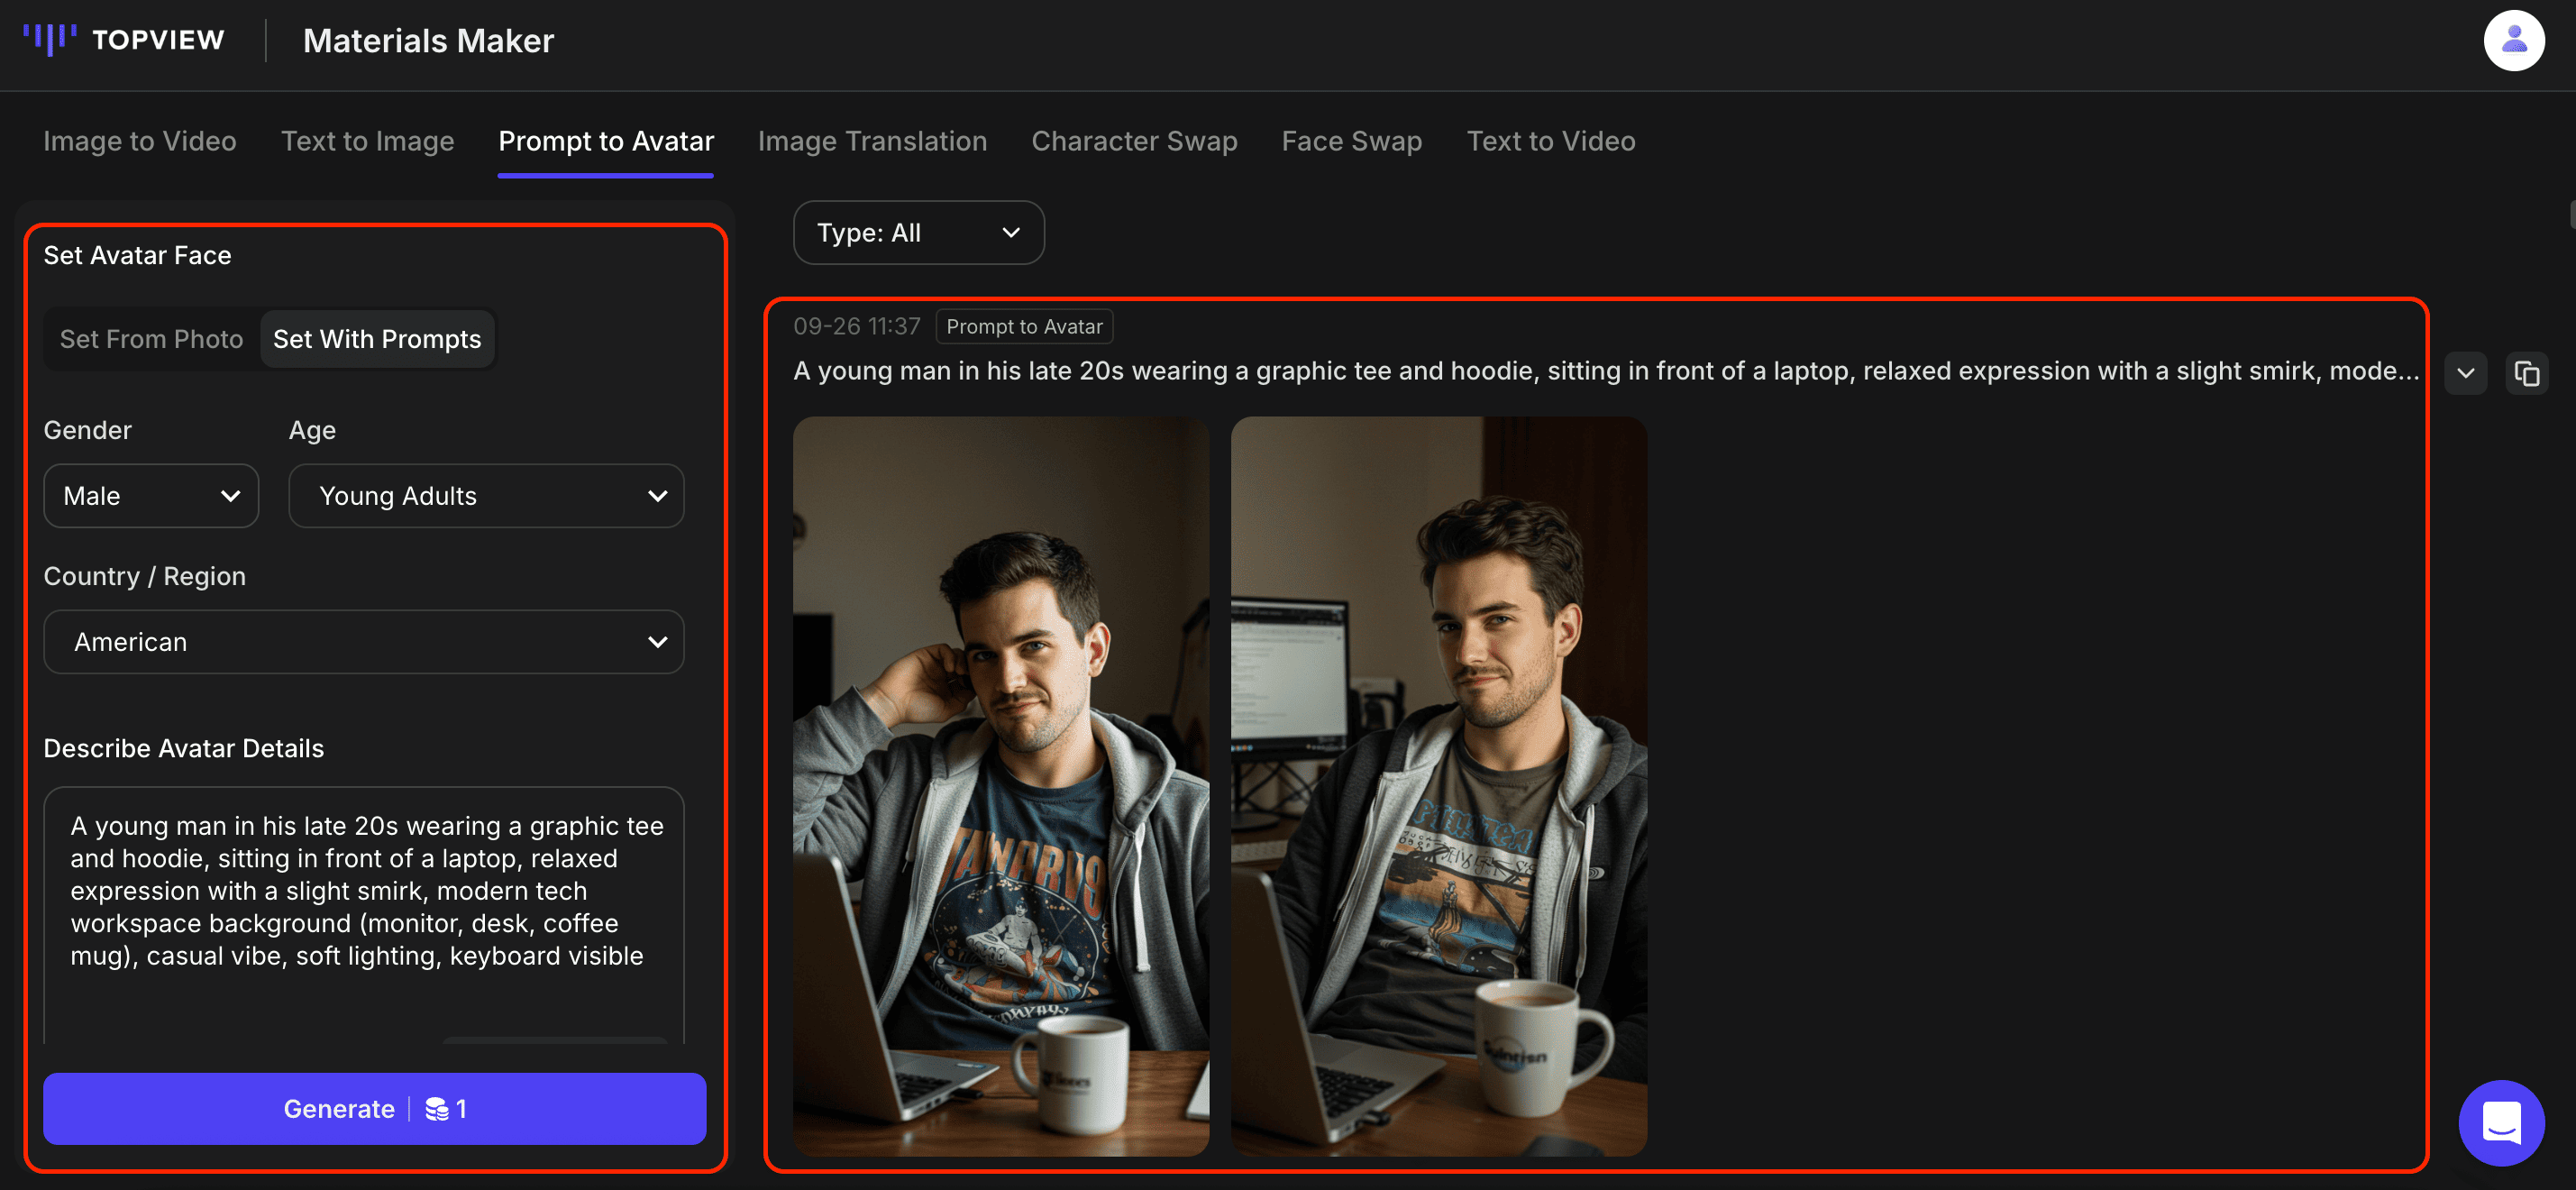
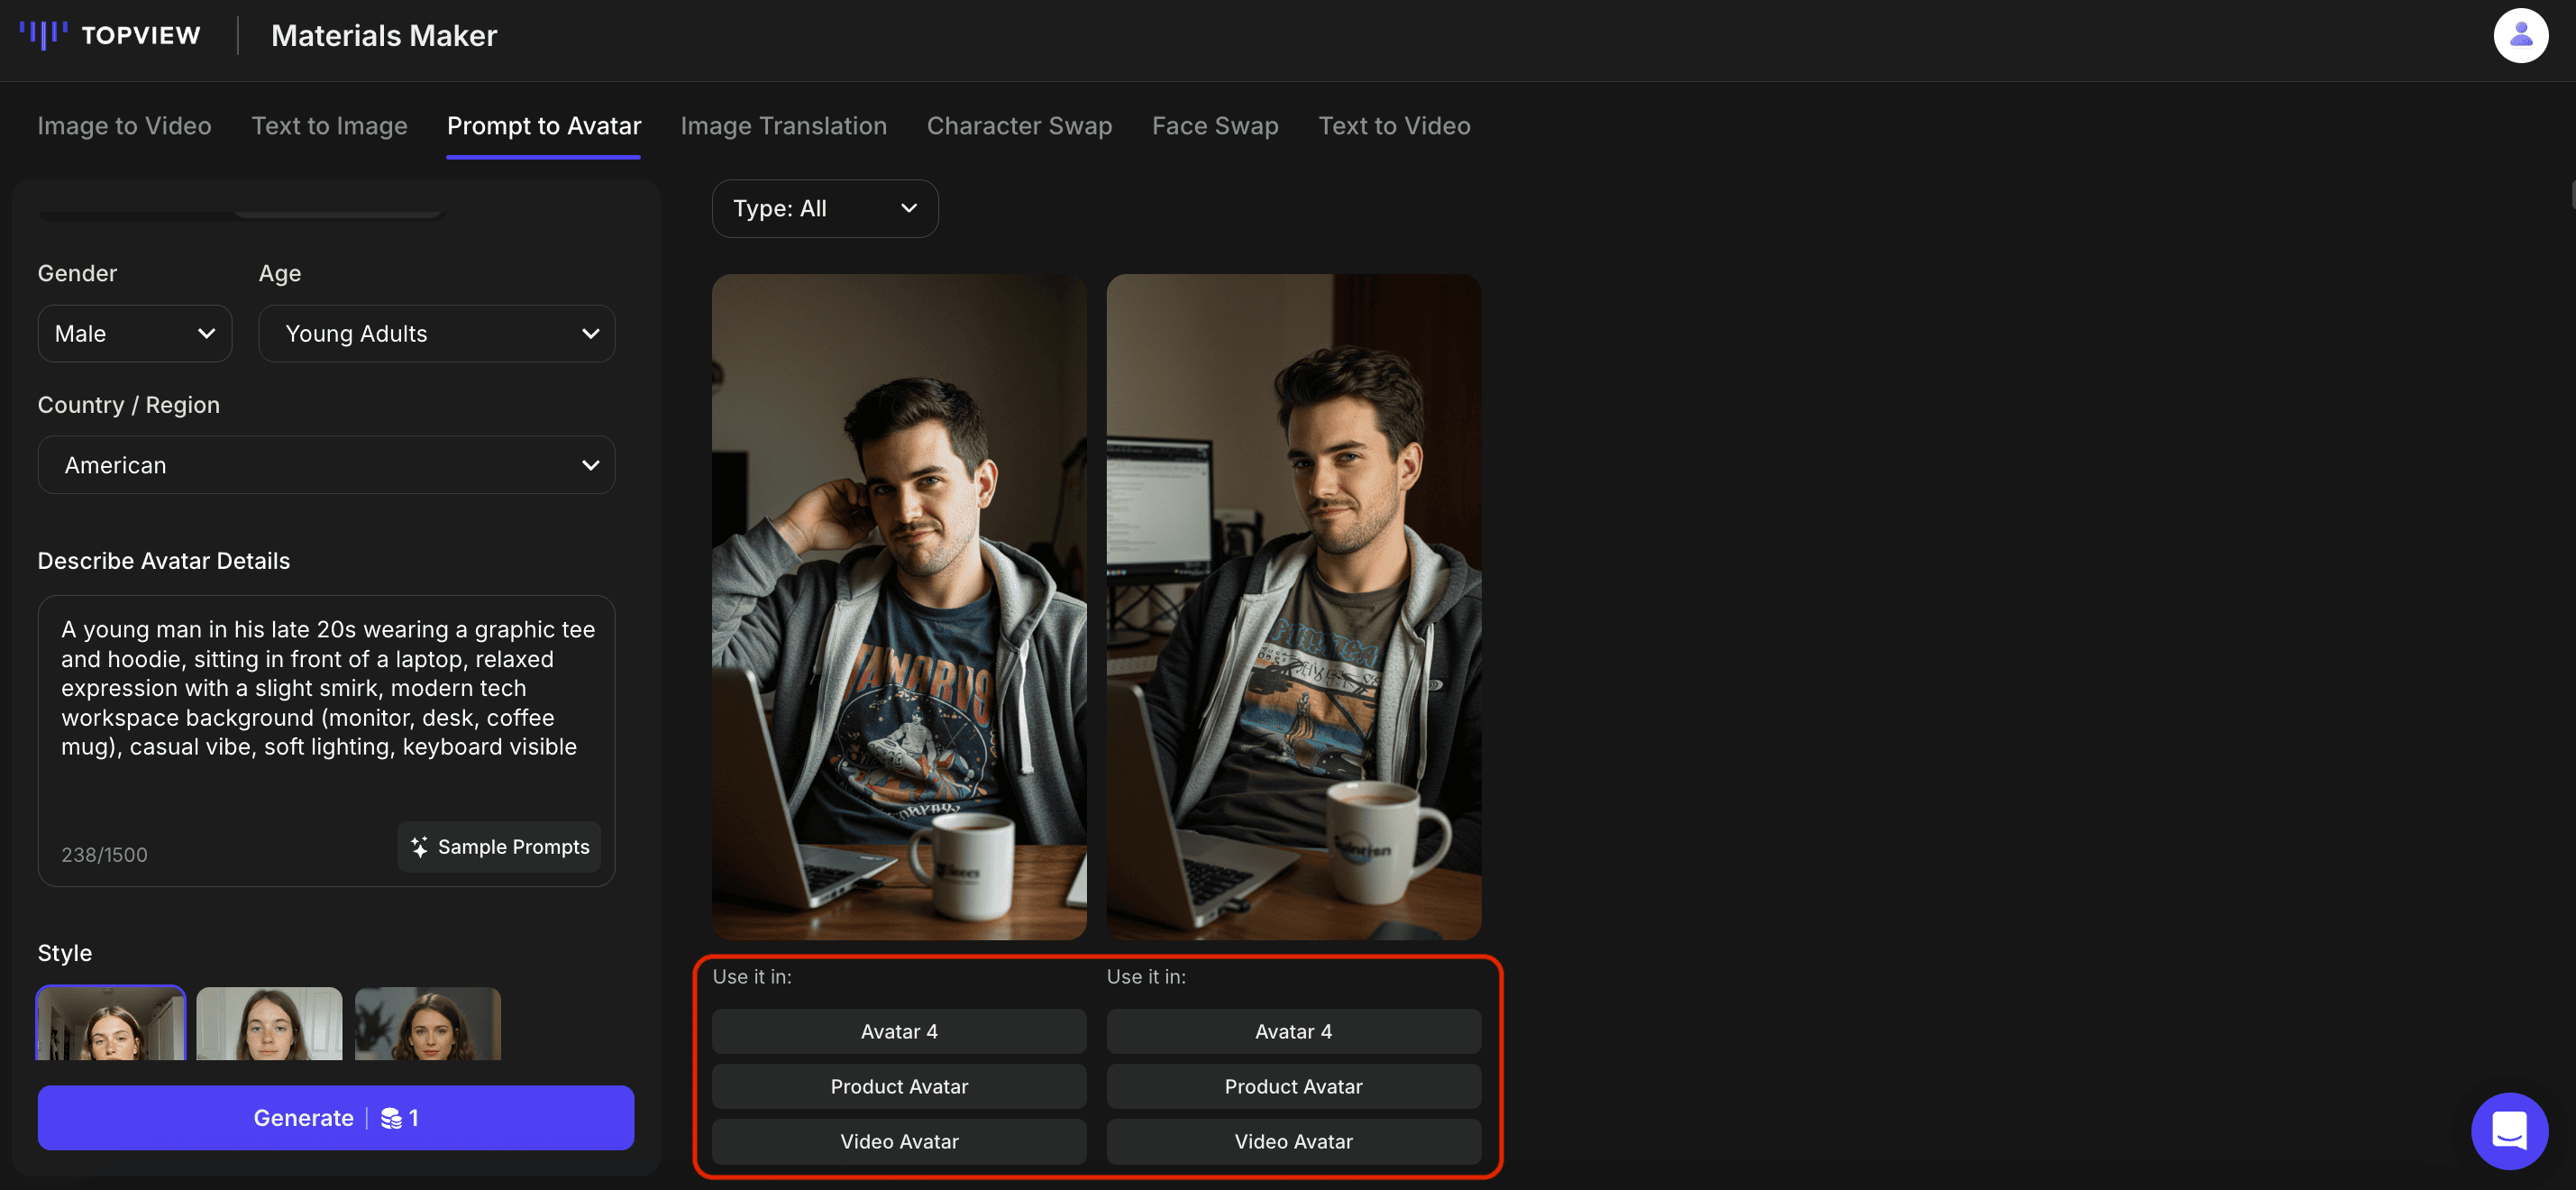
Set With Prompts
Describe your desired appearance using text prompts. The system will generate a brand-new digital human from scratch.
Best for: users wanting flexibility and variety.
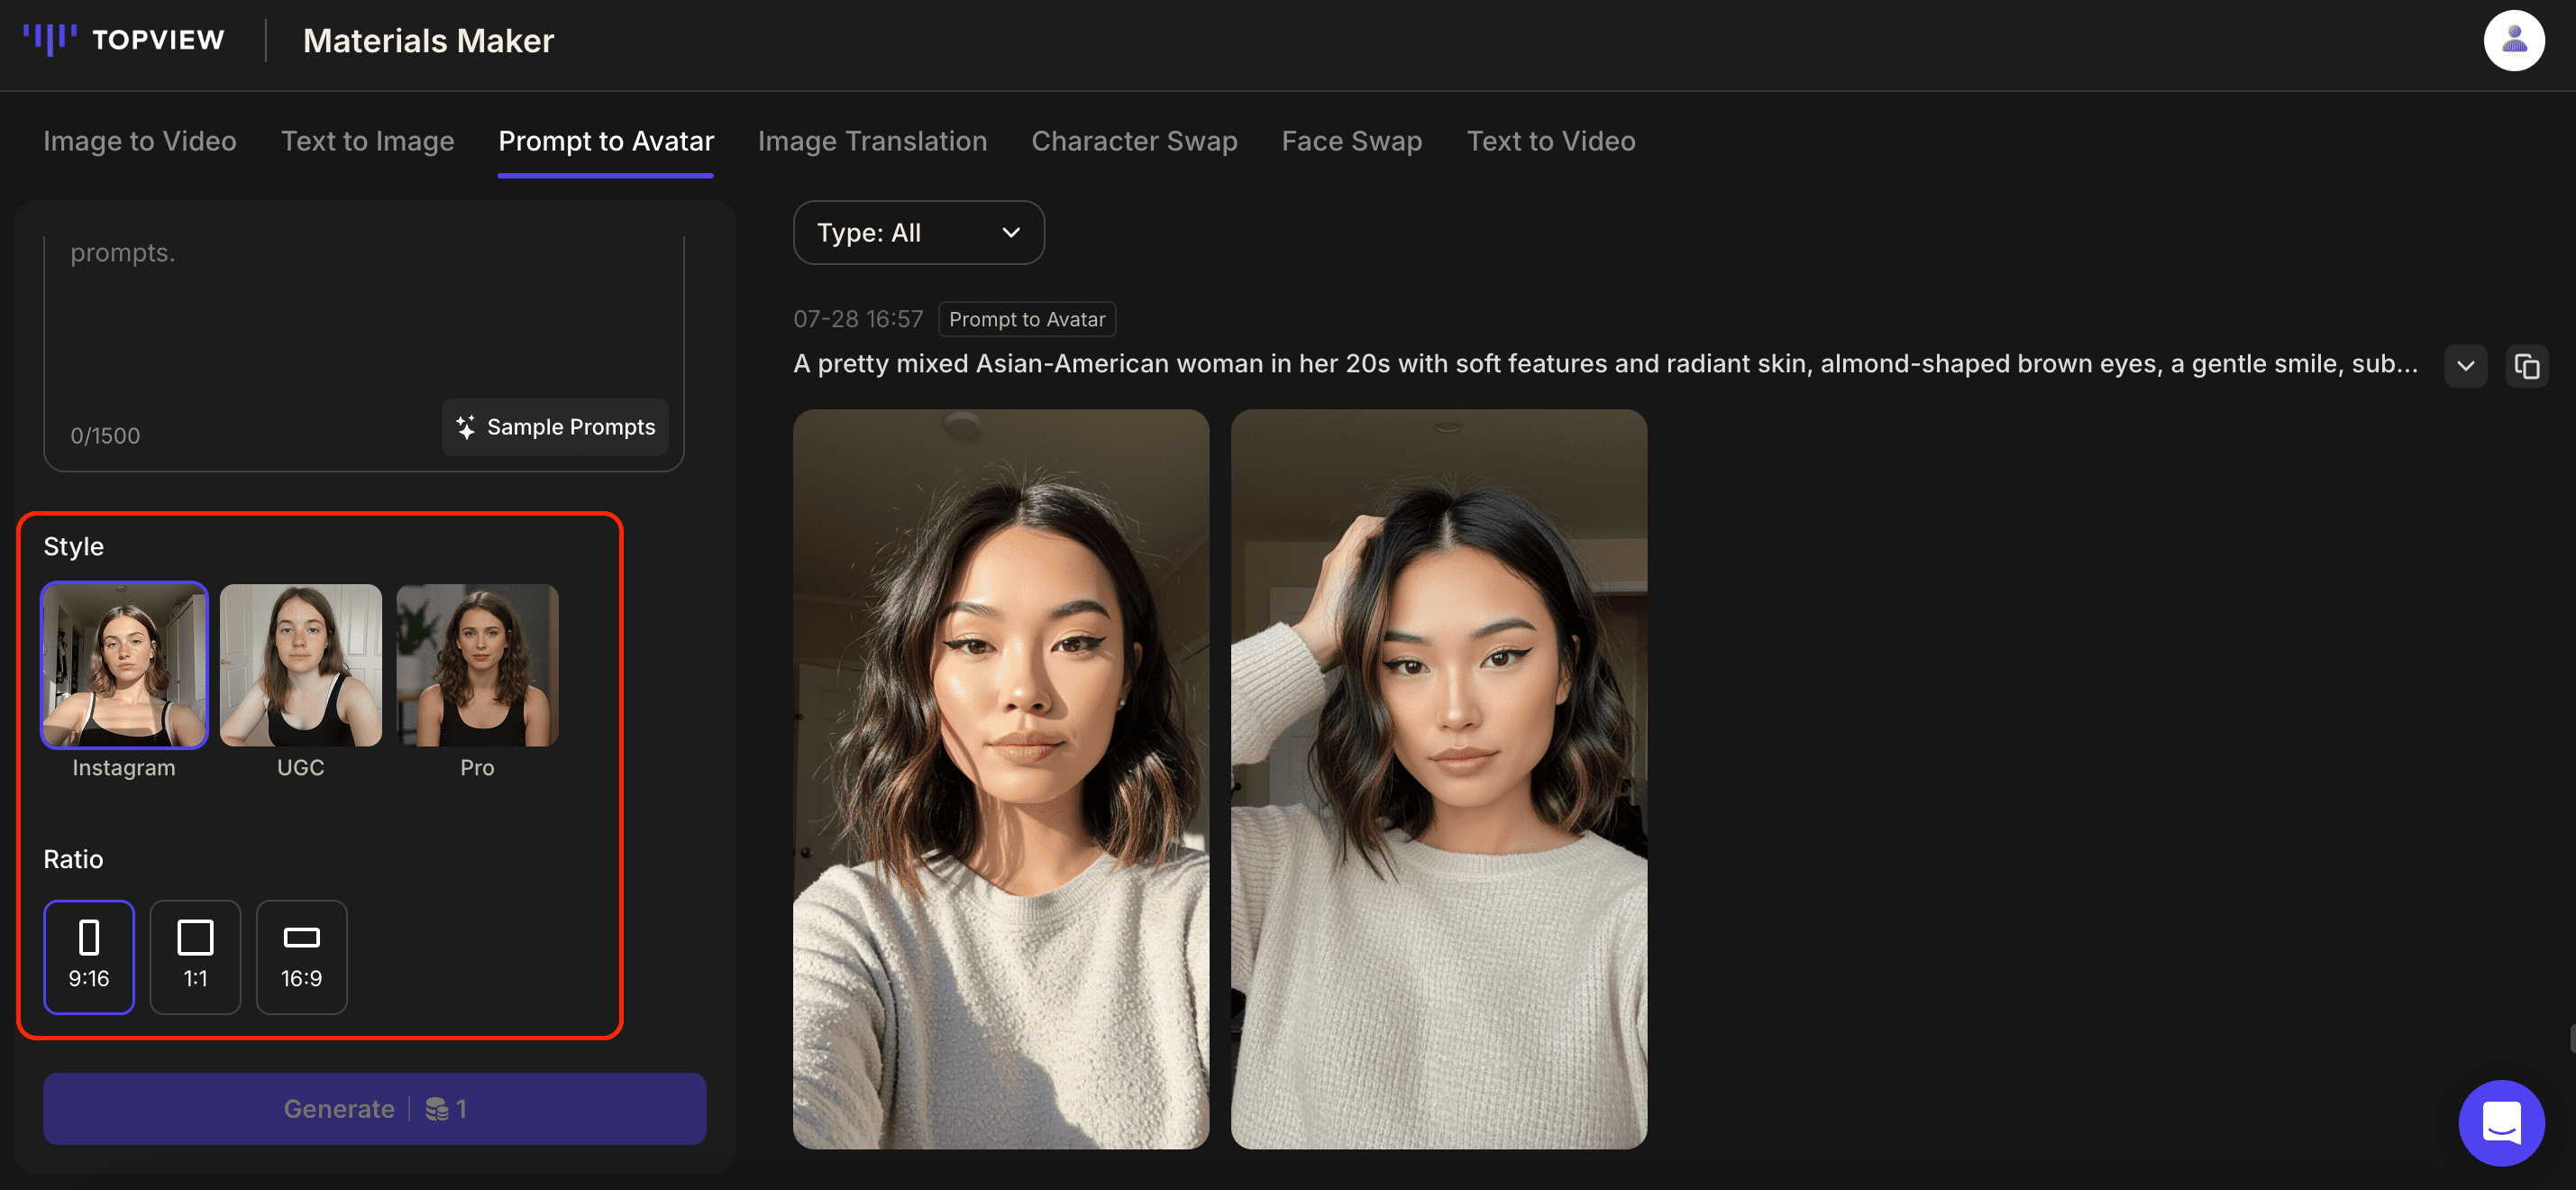
Step 2: Choose Style & Aspect Ratio
Select the style and aspect ratio for your avatar:
- INS Style: Polished, fashionable look
- UGC Style: Casual, natural feel
- Pro Style: Professional photography finish
- 9:16 -- TikTok, Reels, vertical
- 1:1 -- Square, profile pictures
- 16:9 -- YouTube, presentations
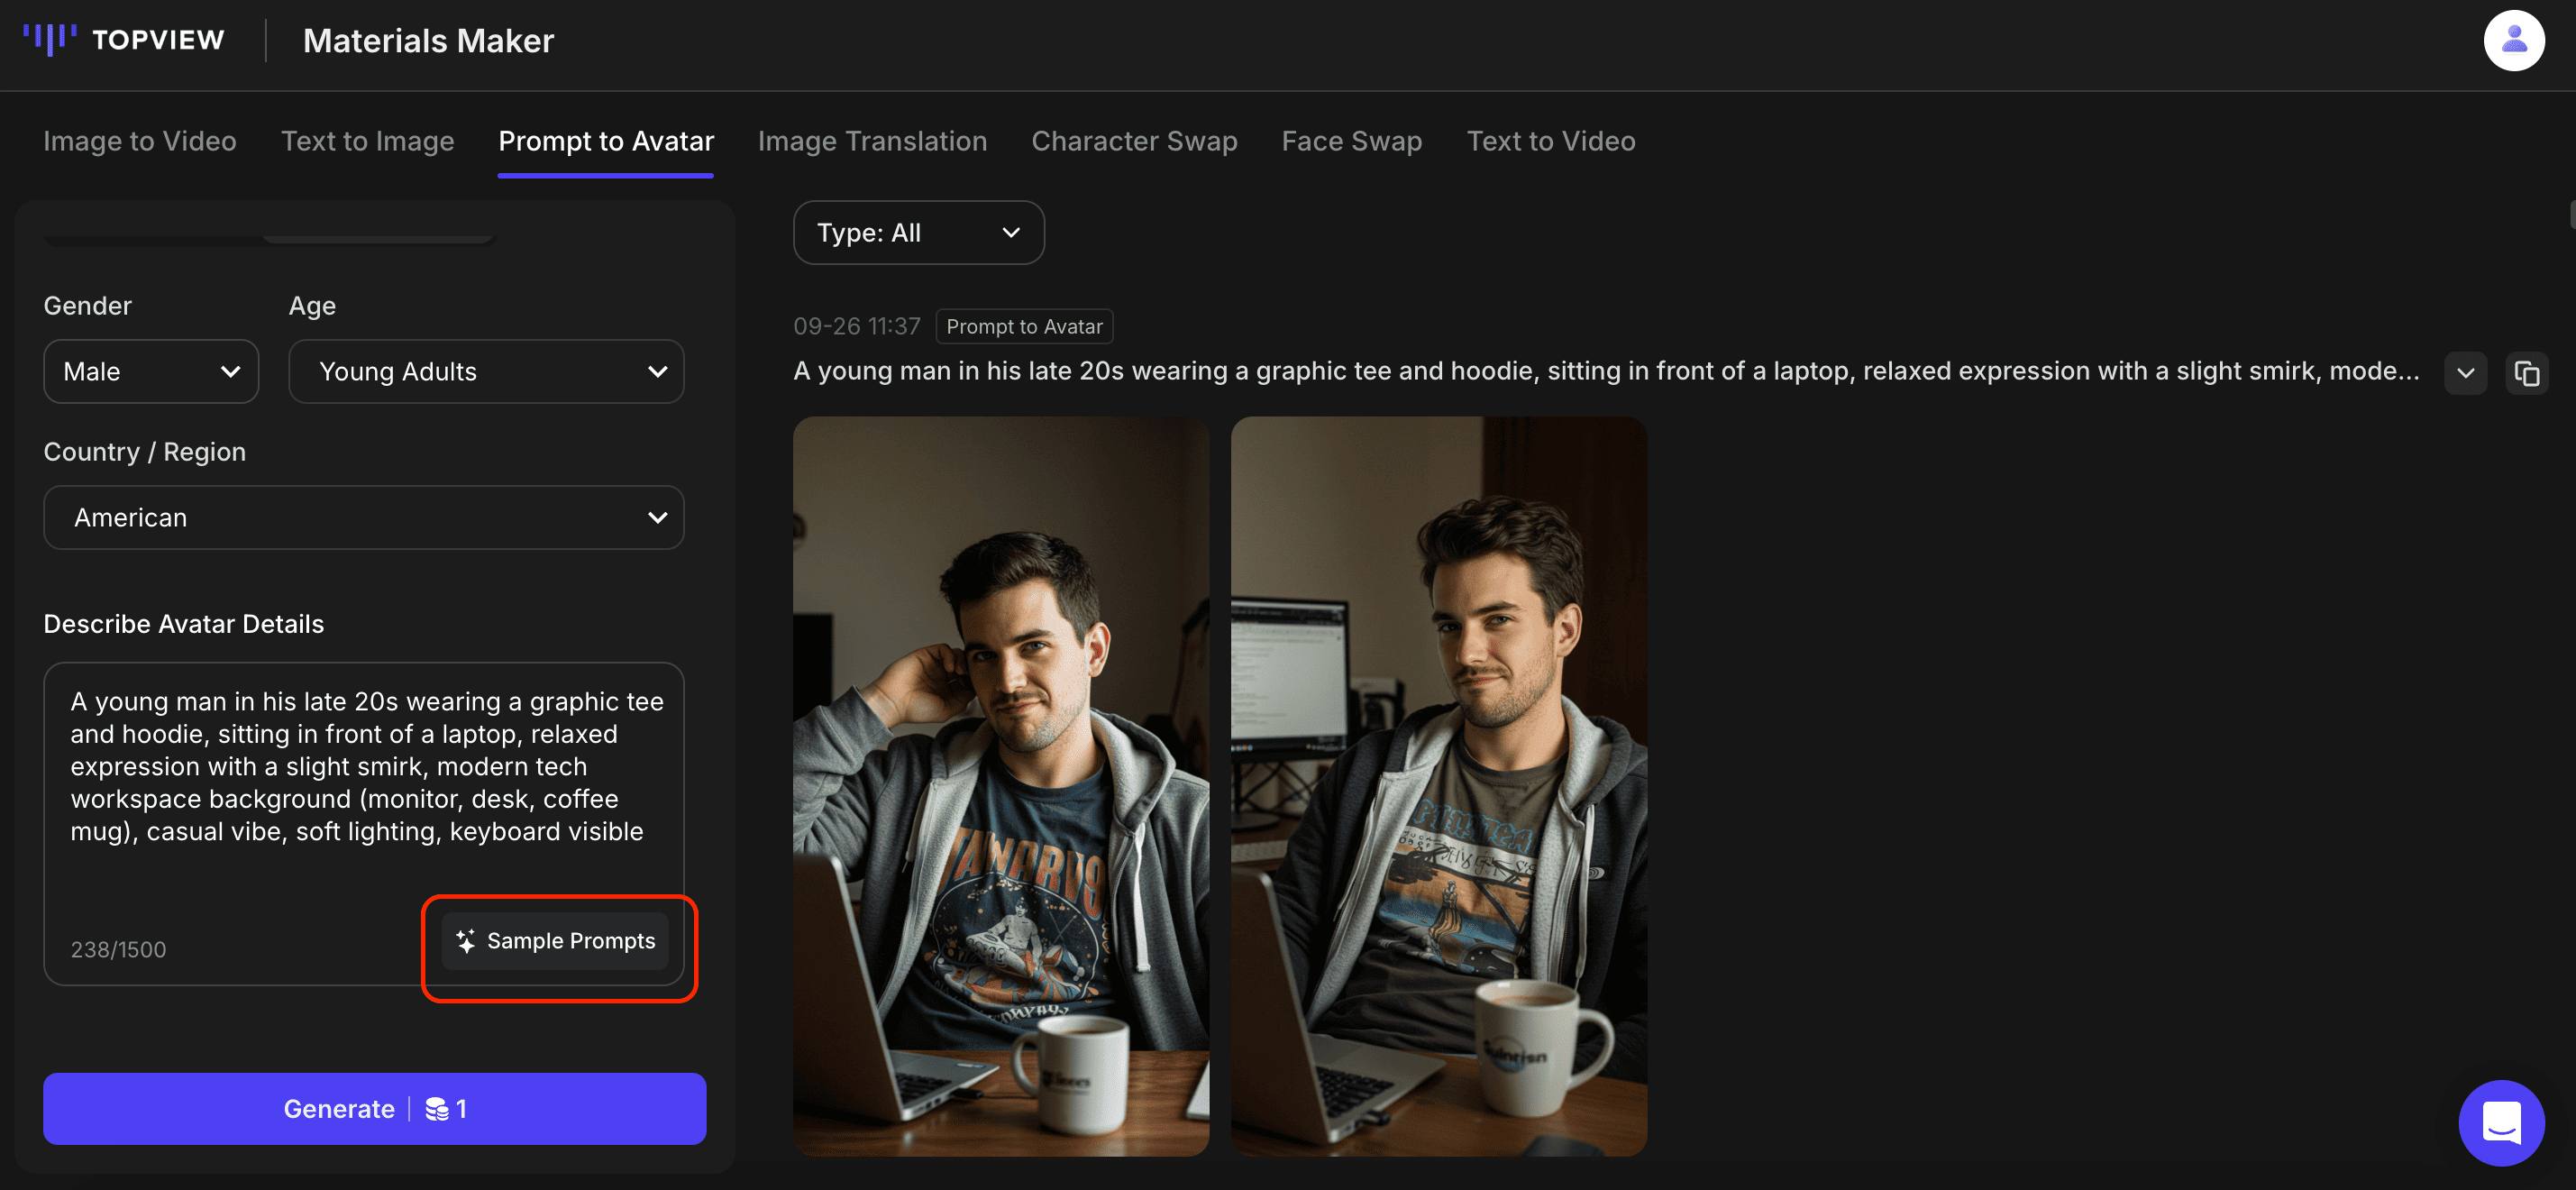
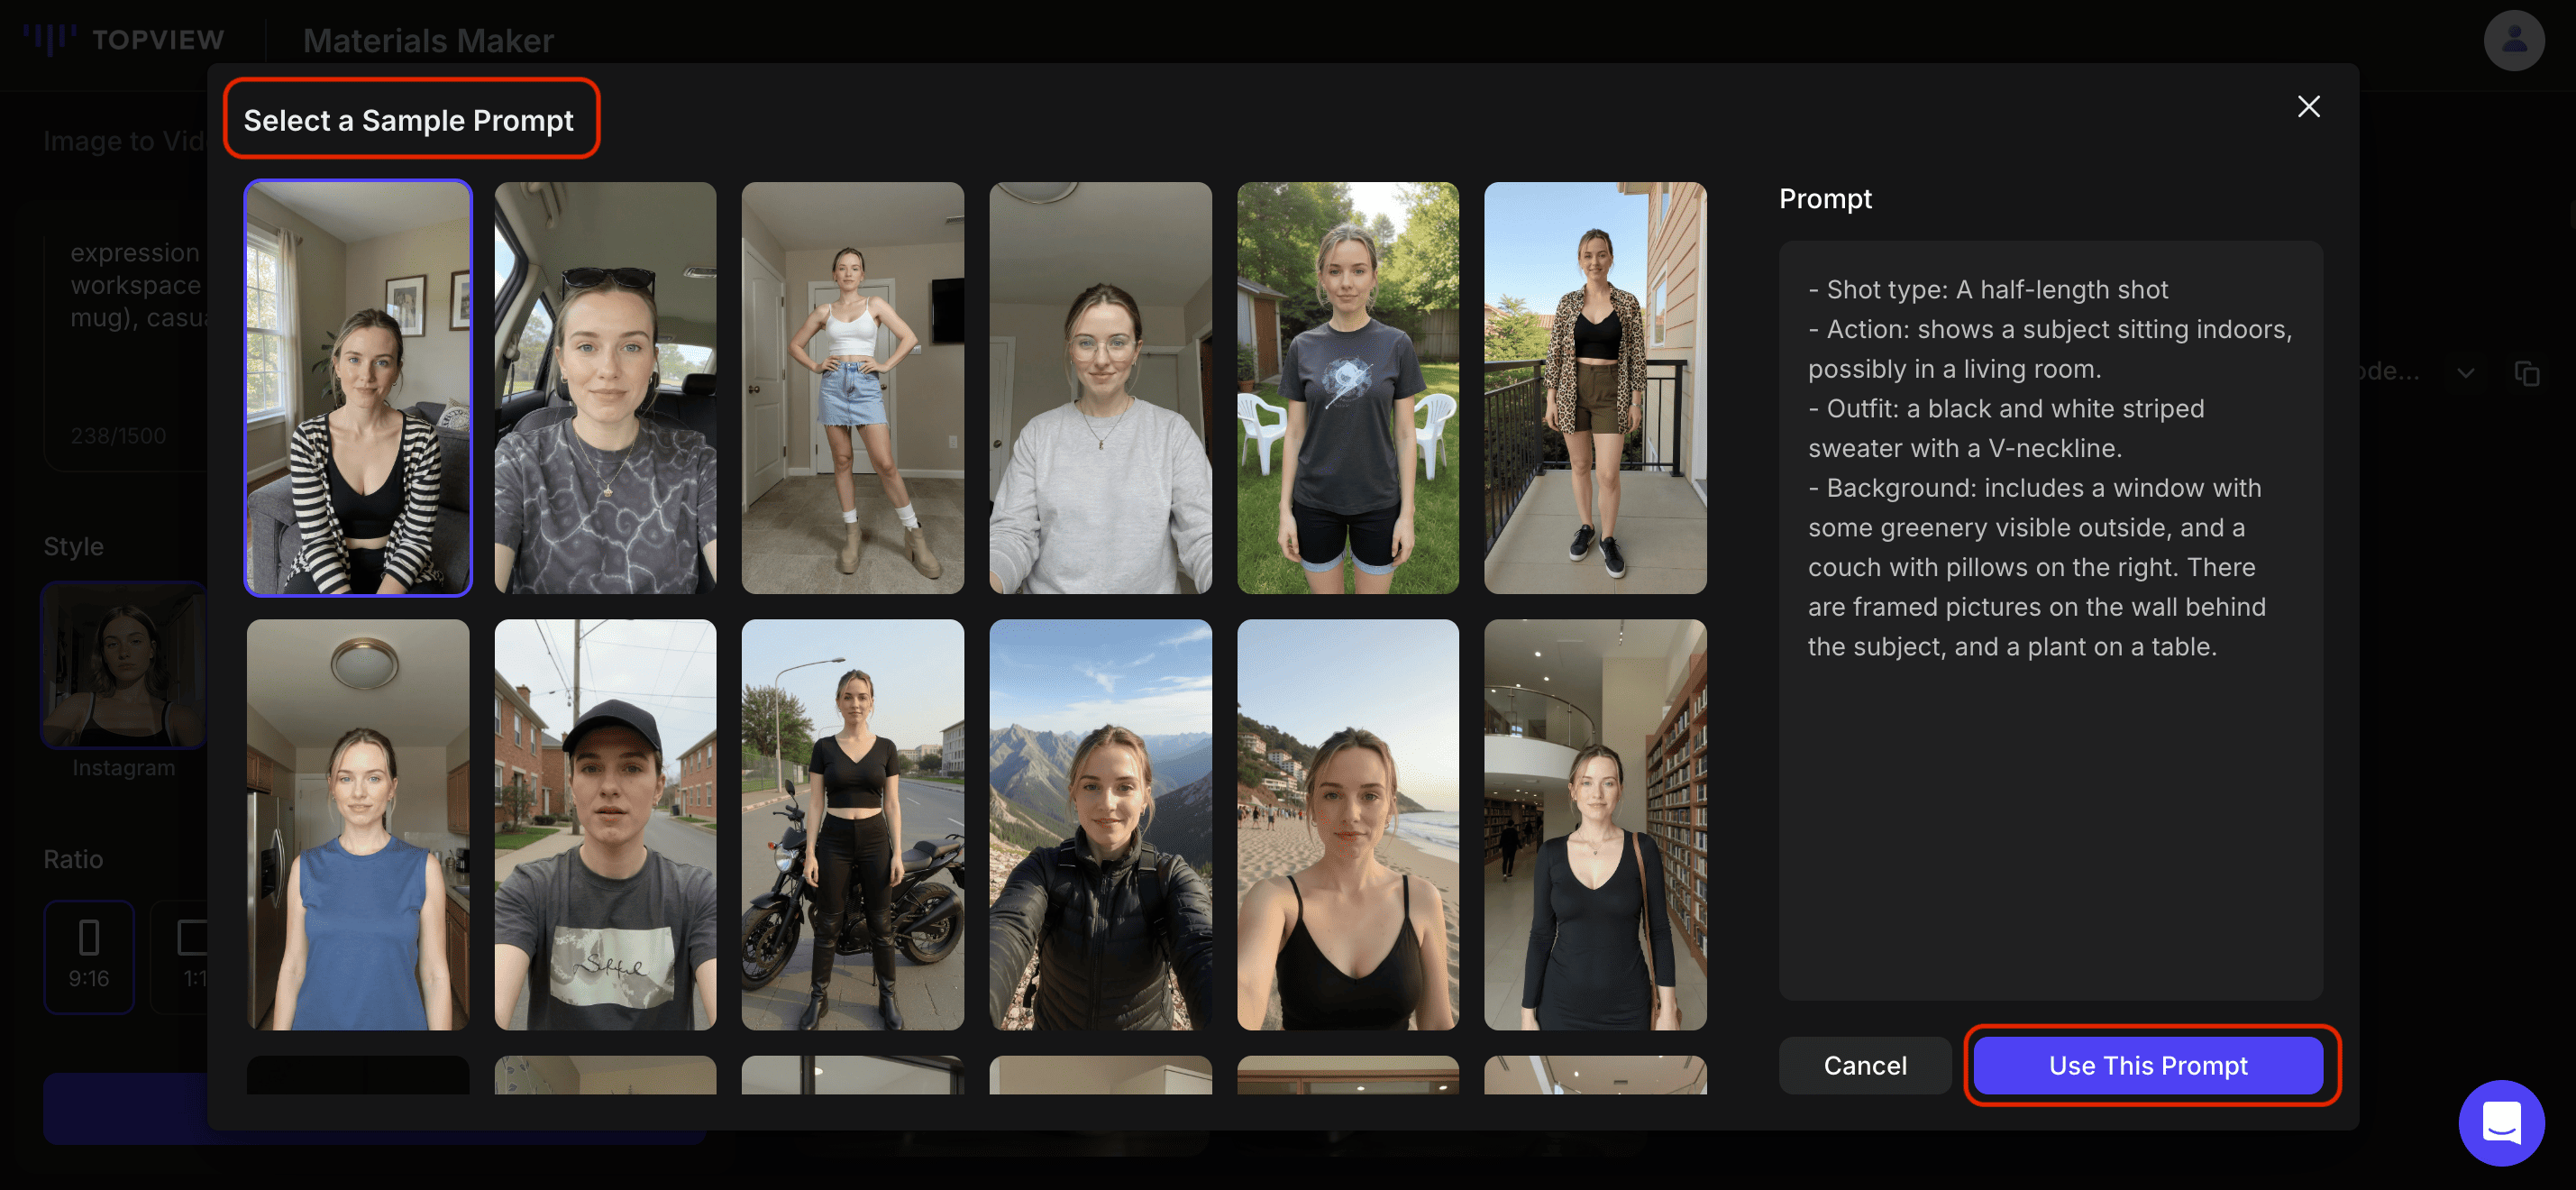
Step 3: Enter Prompt & Generate
Enter a prompt to generate your avatar. In Set from Photo mode, the face stays fixed — use prompts for hairstyle, clothing, and background. In Set With Prompts mode, write a detailed description of your ideal avatar.
Set from Photo Mode
Set with Prompts Mode
Step 4: Create Avatar Video
After your avatar image is generated, you can create a dynamic avatar video by choosing one of the following paths:
- Avatar 4: Go directly to the Avatar 4 page. Generate a talking avatar video by inserting a script and selecting an AI voice.
- Product Avatar: Go directly to the Product Avatar page with your chosen image to create an avatar that holds your product.
- Video Avatar: Choose your preferred avatar mode (Avatar 1 for classic workflow, or Avatar 4 for the latest model).
How to Write Great Prompts for AI Avatars
Creating effective prompts is the key to generating high-quality AI images. Follow these six steps to craft prompts that work:
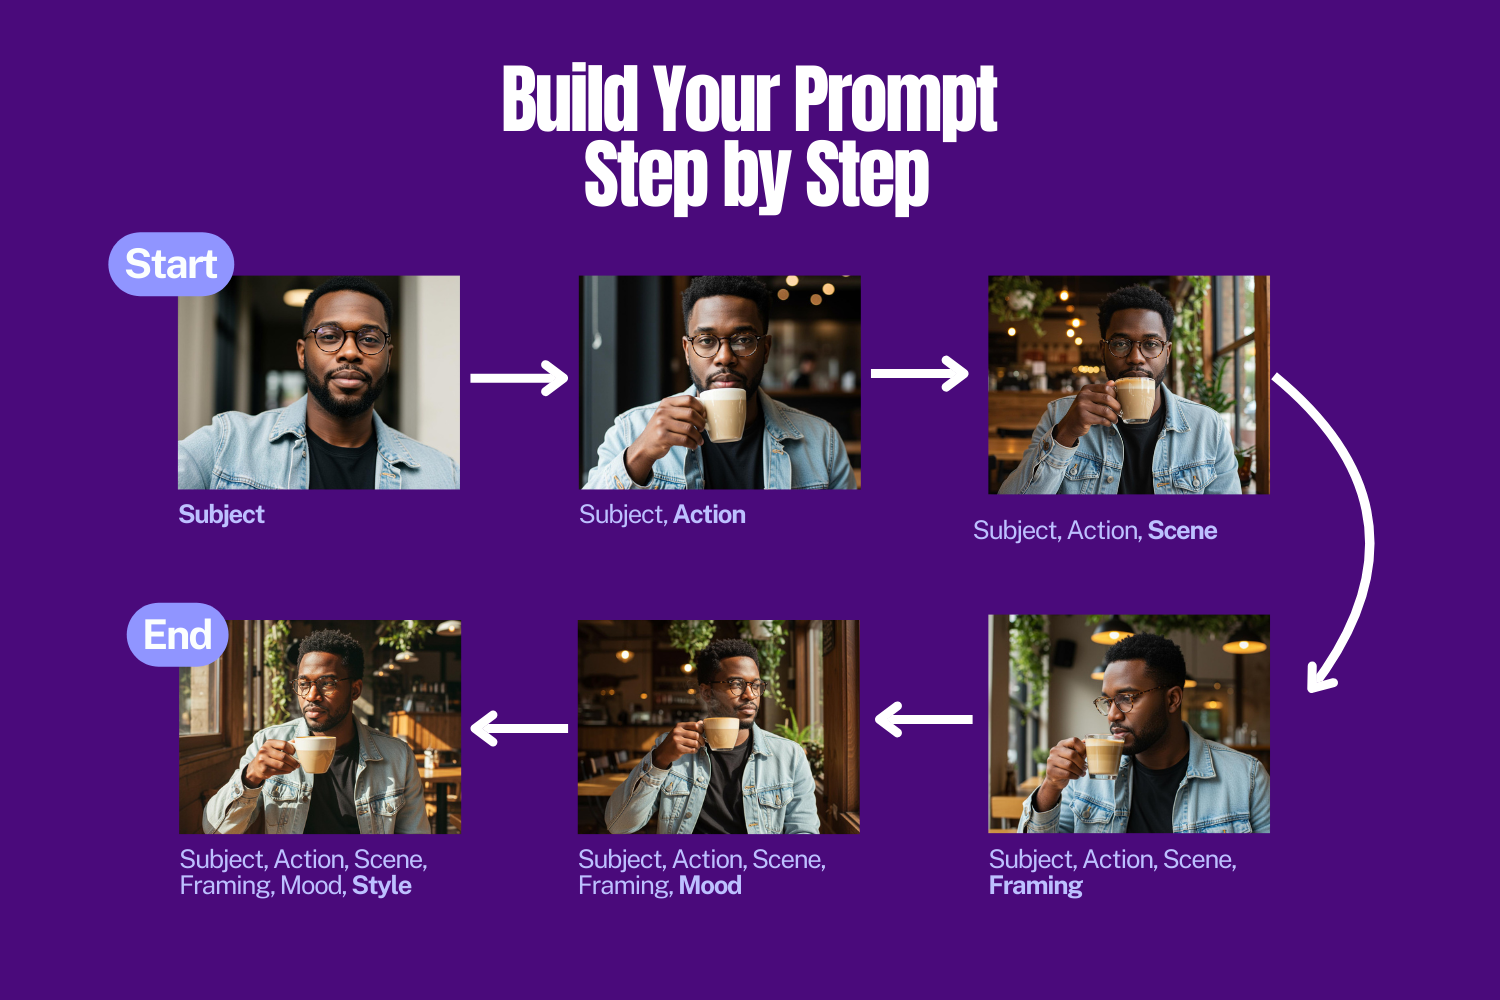
1. Subject — Define the Focus
Start with who or what the image is about: gender, age, clothing, accessories, facial expressions, and body posture.
"An African American man in his late 20s with short, neatly styled black hair, a trimmed beard, and soft facial features. He's sitting upright, relaxed, and wearing a light-washed denim jacket over a black t-shirt, paired with round tortoiseshell glasses."

2. Action — Describe What's Happening
Keep it short and clear: movements, gestures, expressions, product interaction.
"...He is sipping a latte with his right hand."

3. Scene — Set the Environment
Add context: indoor/outdoor, furniture, props, style of space, time of day.
"...He is seated at a window-side table inside a small, rustic cafe with warm wooden furniture, soft yellow lighting, and green hanging plants above."

4. Framing — Add Cinematic Flair
Camera angle (close-up, wide shot, eye level) and camera movement (pan, zoom, tracking).
"...The camera uses an eye-level medium shot focused on the man's profile."

5. Mood — Set the Emotional Tone
Define atmosphere and lighting: warm morning light, soft shadows, moody, cozy, luxurious.
"...The soft golden afternoon sunlight casts warm shadows across the table and highlights the steam rising from the coffee. The mood is calm, introspective, and cozy."

6. Style — Choose the Visual Look
Decide the final look: photorealistic, cinematic, minimalist, 3D Pixar-style, 4K, soft focus, shallow depth of field.
"...Cinematic, photorealistic style with shallow depth of field in 4K resolution."

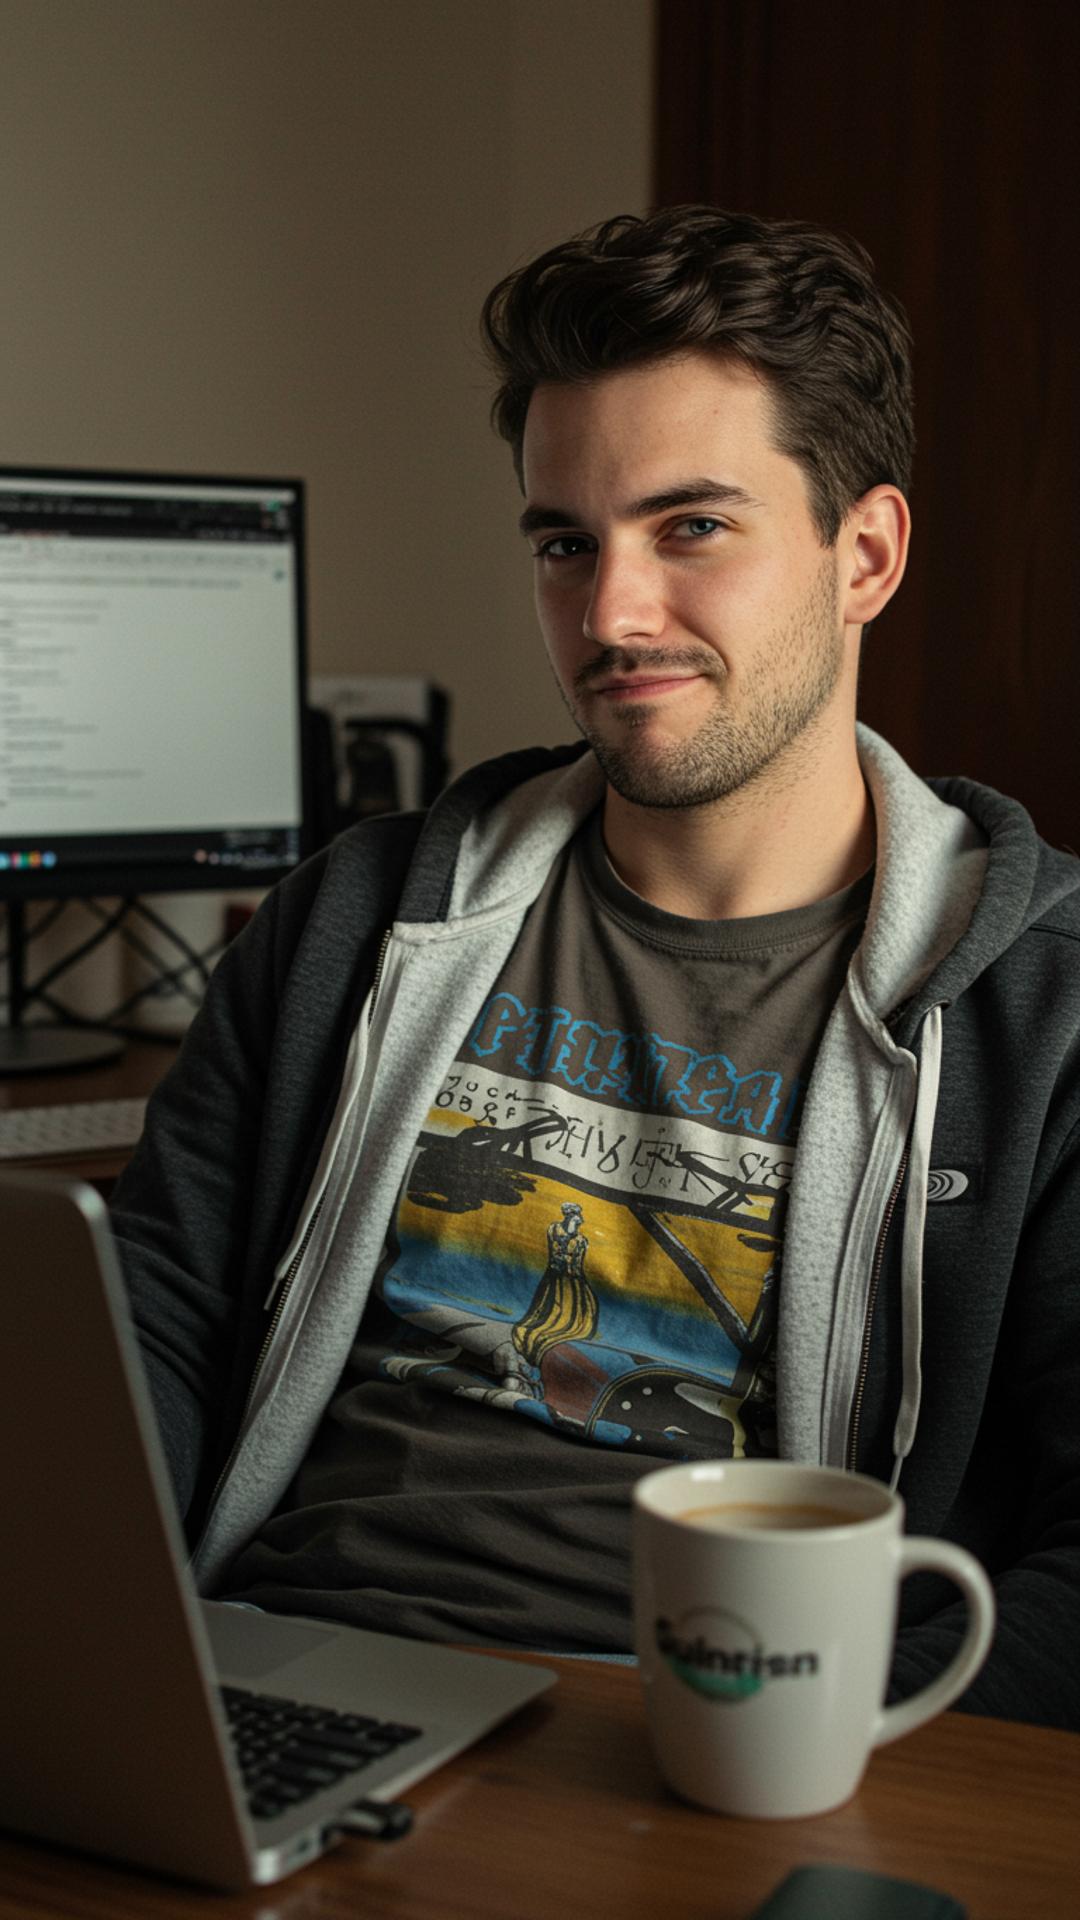
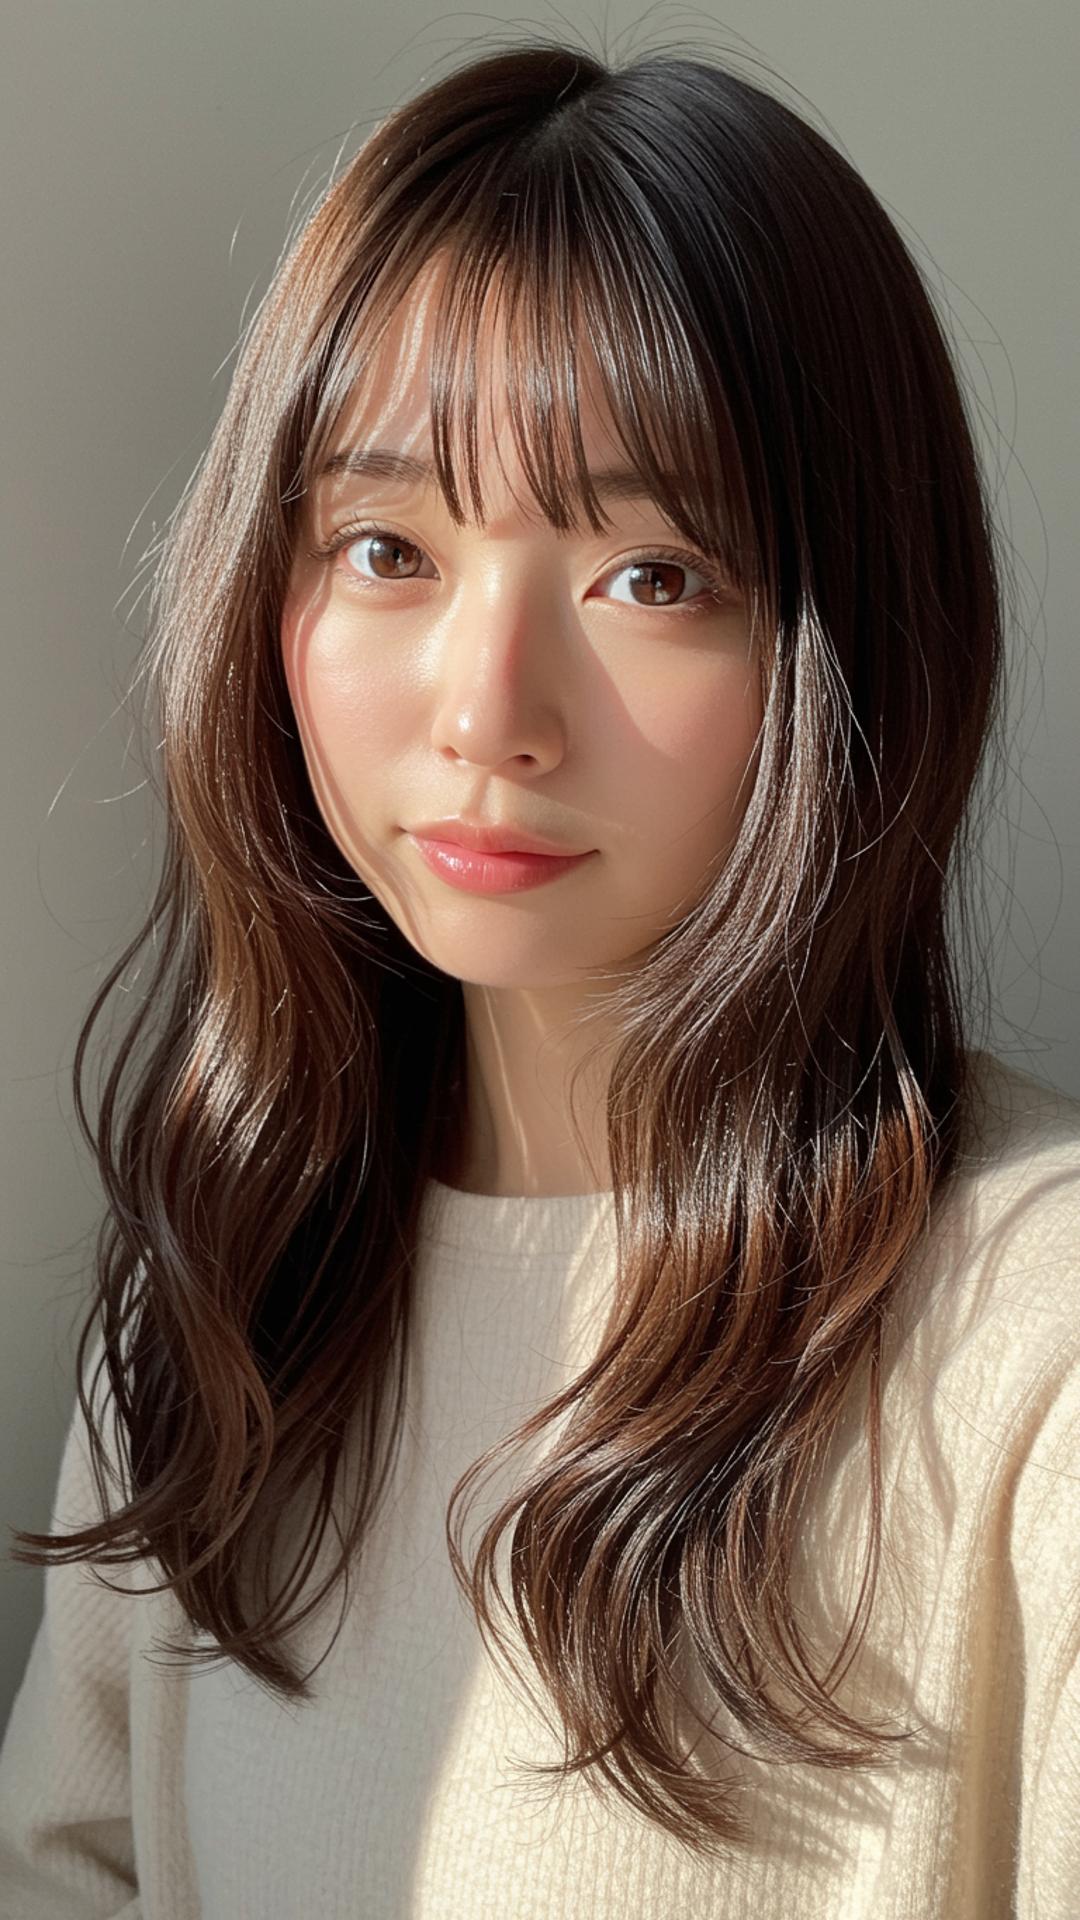
Sample Avatar Images