Topview Official Guide: AI Video
Official Guide
AI Video: The Complete Video Creation Suite
Generate, edit, upscale, and transform videos with Topview's full suite of AI-powered video tools.
Tools Overview
Turn a static image into a dynamic video clip.
Generate videos directly from text prompts.
Use reference images/videos to guide generation.
Replace characters while keeping body language intact.
Enhance video resolution with AI.
Apply reference motion to character images.
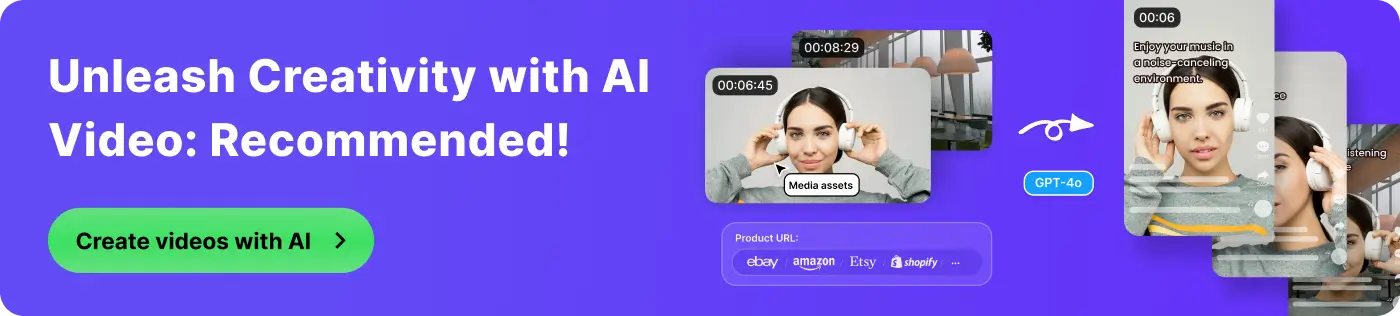
Turn product URLs into marketing videos automatically.
Image to Video
Step 1: Choose a Video Model
Enter the function, which lists a series of the latest popular video models to choose from. Different models support different video durations.
Step 2: Upload, Prompt & Generate
After selecting a model, upload an image, input a prompt to guide the video content, set the video duration, then click "Generate" to obtain the video.

Text to Video
Select the video model, input the prompt for the video, select the video duration, then click "Generate" to obtain the video.
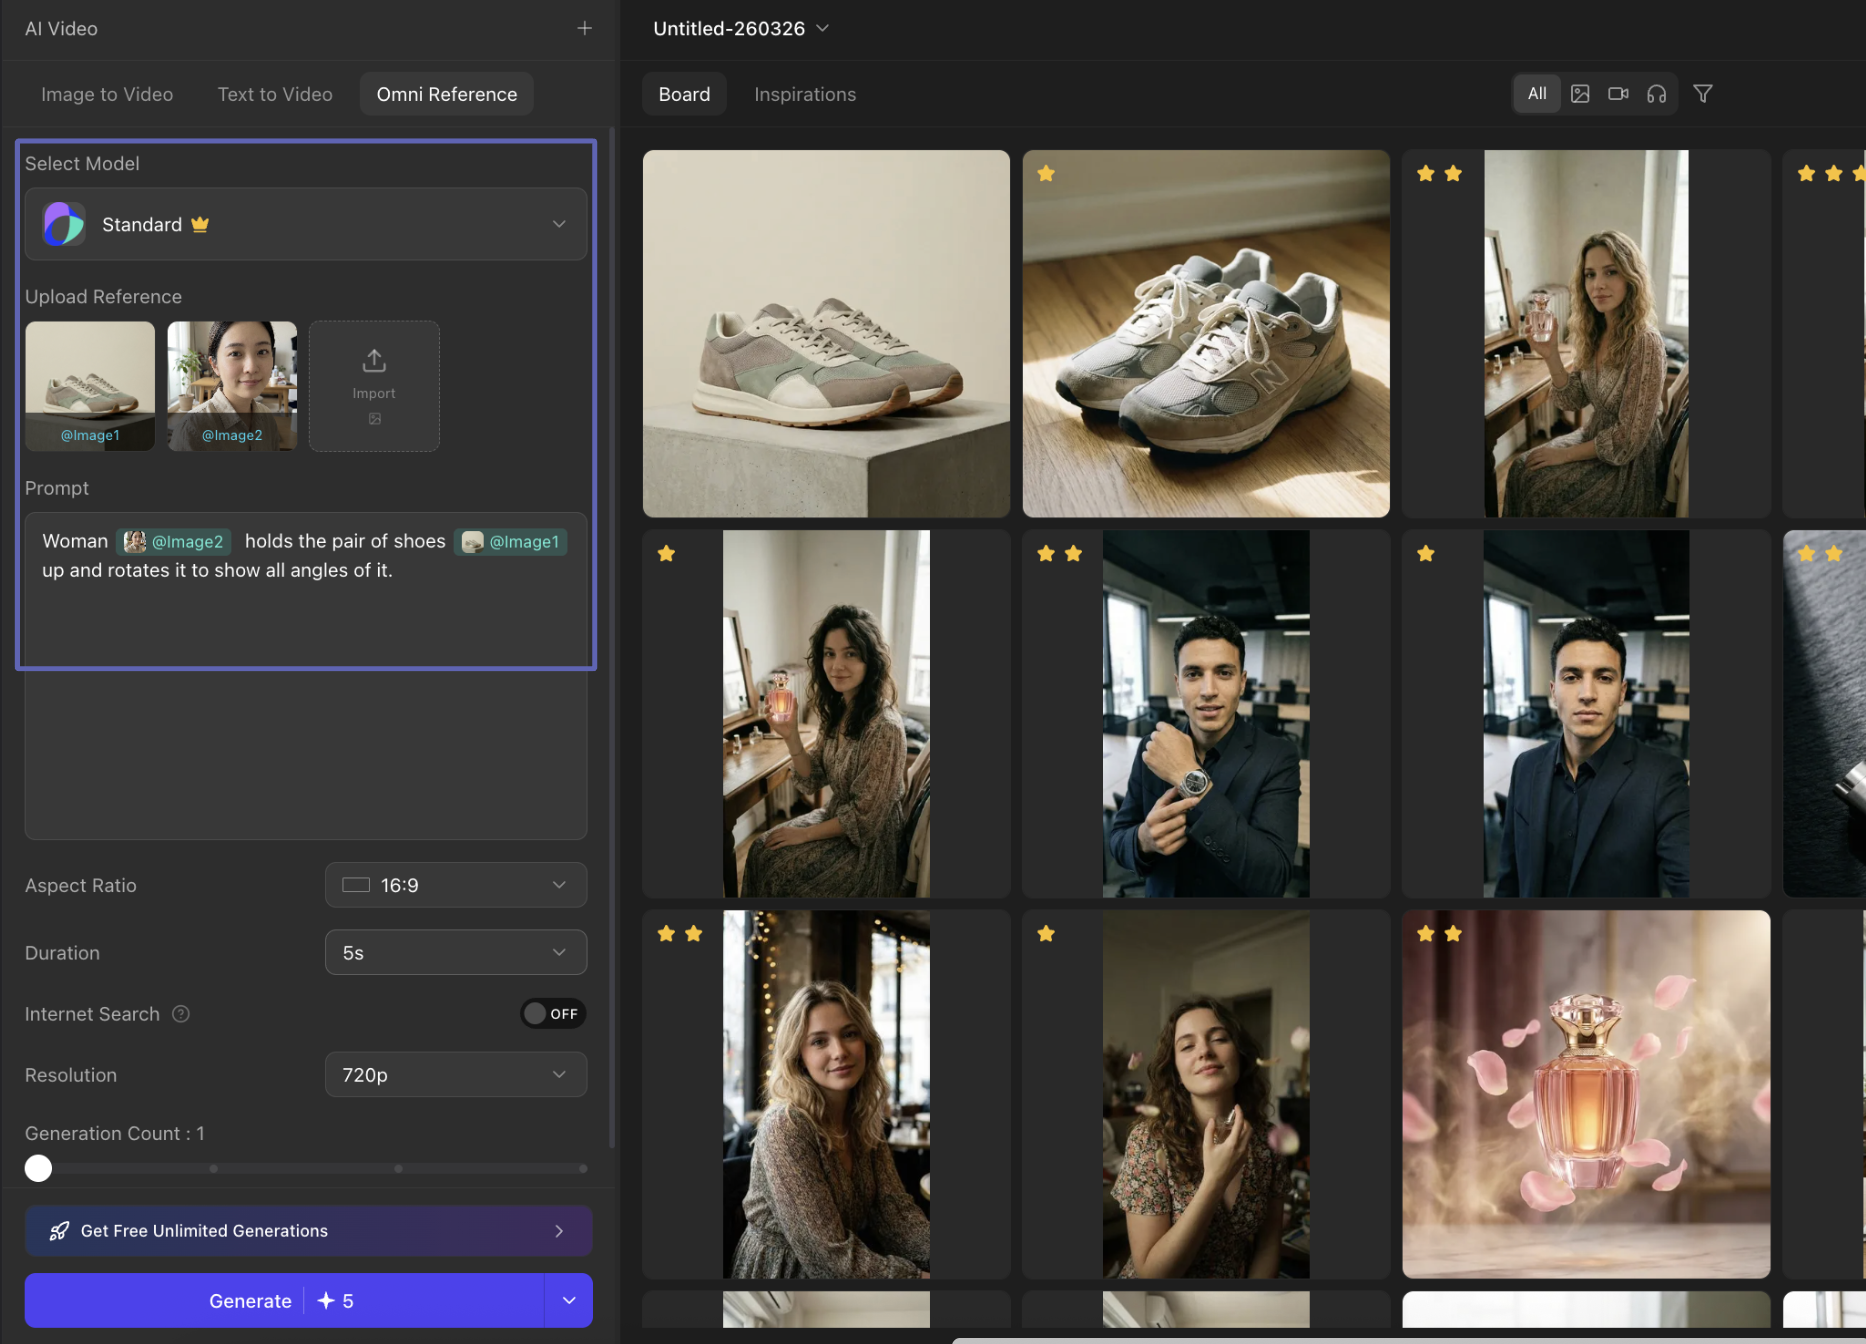
Omni Reference
Step 1: Upload References
Select the video model and upload reference images or videos.
Step 2: Write Prompt with References
Input the prompt for the video. Type "@" to reference the files you have uploaded directly within the prompt.
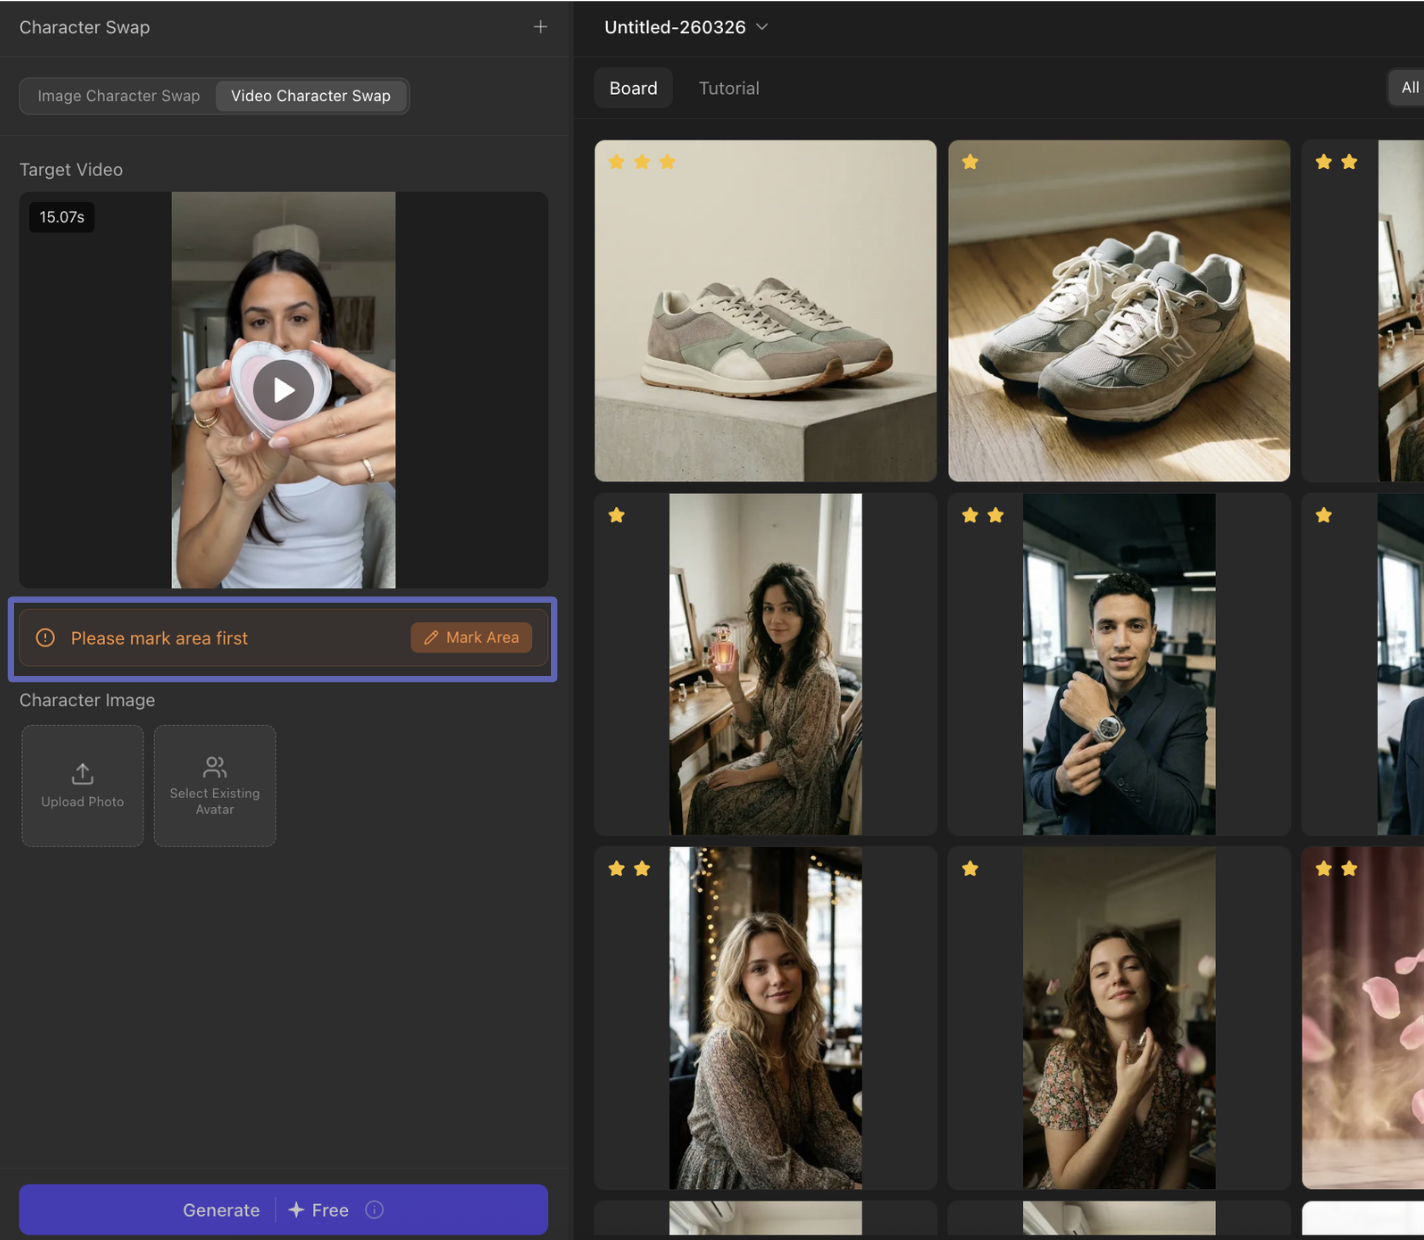
Video Character Swap
This feature can replace the character in the video while retaining all the body language and facial expressions of the original video's character, while simultaneously keeping the product in their hand unchanged.
Step 1: Upload Target Video
Upload your target video. For best results, it is recommended to use a video with preferably no subtitles, and avoid one with too many shot sequences.
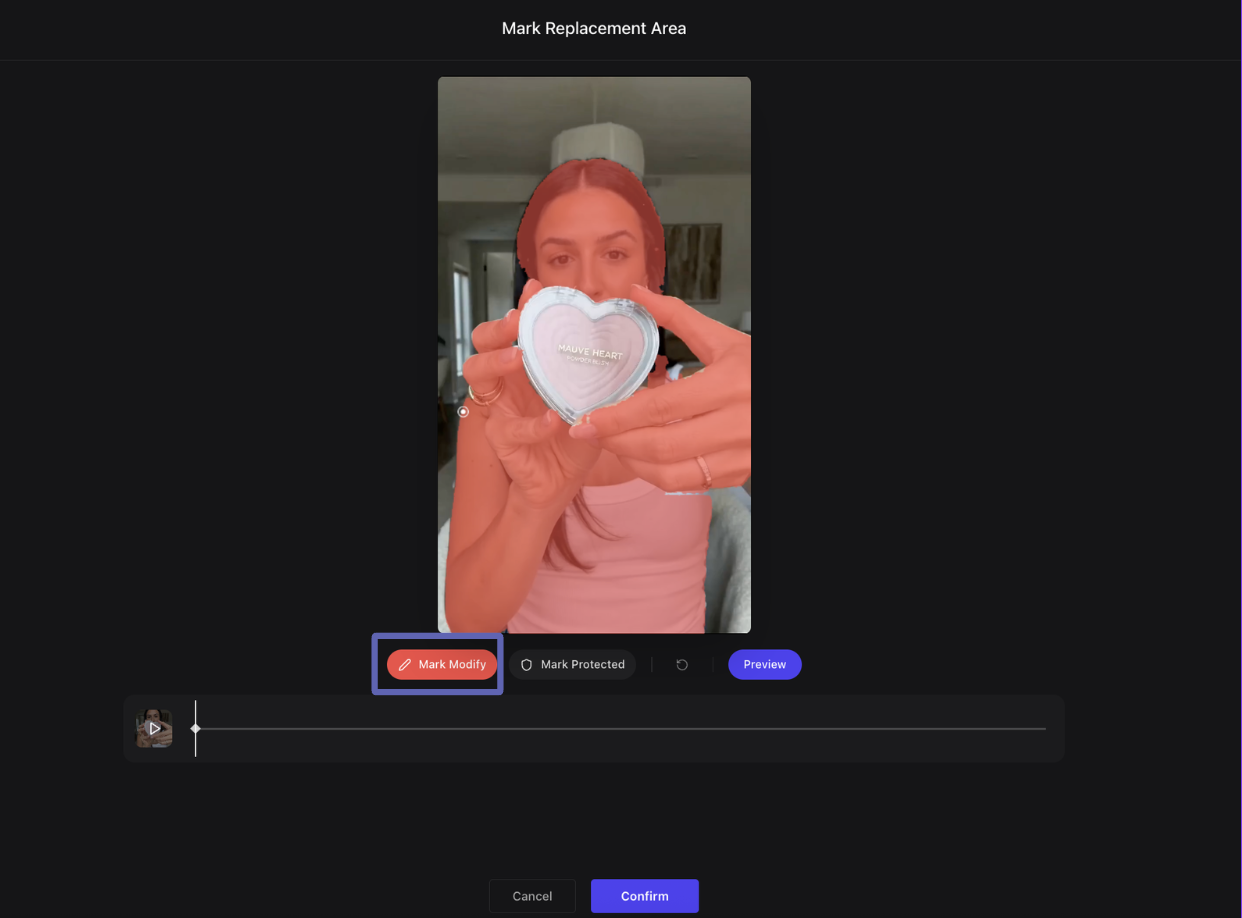
Step 2: Mark Modify Area
Draw a replacement template. Click on the character area to be replaced to create a replacement template (red).
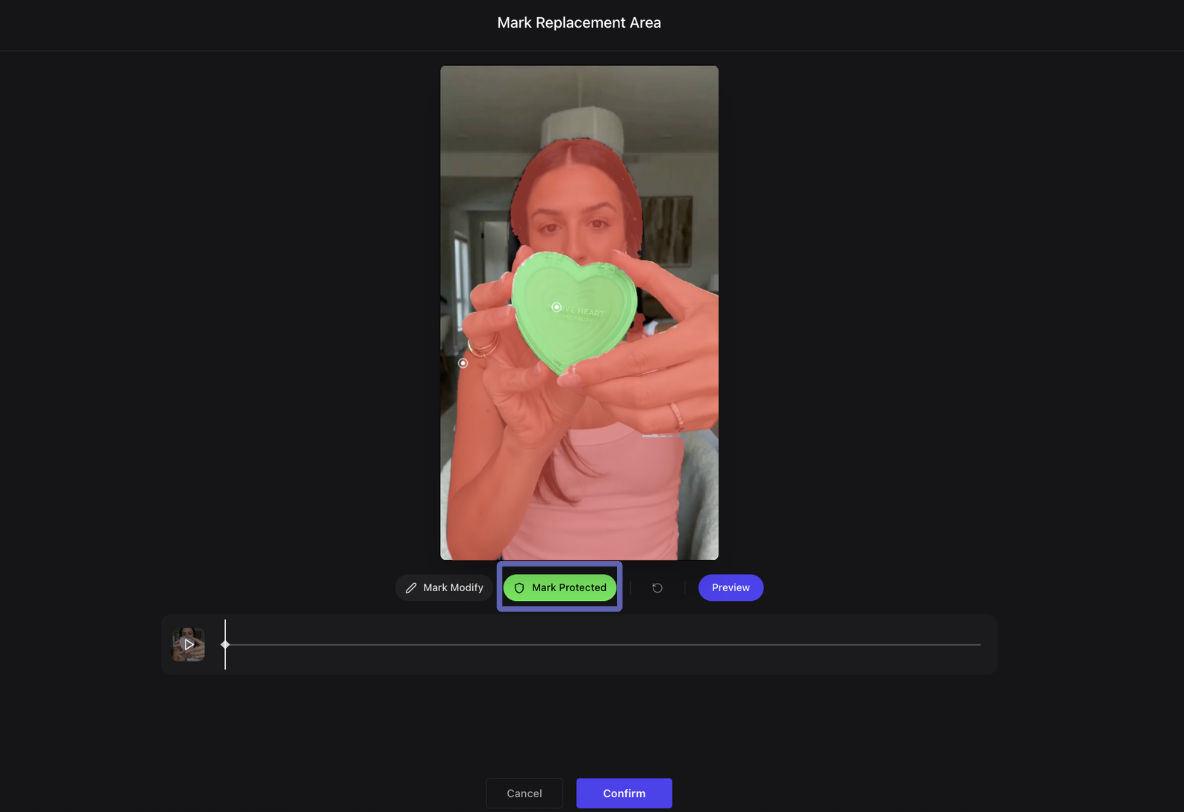
Step 3: Mark Protected Area
Draw a product protection template. Click on the product area to create a protection template (green).
Step 4: Preview & Adjust
Select "Preview Full Selected Area" and check if the product remains covered by the template. If there is an error, pause the video and redraw the template in that shot. Click the preview button again after adjustment — the AI will automatically adjust the template for the remaining shots.
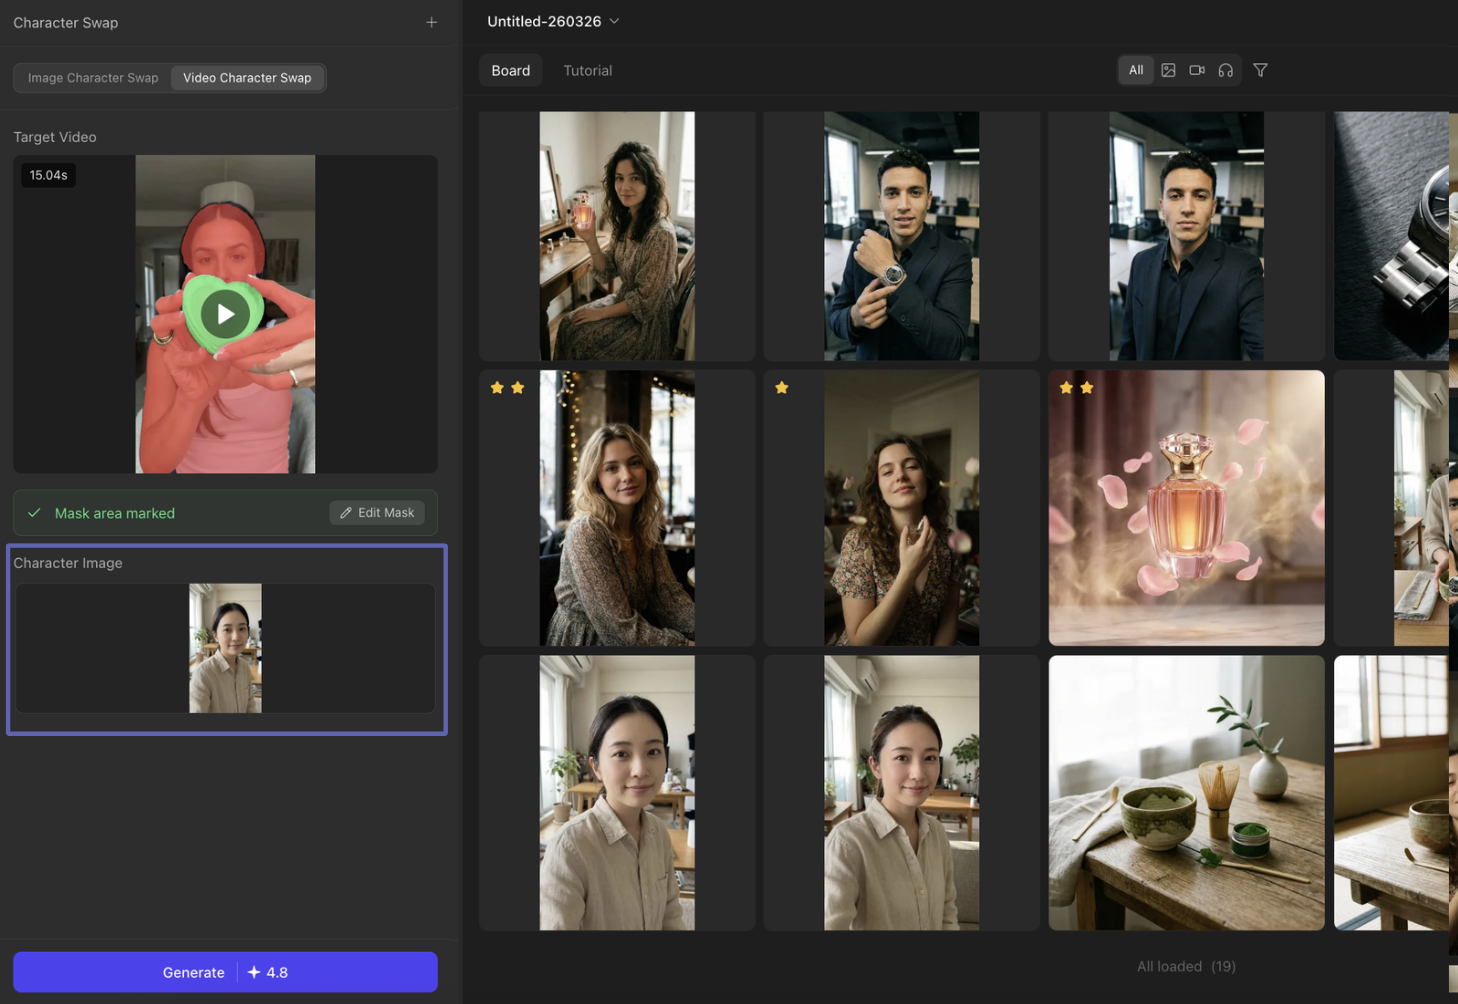
Step 5: Confirm & Generate
When everything is ready, click "Confirm" to proceed. Upload the image of the desired character or select from the templates available. Click "Generate" to produce the video with the new character.
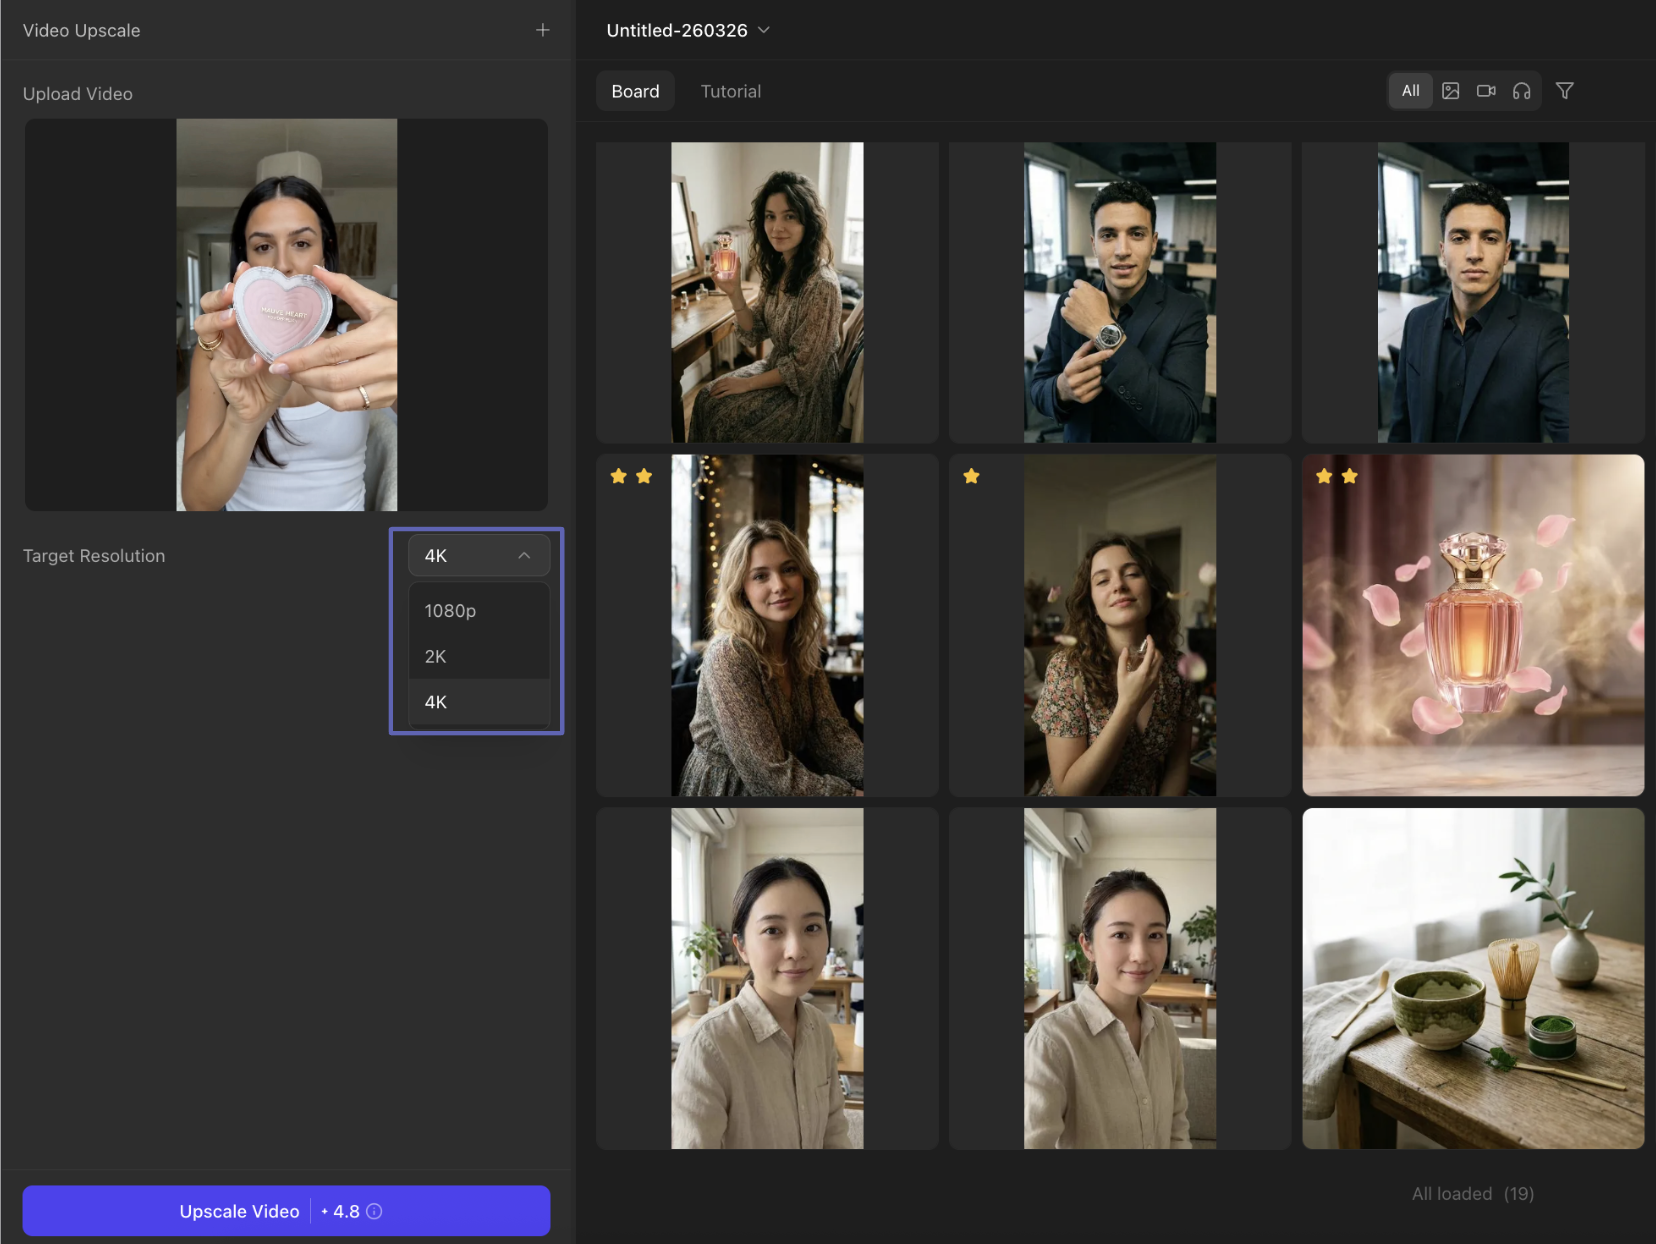
Video Upscale
Upload the video, select the target resolution, then click "Generate".
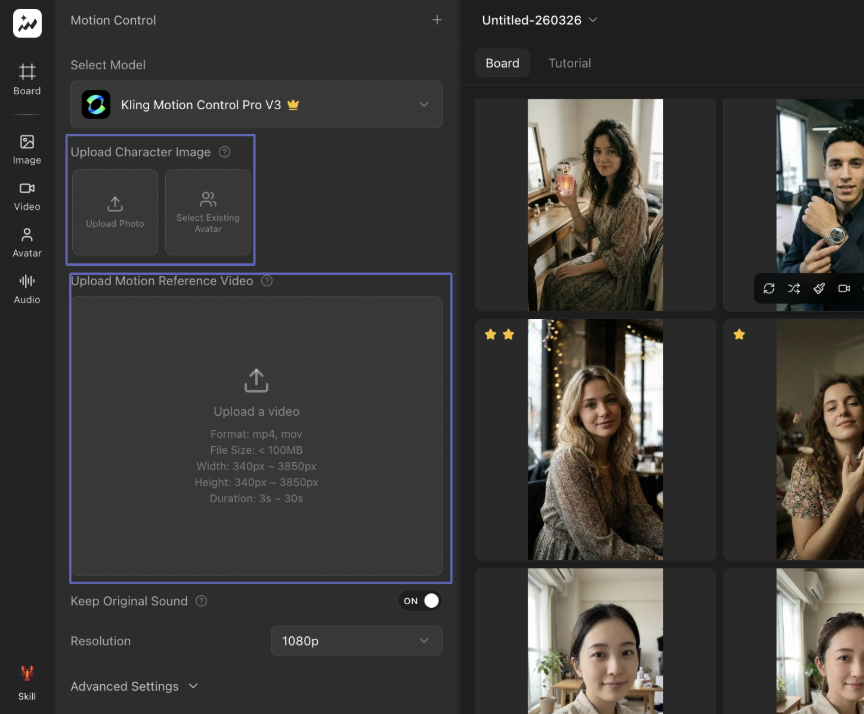
Motion Control
Upload your character image and the reference motion video. Choose the quality and whether to keep the original sound or not. Click "Generate" once done.
URL to Video
Turn any product page into a polished marketing video. AI automatically extracts content, generates scripts, and produces videos in multiple styles.
Workflow
- Enter the URL: AI will automatically obtain the images and videos. Or, upload images/videos locally (MP4 format only, max 1GB, max 10 minutes).
- Product Details: Enter the product name and description (e.g. selling points or keywords).
- Generate Scripts: Click "Generate" — AI automatically produces 3 scripts and videos in different styles to choose from.
- Edit Script: Click on the text to edit the script directly. Click the "Voiceover" button to change the voiceover.
- Export: Once satisfied, click "Export" to export the video.
Advanced Editing
If you are unsatisfied with the video, enter the editing mode. Here you can edit subtitle positioning, replace video clips, change background music, replace characters, and more. Click "Export" after confirming everything is correct.
Important Notes
- AI avatars cannot be customized using close-up shots — photos showing at least the upper half of the body are required.
- Do not use public models. It is recommended to customize and generate the avatars.